Pedro!'s rebuilding projects
Moderators: Brant, Sagebrush, Forum Moderators
-
Pedrotq

- Gold Member

- Posts: 1072
- Joined: Tue Dec 03, 2013 3:04 am
- Location: Perth, Western Australia
Re: Pedro!'s rebuilding projects
A continuation of the continued ................ 
- Attachments
-
- Outside view.
- 100_9835.JPG (384.48 KiB) Viewed 287 times
-
- Inside view.
- 100_9836.JPG (387.19 KiB) Viewed 287 times
-
- Press a good shockies mounting rubber in.
- 100_9837.JPG (167.24 KiB) Viewed 287 times
Pedrotq ~ (Pedro The Questionable)
Perth, Western Australia.
1988 GL-1500 ~ HRD sidecar outfit.
1990 GL-1500SE ~ (project) ~ Stripped down to be a "Naked 90".
Perth, Western Australia.
1988 GL-1500 ~ HRD sidecar outfit.
1990 GL-1500SE ~ (project) ~ Stripped down to be a "Naked 90".
-
Pedrotq
- Gold Member
- Posts: 1072
- Joined: Tue Dec 03, 2013 3:04 am
- Location: Perth, Western Australia
Re: Pedro!'s rebuilding projects
Fits nicely 
Have to sand blast and paint her one day, just before I fit it.
The only fault I found is the little tail on the rear makes it a little hard to slide the shockies on, so I need to undo the right shockies first, but I dint want to remove it as it might compromise the brackets integrity as there aint much meat holding the shockie ear on.
Today I hope to fit the Dyna ignition to the #2 project, the coils need to have at least 3 Ohm's resistance on the primary windings, I tested my spares and three have 3 Ohms and two have 1.5 Ohms, they are all GL-1500 coils, so now I have to dismantle the false tank and check what I have on my machine.
Happy & Safe Riding to Everyone, Peter.
- Attachments
-
- Slipped onto the axle and hope it all aligns up.
- 100_9839.JPG (225.47 KiB) Viewed 285 times
-
- I am happy with this side.
- 100_9840.JPG (261.56 KiB) Viewed 285 times
-
- And this side too.
- 100_9841.JPG (229.47 KiB) Viewed 285 times
-
- Bingo! ...... it all lines up .........Now what can I make next ???
- 100_9842.JPG (279.83 KiB) Viewed 285 times
Pedrotq ~ (Pedro The Questionable)
Perth, Western Australia.
1988 GL-1500 ~ HRD sidecar outfit.
1990 GL-1500SE ~ (project) ~ Stripped down to be a "Naked 90".
Perth, Western Australia.
1988 GL-1500 ~ HRD sidecar outfit.
1990 GL-1500SE ~ (project) ~ Stripped down to be a "Naked 90".
-
Easter
- True Blue Steel Biker

- Posts: 2999
- Joined: Thu Sep 13, 2012 11:33 am
- Location: South of Houston 100 miles
Re: Pedro!'s rebuilding projects
Maybe shorter shocks would have been simpler (but not as cool!).
Bikes at present:
83 XL 600r with a 2004 XR650L engine
And a slightly worse for the wear BMW GS adventure bike awaiting repair
83 GL in process
83 XL 600r with a 2004 XR650L engine
And a slightly worse for the wear BMW GS adventure bike awaiting repair
83 GL in process
-
HOTT

- Run Executive

- Posts: 3252
- Joined: Sun Aug 02, 2009 6:48 pm
- My Album: http://www.ngwclub.com/gallery3/index.php/wingmans/HOTT
- Location: Spring,TX
- Contact:
Re: Pedro!'s rebuilding projects
I'm gona keep the words to a minimum and agree with Liam.
Craftsman.
good stuff
HOTT
Craftsman.
good stuff
HOTT
If we can't fix it, we can fix it so no one else can.
the Condor BOTY 2011
Ol' Sparky BOTM Dec. 2011
Lucky #13 BOTY 2018
the Condor BOTY 2011
Ol' Sparky BOTM Dec. 2011
Lucky #13 BOTY 2018
-
5speed

- Honored Life Member

- Posts: 5315
- Joined: Sat Jul 11, 2015 2:37 pm
- Location: Nova Scotia Canada
Re: Pedro!'s rebuilding projects
love reading your build thread and seeing what you come up with and build next..
Last edited by 5speed on Sat Jan 21, 2017 9:50 pm, edited 1 time in total.
1982 1100 standard. (sold)
1986 Yamaha FJ1200
2000 Yamaha Roadstar
1976 GoldWing. running but not on the road
1978 Goldwing. future cafe project.
2019 Can-Am ryker (boss's new ride)
2002 Shadow American Classic(sold)
1983 Shadow 500. (sold)
1986 Yamaha FJ1200
2000 Yamaha Roadstar
1976 GoldWing. running but not on the road
1978 Goldwing. future cafe project.
2019 Can-Am ryker (boss's new ride)
2002 Shadow American Classic(sold)
1983 Shadow 500. (sold)
-
ericheath

- Honored Life Member
- Posts: 9581
- Joined: Wed Jul 29, 2009 11:20 am
- Location: Winnipeg, Manituba
Re: Pedro!'s rebuilding projects
I see said the blind man to his deaf daughter who was playing the piano by ear!! First set I have seen with a way of tying the bracket so it isn't swivelling upward should you hit a bump and go airborne. Apparently the brain works differently when you're south of the equator.
Whatever I suggest here should be given ample time for a moderator to delicately correct. I apologize in advance.
77 WING, 1200 engine with 77 heads, cams, gl1100 foot pegs, Magna V65 front end, 764A carbs, [-gone Suzuki M109 monoshock--, replaced with gl1100 shocks] gl 1200 swing arm, gl1500 final drive, wheel and rear brakes Valkyrie seat, Meanstreak tank, Sportster pipes, Power Arc ignition off crank.
77 Wing. black
83 Wing, in pieces
"Continuing education is important even if the subject matter is fairly useless (as in this case)."---Greg Foresi
-
Pedrotq
- Gold Member
- Posts: 1072
- Joined: Tue Dec 03, 2013 3:04 am
- Location: Perth, Western Australia
Re: Pedro!'s rebuilding projects
G'day to Everyone! 
Many thanks for the terrific comments, they give me more drive to continue modifying things
Actually I am going to fit the shortened shockies too.
Back to #2
Fitted the Dyna ignition, it went on perfectly, but I had big trouble starting the old lady, just cranked over and over with just a grunt now and then .......... .......... then I activated the left pair of choke butterflies and she started firing, once running (roughly) I released it and slowly she came to life.
I completely removed the chokes on both the GL-1500 and the Valkyrie and have no trouble starting them, probably as they have electronic ignition modules controlling timing. so out come the carbs to refit the choke mechanism.
Went for a ride just around the block, then two blocks (I don't want to break down far away from home), eventually I was going round several suburbs, she is still rough as guts under 2500 rpm but fine above, feeling good for myself I stopped in at the local bottle shop and acquired a couple of boxes of Pale Ale, I got close to home and she started to splutter badly and I only just got home I am wildly guessing that any crap in the fuel tank has blocked the fuel filter (an easy fix) but I will find out today.
Happy and Safe Riding to All, Peter.
Many thanks for the terrific comments, they give me more drive to continue modifying things
Actually I am going to fit the shortened shockies too.
Back to #2
Fitted the Dyna ignition, it went on perfectly, but I had big trouble starting the old lady, just cranked over and over with just a grunt now and then ..........
I completely removed the chokes on both the GL-1500 and the Valkyrie and have no trouble starting them, probably as they have electronic ignition modules controlling timing. so out come the carbs to refit the choke mechanism.
Went for a ride just around the block, then two blocks (I don't want to break down far away from home), eventually I was going round several suburbs, she is still rough as guts under 2500 rpm but fine above, feeling good for myself I stopped in at the local bottle shop and acquired a couple of boxes of Pale Ale, I got close to home and she started to splutter badly and I only just got home
Happy and Safe Riding to All, Peter.
- Attachments
-
- Pulled apart again.
- 100_9845.JPG (315.52 KiB) Viewed 252 times
-
- ready to fit the choke back on.
- 100_9846.JPG (275.49 KiB) Viewed 252 times
Pedrotq ~ (Pedro The Questionable)
Perth, Western Australia.
1988 GL-1500 ~ HRD sidecar outfit.
1990 GL-1500SE ~ (project) ~ Stripped down to be a "Naked 90".
Perth, Western Australia.
1988 GL-1500 ~ HRD sidecar outfit.
1990 GL-1500SE ~ (project) ~ Stripped down to be a "Naked 90".
-
Pedrotq
- Gold Member
- Posts: 1072
- Joined: Tue Dec 03, 2013 3:04 am
- Location: Perth, Western Australia
Re: Pedro!'s rebuilding projects
G'day to All,
well I found no crap anywhere, the fuel filter was squeaky clean, but #1 & #2 plugs were all sooty
I refitted the choke mechanism so she will start easier.
I also noticed that the 78 carbs have a shorter Aluminium needle in them but unfortunately I only have 3 spare as I gave one away to help a buddy to get his machine going. the ones in my machine are the longer Brass ones.
The engine is a 76, but I put a 78 crank, camshafts, timing advancer and carbs on to get the torque lower for tugging the chair about.
Hmmm, what to do ............ I will add a washer under the head of the needle and machine the hat down to keep the same thickness.
well I found no crap anywhere, the fuel filter was squeaky clean, but #1 & #2 plugs were all sooty
I refitted the choke mechanism so she will start easier.
I also noticed that the 78 carbs have a shorter Aluminium needle in them but unfortunately I only have 3 spare as I gave one away to help a buddy to get his machine going. the ones in my machine are the longer Brass ones.
The engine is a 76, but I put a 78 crank, camshafts, timing advancer and carbs on to get the torque lower for tugging the chair about.
Hmmm, what to do
- Attachments
-
- Sooty plugs.
- 100_9849.JPG (117.77 KiB) Viewed 239 times
-
- Stock 78 needle on the Left and what I have on the Right.
- 100_9850.JPG (132.1 KiB) Viewed 239 times
-
- Set one up in the lathe with a washer under the hat.
- 100_9851.JPG (190.77 KiB) Viewed 239 times
-
- Machine the top of the hat off to mimic the thickness required.
- 100_9852.JPG (196.22 KiB) Viewed 239 times
-
- There we go....... now do this 3 more times.
- 100_9853.JPG (115.96 KiB) Viewed 239 times
Pedrotq ~ (Pedro The Questionable)
Perth, Western Australia.
1988 GL-1500 ~ HRD sidecar outfit.
1990 GL-1500SE ~ (project) ~ Stripped down to be a "Naked 90".
Perth, Western Australia.
1988 GL-1500 ~ HRD sidecar outfit.
1990 GL-1500SE ~ (project) ~ Stripped down to be a "Naked 90".
-
Pedrotq
- Gold Member
- Posts: 1072
- Joined: Tue Dec 03, 2013 3:04 am
- Location: Perth, Western Australia
Re: Pedro!'s rebuilding projects
She started first time
but still runs rough, I guess I will have to mess with the mixture screws again, I reset them all back to 1&1/2 turns out as per the book.
Checked the synch and she looked fine.
I will play with her over the weekend.
Happy and safe riding to everyone, Peter.
but still runs rough, I guess I will have to mess with the mixture screws again, I reset them all back to 1&1/2 turns out as per the book.
Checked the synch and she looked fine.
I will play with her over the weekend.
Happy and safe riding to everyone, Peter.
- Attachments
-
- Synch ok.
- 100_9854.JPG (267.36 KiB) Viewed 239 times
Pedrotq ~ (Pedro The Questionable)
Perth, Western Australia.
1988 GL-1500 ~ HRD sidecar outfit.
1990 GL-1500SE ~ (project) ~ Stripped down to be a "Naked 90".
Perth, Western Australia.
1988 GL-1500 ~ HRD sidecar outfit.
1990 GL-1500SE ~ (project) ~ Stripped down to be a "Naked 90".
-
Pedrotq
- Gold Member
- Posts: 1072
- Joined: Tue Dec 03, 2013 3:04 am
- Location: Perth, Western Australia
Re: Pedro!'s rebuilding projects
Well here I am again, Sunday and my last day of parole 
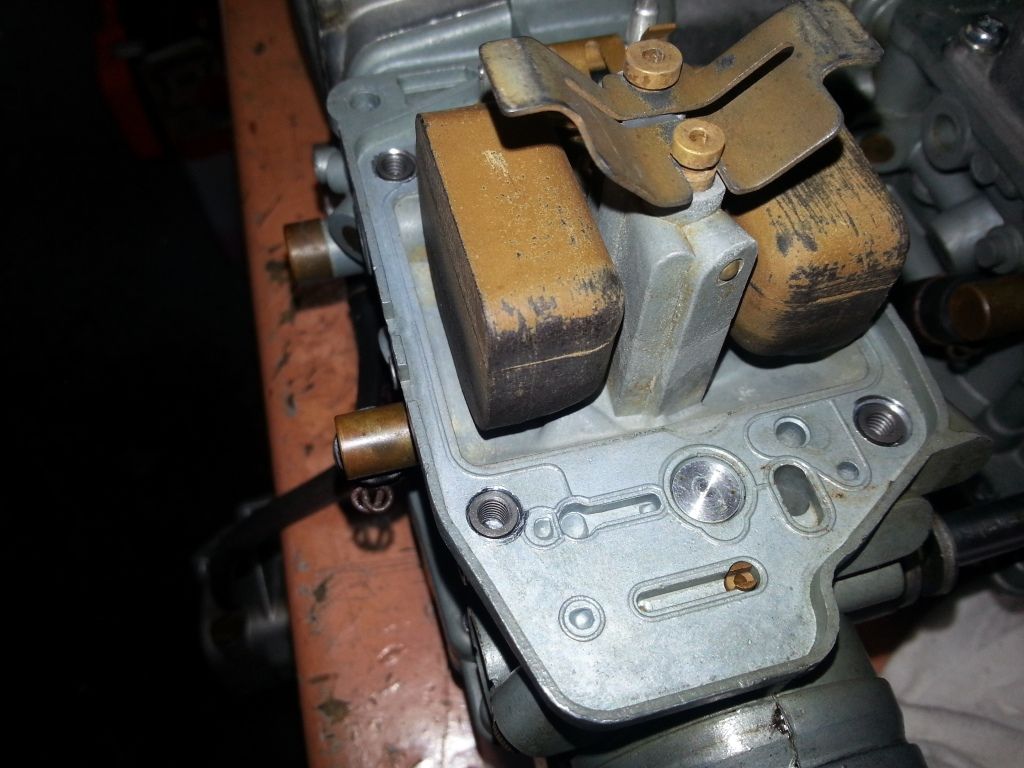
After finding things wrong with the #2 carbie set I decided to remove and strip down the #1 carbs, everything was as they should be except for the over generous amounts of rubber grease that I used on assembly that have turned into treacle a quick washout and they are ready for assembly.
I wanted to sandblast my #1 muffler in a home made booth as my one is too small for such large objects, but I found (I already knew) that my compressor is not adequate for the job, I need to step up a few models to get the required output. mine is good for pumping up tyres and footballs.
Have to go for a ride today and also test the sidecar out and probably tweak the mixture screws a few times.
Happy and safe riding to All, Peter.
After finding things wrong with the #2 carbie set I decided to remove and strip down the #1 carbs, everything was as they should be except for the over generous amounts of rubber grease that I used on assembly that have turned into treacle
I wanted to sandblast my #1 muffler in a home made booth as my one is too small for such large objects, but I found (I already knew) that my compressor is not adequate for the job, I need to step up a few models to get the required output. mine is good for pumping up tyres and footballs.
Have to go for a ride today and also test the sidecar out and probably tweak the mixture screws a few times.
Happy and safe riding to All, Peter.
- Attachments
-
- Underside.
- 100_9855.JPG (216.96 KiB) Viewed 218 times
-
- Topside.
- 100_9856.JPG (229.79 KiB) Viewed 218 times
-
- Improvised sanding booth for large items.
- 100_9857.JPG (208.57 KiB) Viewed 218 times
-
- #1 back up on the small stand.
- 100_9858.JPG (331.88 KiB) Viewed 218 times
-
- #1 carbs partially dismantled, cleaned and ready for assembly.
- 100_9859.JPG (328.34 KiB) Viewed 218 times
Pedrotq ~ (Pedro The Questionable)
Perth, Western Australia.
1988 GL-1500 ~ HRD sidecar outfit.
1990 GL-1500SE ~ (project) ~ Stripped down to be a "Naked 90".
Perth, Western Australia.
1988 GL-1500 ~ HRD sidecar outfit.
1990 GL-1500SE ~ (project) ~ Stripped down to be a "Naked 90".
-
Easter
- True Blue Steel Biker
- Posts: 2999
- Joined: Thu Sep 13, 2012 11:33 am
- Location: South of Houston 100 miles
Re: Pedro!'s rebuilding projects
Now that is a really cool use of the chemical "tote". I have several lying around the shop (plant) and can snag one for a blasting booth. Thanks for the idea.
Bikes at present:
83 XL 600r with a 2004 XR650L engine
And a slightly worse for the wear BMW GS adventure bike awaiting repair
83 GL in process
83 XL 600r with a 2004 XR650L engine
And a slightly worse for the wear BMW GS adventure bike awaiting repair
83 GL in process
-
Pedrotq
- Gold Member
- Posts: 1072
- Joined: Tue Dec 03, 2013 3:04 am
- Location: Perth, Western Australia
Re: Pedro!'s rebuilding projects
G'day to All,
I am glad that I have ideas that others think are good too
Got home last night from a wonderful week in Paradise, my first day is just lazing about and become human again
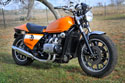
Decided to modify a damaged front fender for my #5 project, the rear end of it still wobbles a bit and I might not have been too accurate drilling the new holes, but this is all "Research & Development" as I will do it more carefully when it comes time for the "Real Thing" (Russell Morris, one of my favourite songs).
I have assembled #5 just to see what she will look like, there is no crank, pistons or anything else in the motor, just the outer covers and I plan on carving the seat down heavily.
I am glad that I have ideas that others think are good too
Got home last night from a wonderful week in Paradise, my first day is just lazing about and become human again
Decided to modify a damaged front fender for my #5 project, the rear end of it still wobbles a bit and I might not have been too accurate drilling the new holes, but this is all "Research & Development" as I will do it more carefully when it comes time for the "Real Thing" (Russell Morris, one of my favourite songs).
I have assembled #5 just to see what she will look like, there is no crank, pistons or anything else in the motor, just the outer covers and I plan on carving the seat down heavily.
- Attachments
-
- My shortened shocks.
- 100_9860.JPG (428.68 KiB) Viewed 172 times
-
- Cut the damaged piece off.
- 100_9861.JPG (303.16 KiB) Viewed 172 times
-
- Grind the heads off the inside and punch the rivets out.
- 100_9862.JPG (325.35 KiB) Viewed 172 times
-
- Drill new holes (a bit roughly I must say), I plan of having SS dome nuts on the outside.
- 100_9863.JPG (324.48 KiB) Viewed 172 times
-
- A mock up of what she will look like (still not radical enough for me, but I am limited by the Vehicle Licencing Centre).
- 100_9867.JPG (266.8 KiB) Viewed 172 times
Pedrotq ~ (Pedro The Questionable)
Perth, Western Australia.
1988 GL-1500 ~ HRD sidecar outfit.
1990 GL-1500SE ~ (project) ~ Stripped down to be a "Naked 90".
Perth, Western Australia.
1988 GL-1500 ~ HRD sidecar outfit.
1990 GL-1500SE ~ (project) ~ Stripped down to be a "Naked 90".
-
Pedrotq
- Gold Member
- Posts: 1072
- Joined: Tue Dec 03, 2013 3:04 am
- Location: Perth, Western Australia
Re: Pedro!'s rebuilding projects
Ok! so I am a perfectionist most of the time, ....... but there comes a time that a bodgey job will do until I get the time and enthusiasm to fix the problem correctly (if at all) 
After stripping the #1 carbs down to double check that the jets are all in correctly (and to wash away that horrible Rubber Grease that I used too liberally quite a while ago) I was assembling them and using my new to me torque screwdriver (should have bought one years ago).
I was tightening up the bowl screws and set my driver to 20 Kgf-cm (which is below the recommended 22.5 for SS screws into Aluminium), but I still managed to strip two screws 
Now I remember that the clown before me used wood screws in the carbs
Oh well, what to do
I remember a few weeks back when I was dismantling the carbs from the #5 and all the bowl screws were odd-ball ones
So I checked them out more closely
The standard bowl screw is an M4 x 0.7mm .......... the odd-ball ones were 5/32 x 32 tpi
So I tried one of these screws in my stripped bowl holes and they screwed in snugly and torqued down nicely.
I know this is not the correct remedy but it will get you out of a fix one day until a proper cure can be done
Happy & Safe Riding to All, more updates tomorrow (I hope) Peter.
After stripping the #1 carbs down to double check that the jets are all in correctly (and to wash away that horrible Rubber Grease that I used too liberally quite a while ago) I was assembling them and using my new to me torque screwdriver (should have bought one years ago).
I was tightening up the bowl screws and set my driver to 20 Kgf-cm (which is below the recommended 22.5 for SS screws into Aluminium), but I still managed to strip two screws
Now I remember that the clown before me used wood screws in the carbs
Oh well, what to do
I remember a few weeks back when I was dismantling the carbs from the #5 and all the bowl screws were odd-ball ones
So I checked them out more closely
The standard bowl screw is an M4 x 0.7mm .......... the odd-ball ones were 5/32 x 32 tpi
So I tried one of these screws in my stripped bowl holes and they screwed in snugly and torqued down nicely.
I know this is not the correct remedy but it will get you out of a fix one day until a proper cure can be done
Happy & Safe Riding to All, more updates tomorrow (I hope) Peter.
- Attachments
-
- One of the stripped screws (now replaced)
- 100_9864.JPG (272.71 KiB) Viewed 169 times
-
- 100_9865.JPG (175.16 KiB) Viewed 169 times
Pedrotq ~ (Pedro The Questionable)
Perth, Western Australia.
1988 GL-1500 ~ HRD sidecar outfit.
1990 GL-1500SE ~ (project) ~ Stripped down to be a "Naked 90".
Perth, Western Australia.
1988 GL-1500 ~ HRD sidecar outfit.
1990 GL-1500SE ~ (project) ~ Stripped down to be a "Naked 90".
-
robin1731

- Membership Admin

- Posts: 21729
- Joined: Mon May 29, 2006 8:31 am
- Location: Decatur, Indiana
Re: Pedro!'s rebuilding projects
Time-sert. 
.
.
1976 Goldwing Super Sport
1985 Honda Elite
1976 KZ900 Dragbike
1992 ZX7 Dragbike (KZ900 style motor w/NOS)
and a rotation of various purchases
Randakk approved Carb Rebuilder
1985 Honda Elite
1976 KZ900 Dragbike
1992 ZX7 Dragbike (KZ900 style motor w/NOS)
and a rotation of various purchases
Randakk approved Carb Rebuilder
-
Liam

- True Blue Steel Biker
- Posts: 2073
- Joined: Sun Jan 06, 2013 11:23 am
- Location: Ireland
Re: Pedro!'s rebuilding projects
I agree with Robin on the Time Serts

-
- Similar Topics
- Replies
- Views
- Last post
-
- 31 Replies
- 1963 Views
-
Last post by gltriker
-
- 11 Replies
- 1386 Views
-
Last post by heraldhamster
-
- 36 Replies
- 1105 Views
-
Last post by Fred Camper