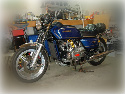
Today I made some observations and measurements of the carburetor that Mike sent me (thanks!) before testing it in the oven.
Basically, I'm looking at every plug, port or plastic part that could be affected by the heating.
On the float side or outlet, I was mostly concerned with the fuel jet:


On the air circuit side, a few plugs and one very important piece where the CV slide lug is staked to the carb body:

On the fuel circuit side, more plugs... the one at the bottom in the center actually isn't a plug:

The intake side has one plug and the brass nozzle:

Here's my biggest concern; the CV slide lug. It's the only non-metallic part on the carb and is also impossible to remove/replace without destroying it.

I tested the plugs and whatnot by applying pressure to see if they were free to move, or were solid in their place. Of course they were all solid.
The normal procedure for most powders is heat to flow-out temps (450 deg F in this case) for around 10 minutes, then lower to cure temp (400 deg F in this case) for 20 minutes. To make sure the carb would hold up to the heat, I baked this carb for 30 minutes at 450 degrees to represent a worst-case scenario.
I'm happy to report that after subjecting the carburetor to this test, there were no obvious failures. All plugs remained flush and are solid. The plastic CV slide lug didn't melt as I had feared. It did, however turn black! I suspect oil and/or gasoline saturated the piece and that is what changed its appearance when heating; the piece itself is not brittle or stiff. (you can see the nick in the piece where I tested it...)

So it looks like I'll be able to powder-coat them after all. In fact, I've already done the float bowls and the air cut-off valve...


Tomorrow I'm going to try to get all four carbs and the central plenum coated. When Randakk's kit gets here next week, the fun will begin.
Oh, also the CV needles I got from the bag o' parts are correct for the 755A. SCORE!
-Deek
"Eat, drink and be merry. For tomorrow we die."
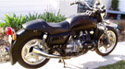
1975 GL 1000 (First Year) under the knife; soon to be a cafe' inspired "Boss" of a freedom machine.