Page 6 of 11
Re: Mr.H's new engine
Posted: Wed Mar 28, 2018 6:10 pm
by Sidecar Bob
I know I should use the 1100 the camshaft holders that came with the 1100 heads because the bearing surfaces have to be machined in both together.
I think I should I use the 1000 rockers with the 1000 cams (in the 1100 heads) but I would like confirmation.
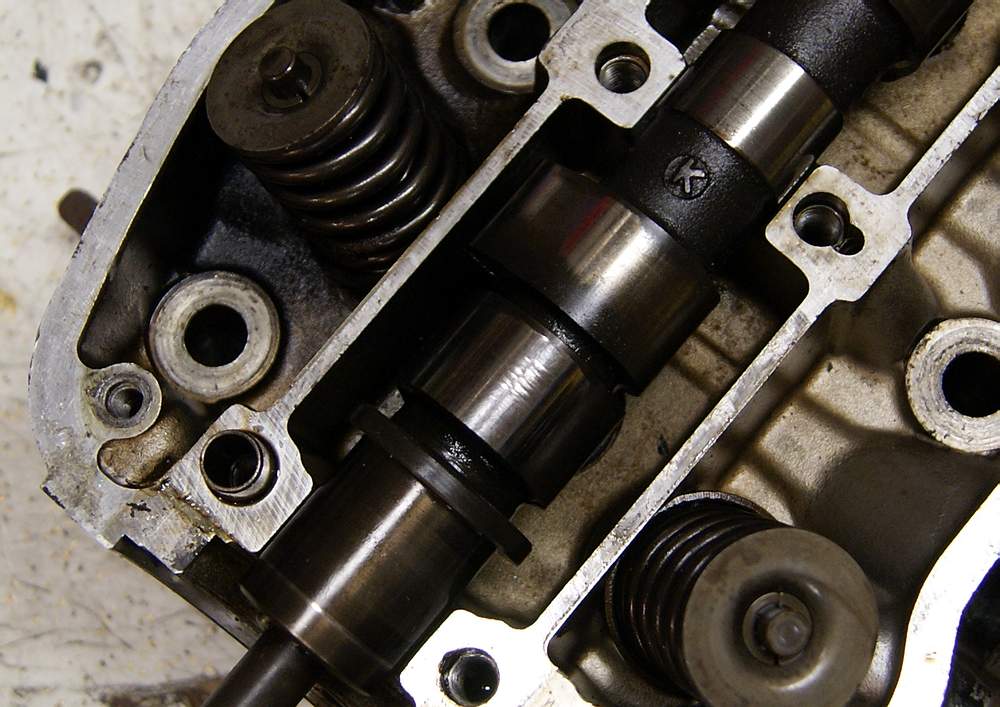
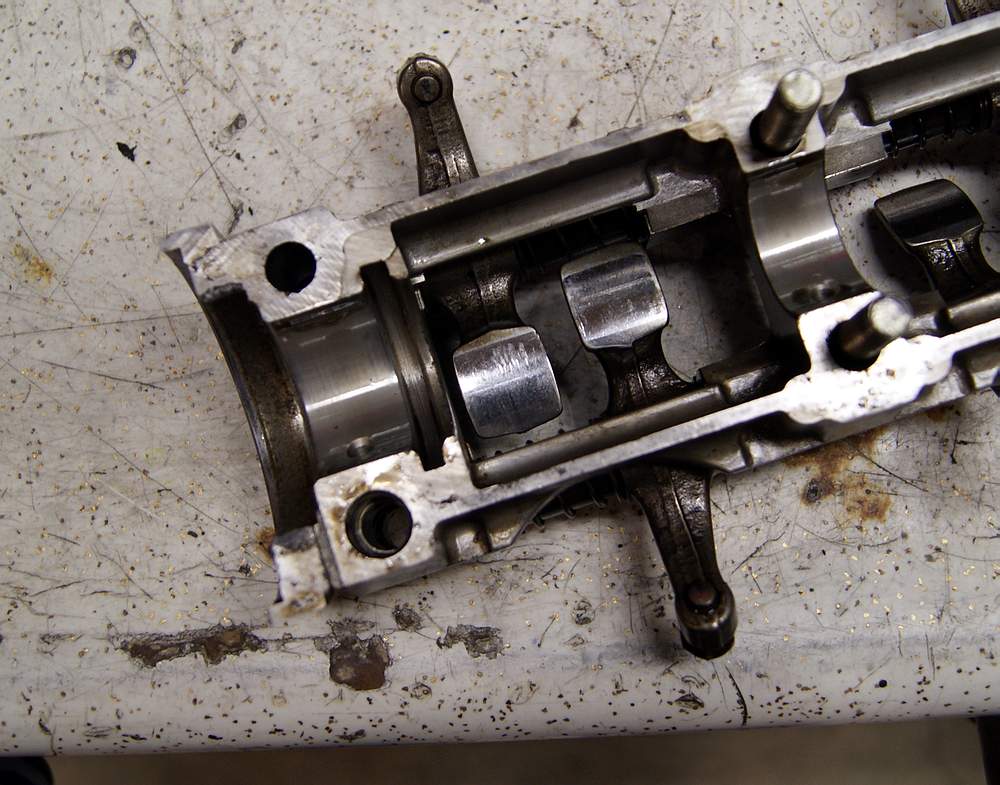
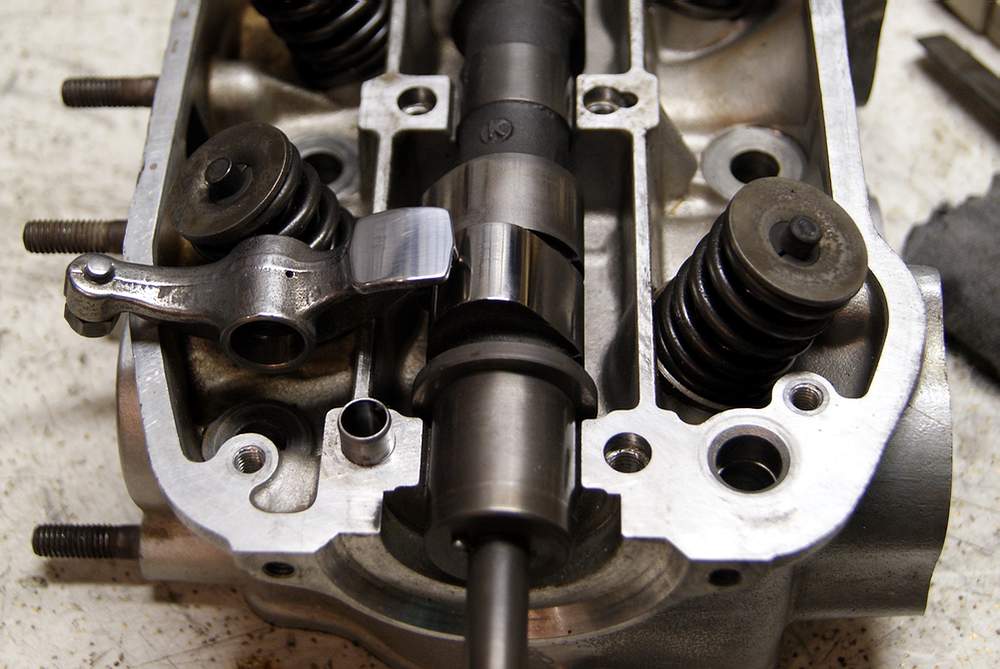
Also, should I be thinking about dressing the cams & followers in any way? There are shallow ridges on the lifting areas of the lobes and matching grooves in the followers. None of them have sharp edges and while they look bad I can barely feel them with a fingernail.....
Re: Mr.H's new engine
Posted: Wed Mar 28, 2018 7:37 pm
by Track T 2411
Keep the holders with the heads, and the rockers with the cams, if possible.
Re: Mr.H's new engine
Posted: Wed Mar 28, 2018 8:55 pm
by ericheath
Check Wingovations site for Old Fogeys recommendation on dressing the cam surfaces.
Re: Mr.H's new engine
Posted: Wed Mar 28, 2018 9:09 pm
by gltriker
I would take a close look at where each valve lash adjuster screw's, ball end contacts its complementing valve stem tip for wear, too.
If needed, New adjuster screws and their locking nuts are still available from Honda parts.

Re: Mr.H's new engine
Posted: Wed Mar 28, 2018 10:04 pm
by robin1731
Sidecar Bob wrote:snip........... There are shallow ridges on the lifting areas of the lobes and matching grooves in the followers. None of them have sharp edges and while they look bad I can barely feel them with a fingernail.....
That is not a good thing. You should never be able to see/feel any wear like that.
.
Re: Mr.H's new engine
Posted: Wed Mar 28, 2018 11:29 pm
by Sidecar Bob
I read John's page. It talks about dressing the followers if you have to replace the camshaft but don't have the followers that it is worn in with it. That's why I'm not sure.
I looked at a lot of pics of damaged cams online but couldn't find any that looked like mine. They all had a lot of sharp, deep scoring or large rough areas. Here are pics of the marks on the worst of mine. It almost looks like there were harder areas on the lobes that didn't wear as quickly and they wore grooves in the followers


BTW: The adjusters look OK, as do the ends of the valves.
Re: Mr.H's new engine
Posted: Thu Mar 29, 2018 8:42 am
by robin1731
I wouldn't run those pieces unless I absolutely had too. The wear will get worse. Going by the pics it is past the hardened part of the cam and follower.
.
Re: Mr.H's new engine
Posted: Thu Mar 29, 2018 1:35 pm
by Sidecar Bob
Interesting. From the ridges at the edges of the cam lobes where the followers don't rub these cams appear to have less wear than the ones in the 79,000 Km 1100 engine. And the followers don't look as worn either. Other than the grooves that match the ridges on the cams, that is.
In the last day I have spent several hours on Google trying to find pics of similar wear with no luck. As I said, the ridges & grooves are not very deep. I had to take a bunch of pics before I got ones that showed them...
I think the hole in the follower on the left in this pic from
http://www.wingovations.com/cams-and-rockers/4579471096 showing followers that have been dressed looks deeper

Re: Mr.H's new engine
Posted: Thu Mar 29, 2018 10:04 pm
by Sidecar Bob
Today I learned how to lap the cams & followers. I started by going over them with emery cloth wrapped around a file per the Wingovations link above, then with 400 grit aluminum oxide paper and finished them on the buffing wheel. I cleaned everything with Tool & Parts spray afterwards and then assembled the followers into the 1100 head's cam holder with moly/lith grease, making sure to keep the followers on their original lobes.

Tomorrow I'm going to see if I can figure out how to get the valves out to lap them. Its hard to get my valve spring compressor under the springs because of the big ridges next to them and when I do it lifts the bottom instead of pushing the top down and I can't get the collets out.
Re: Mr.H's new engine
Posted: Thu Mar 29, 2018 11:36 pm
by ericheath
Out if curiosity, did you happen to measure the cam lobe max before and after? I’m curious as to how much stellite the aluminum oxide was able to remove. I never found a source stating how thick it is. I’m thinking it’s a couple mm thick based on some info about stellite coating other metals, but the service limit is not even 1 mm.
Re: Mr.H's new engine
Posted: Fri Mar 30, 2018 8:28 am
by BikeMaine
Good information!
Re: Mr.H's new engine
Posted: Fri Mar 30, 2018 5:03 pm
by Track T 2411
Nice videos, but what's supporting the valve to keep it from moving with the spring?
Re: Mr.H's new engine
Posted: Fri Mar 30, 2018 6:21 pm
by Sidecar Bob
The guy with the vise grips doesn't say. The other guy did 3 videos with different tools and one of them came with a sheet of rubber with a bump to support the valve. I wadded up a rag to support the valve, slipped a magnet inside a 19mm deep socket and bopped it with the deadblow hammer and it worked just like he showed. I tried both methods of getting it back together and all I accomplished was scratching up the socket with the Vise-Grips.
Then I remembered using a big c-clamp and a modified brass bushing to do this about 30 years ago. And then I remembered seeing the modified bushing recently so I dug around and here's my GoldWing valve spring compressor (note the telescopic magnet to fish the collet out)
Valve spring compressor.JPG
Valve spring being compressed.JPG
So that becomes easy. The plan is to remove the valves one at a time, lap the valve, install a new valve stem seal and re-assemble.
If I can find a suitable piece of tubing I'll lap them this way
Re: Mr.H's new engine
Posted: Fri Mar 30, 2018 11:30 pm
by BikeMaine
That is a wicked cool trick with the tubing.
