Page 7 of 11
Re: Mr.H's new engine
Posted: Sat Mar 31, 2018 12:22 am
by Sidecar Bob
Yeah, I tried it but I didn't like it much so I decided to do it by hand but I couldn't find my valve lapping tool that I haven't used in decades (watch: I'll find it next week

). So I tried pushing a piece of inner tube against the head of the valve with the end of a nut driver but that didn't have enough grip. Next I dug through the box of old rubber parts and found an old rocker cover bolt seal that fit into a 10mm nut driver nicely and had enough grip to make the valve spin if I put a finger on the other end of the valve to moderate the pressure. That worked pretty well but it was a lot of work. Then I noticed the electric screwdriver hanging next to me with an adapter and a 10mm socket already on it

After that it got easier.
One exhaust valve only got shiny half way around. I took that as a sign that it was slightly bent so I swapped it with one from the 1000 head that the camshaft & followers came from and it lapped nicely. The valves in the left head are all done so I'll assemble it before I go on to the right head.
Re: Mr.H's new engine
Posted: Sat Mar 31, 2018 8:55 am
by salukispeed
Good catch on the partial clean up of the valve. . Sounds like good progress. I know you ride year round but how soon is nice weather expected for you.
Re: Mr.H's new engine
Posted: Sat Mar 31, 2018 11:56 am
by Sidecar Bob
Actually, we've already had some nice weather and I've already waved at people on 2 wheelers. The 650's engine died in January (I'm looking for a replacement) so when the snow was gone but the ground still frozen at the end of February I took Mr.H out of storage. I don't want to get a lot of salt on it so and I've only been driving it on sunny days, though, which probably won't be a lot this week with the storm you guys are sending us....
Re: Mr.H's new engine
Posted: Sun Apr 08, 2018 12:52 pm
by Sidecar Bob
Both heads are now back together with the mould lines smoothed, valves lapped and '77 cams & followers with the rubbing surfaces cleaned up and buffed installed. I found another bent valve and 2 that were pitted more than I wanted to try to lap through so half of the valves are from the parts engine.
BTW: I got the idea to buff the cams & followers from this. I figured if they polish whole camshafts like that it wouldn't hurt for me to buff the lobes & bearing surfaces on my wheel.
Re: Mr.H's new engine
Posted: Sun Apr 08, 2018 1:04 pm
by robin1731
It was asked but I don't know if answered. Did you measure the cam lobes and compare them to see how much material you actually removed?
.
Re: Mr.H's new engine
Posted: Sun Apr 08, 2018 1:12 pm
by Sidecar Bob
Sidecar Bob wrote:I didn't measure them but the aluminum oxide didn't take much off; I basically used it to get rid of the sanding marks from the emery cloth. As I said before, the marks weren't very deep so I doubt if I removed more than a few thous.
Probably about the same amount as the polishing machine in the video would remove.
Re: Mr.H's new engine
Posted: Sun Apr 08, 2018 1:56 pm
by robin1731
I saw all of that. As an engine builder I am always concerned when anything like that is done. Easy enough to measure the lobes. You would be surprised at how much material can be removed. And how thin the hardness is built in to the cams. Good luck with your build.
.
Re: Mr.H's new engine
Posted: Tue Apr 17, 2018 11:05 pm
by Sidecar Bob
Yeah. I guess we'll know if its OK a few years after its all back together. I keep thinking that if I hadn't stuck the camera into the spark plug holes and seen rust I probably would have slapped in the cams, put it in and started it up without doing much else. Hopefully all this stuff I'm doing will make it better than it would have been.
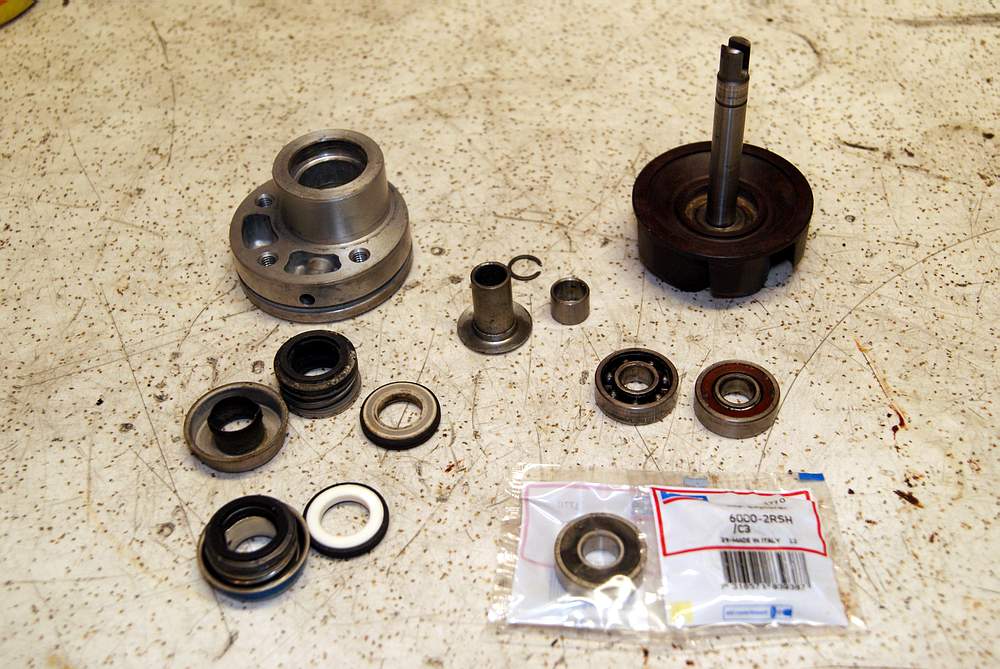
So next the water pump. Here's the disassembled one and the parts for rebuilding it
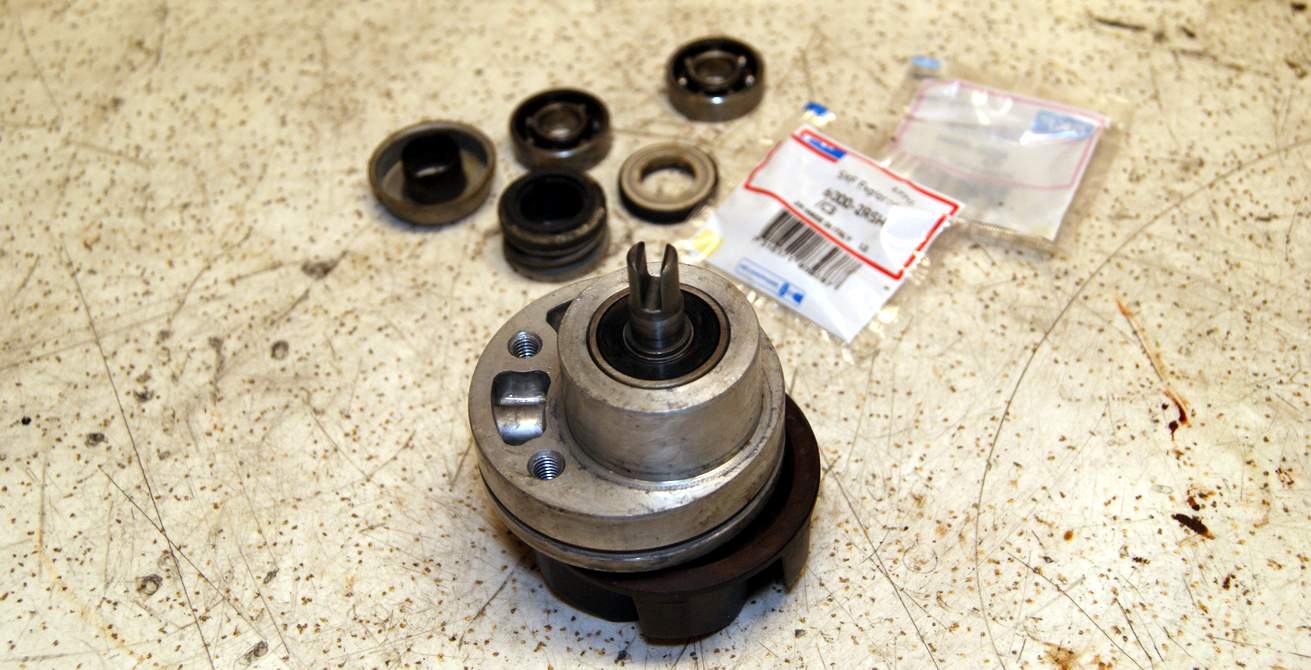
Here it is re-assembled
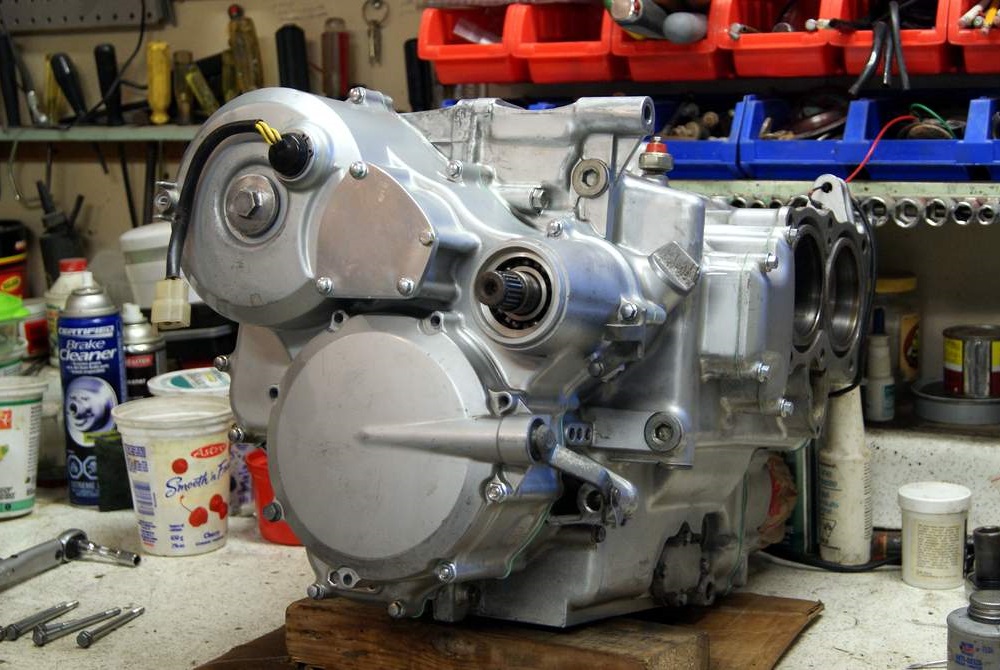
And if you look closely you can see it inside the water pump housing now that the transmission cover is back on

This Athena "complete gasket kit" is turning out to be rather incomplete. All the paper gaskets are there but so far I've discovered that the rubber gasket for the oil strainer cover and at least 6 o-rings are not in the kit. I contacted Athena about this and asked why they do not include a list of the included o-rings and where they go and the customer service rep in the US said that they don't "share" the bill of materials because its "part of the company know-how". I replied that not telling the person using the kit what is in it is illogical. He's asking the engineers in Italy. I have sent him the list of what I'm missing so far.
I've been lucky so far. I have had suitable o-rings on hand and I have no idea why but I had an oil strainer gasket.
Re: Mr.H's new engine
Posted: Wed Apr 18, 2018 8:15 am
by BikeMaine
Sometimes there is no common sense.
Re: Mr.H's new engine
Posted: Wed Apr 18, 2018 5:05 pm
by Track T 2411
You're lucky you had the oil strainer gasket. IIRC, it is NLA ... you're making good progress!
Re: Mr.H's new engine
Posted: Sat Apr 21, 2018 6:12 pm
by Sidecar Bob
I got another reply from Athena "Hi Bob, I’ll be getting the missing o-rings in 10 days or so." so instead of continuing with assembly I spent yesterday's shop time going through all of the parts drawings at my dealer's site for o-rings and figuring out which of the ones in the kit goes where, making up a list of what's missing and measuring the leftovers so I could send him that list too. I won't post my list until I hear back from him.
Back to assembly today. I went to grab a couple of clutch plates from the 1000 parts engine so I could "bin the damper plate" and I discovered that the
1000 and 1100 plates are not the same Now I have to decide whether to put it together with the damper plate or order them and put the clutch in after I paint the engine.
And the question of the day: what colour should I paint the new engine?
I am probably going to use
Dupli-Color Engine enamel. The old engine is painted with their Cast Coat Iron which, contrary to what their website shows, actually has sort of goldish tinge (you can see it in the pic in post #1 of this thread). I like it but the new engine is going to have the same black rocker covers & timing belt covers as the old one (the Rustoleum hammered black has held up really well) and I'd kind of like it to look a little different after all this work. Silver and black have been done to death; I've seen pics on the web of engines painted bright green, yellow and red but with nearly everything else black a bright coloured engine might be too much. I did have the old engine painted Pontiac Blue Metallic for a few years, which looked pretty good with the green paint.
'83 GL1000 3.JPG
I'm starting to think that if I did the block in that and all the covers &c black it could look OK; enough different to make me happy without being garish.
But I'm open to suggestions. What do you guys think?
Re: Mr.H's new engine
Posted: Mon Apr 23, 2018 12:44 am
by Sidecar Bob
Actually, that pic was "posed". Right after I took it I pulled the clutch cover (I need to to take the mechanism apart to replace the oil seal) and the blanking plate (I have to make a gasket for it).
BTW: One of the M6x95mm studs for the rear cover broke when I was taking it apart and the other one was pretty rusty. The dealer couldn't get them for me and I couldn't find them on line so I bought a couple of M6x250mm threaded rods on eBay and cut the 2 studs I needed from one.
Partzilla had the clutch plates so I ordered them.
I'll be in a town with a place I can get the engine paint tomorrow so unless someone tries to talk me out of it before I leave I'll probably get the blue. There is already dark blue on the bike so it should look OK.
Re: Mr.H's new engine
Posted: Mon Apr 23, 2018 5:32 am
by BikeMaine
I'm looking forward to your paint job.
Re: Mr.H's new engine
Posted: Mon Apr 23, 2018 11:00 pm
by Sidecar Bob
Canadian Tire in Lindsay didn't have the Pontiac Blue Metallic in stock. In fact, they didn't even have a space for it on the shelf. But they did have one can of VHT Engine Metallic in Titanium Silver Blue. They also had the same Dupli-Color Honda Electron Blue Pearl that I used for the stripes on the bodywork a few steps away to compare with and I think it will be much better (it had better be for the price). So I took that 1 can and I'll be passing the store in a couple of other towns later in the week so I'll try to get another can there (not sure if I'll need 2 but I'd rather not find out halfway through).
Paints.jpg
BTW: I put the old can of Plastikote Pontiac Blue Metallic in to show how much better the Titanium Blue Silver goes with the Electron Blue (Dupli-Color's should be pretty close to the same). The rest of t he bodywork is a generic black acrylic enamel over rubberized rockerguard so that the rockerguard's texture makes it sparkle a bit.
Re: Mr.H's new engine
Posted: Tue May 01, 2018 2:27 pm
by Sidecar Bob
Whine, Click, Engine stuck... Well, this is different so working on the new engine has become my top priority.
NOTE: I'm editing this in 2023 to say that while the VHT engine enamel looks nice I cannot recommend using it. After 5 years, about 3500 Km and hundreds of heat cycles it is still not resistant to gasoline spills.
On Sunday I wiped the engine down, masked it and winched it down from the bench to the dolly for the trip to the other side of the garage. Then I decided to bolt the points case onto the head before painting it and broke the ears off when I tightened it down

Well, I can't drive the bike anyway so I'll grab the one from the old engine. One bolt came out easily bit the other wouldn't budge so I had to drill it out, then I got to work with the files and this time fitted it to allow for the original type gasket and it went on without breaking. The rest of yesterday was prepping the cooling system parts.
I headed out to the garage as soon as the thermometer said 15c (its 21c & sunny here as I type this with a high of 24 forecast), opened the doors, rolled Mr.H outside and swept. By the time I had everything moved from the shop to where I would paint and winched the engine up again so I could add a couple of milk crates and a board between it and the dolly and decide to add a couple of 1x2s so that I wouldn't damage the paint on the bottom too much sitting it down (I'll have to touch up the bottom once its in the frame anyway) it was warm enough to start painting (I had painted the bottom of the engine and the first light coat on the stuff on the table before I remembered to take a pic).
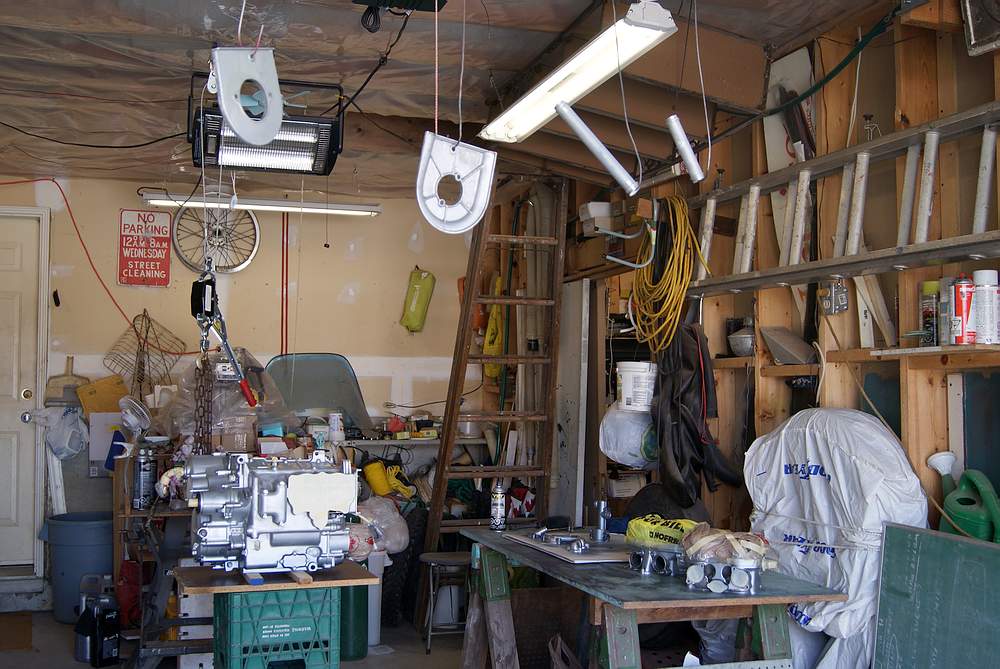
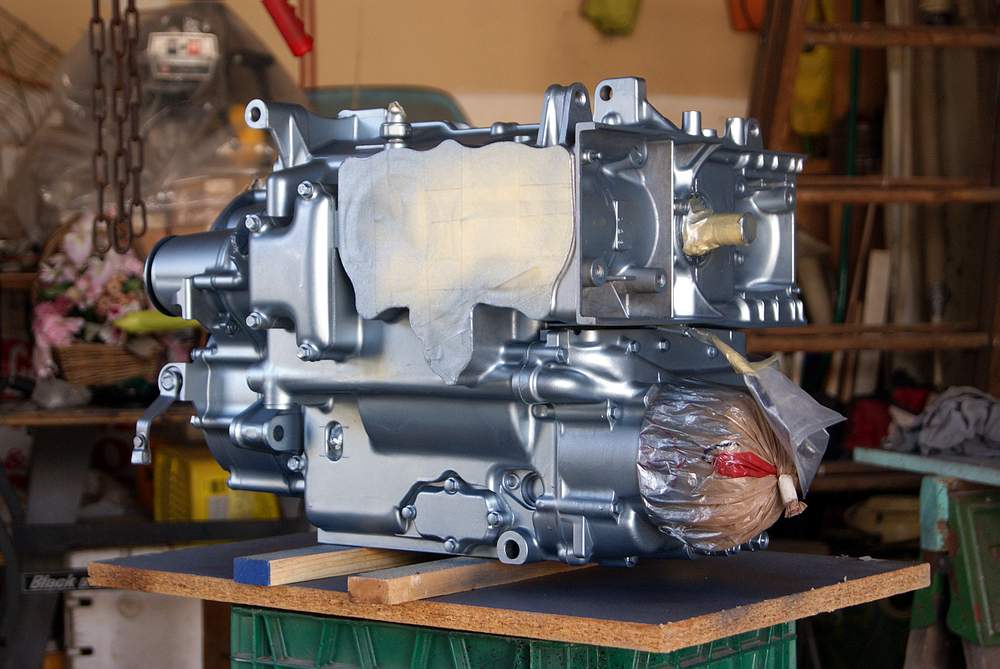
BTW: I rolled the engine nearer to the door while painting, then back inside to dry.
Tonight's overnight low will be 14c so I'll leave the everything where it is to cure a bit before I move it back to the shop for assembly so that's all for today except giving Mr.H a good wash before I bring it back inside.