Neutral Switch Replacement w/ Engine in Frame
Posted: Fri Nov 14, 2008 5:59 pm
DISCLAIMER:
First I am NOT:
1. a photographer
2. a writer
3. an engineer
4. a trained motorcycle mechanic
Nor do I play one on TV and I did not stay at a Holiday Inn Express last night.
I have, however, replaced a neutral switch on a GL1000 without removing the engine. Here I am going to attempt to repeat that procedure and document with pictures and a narrative. I will be using my 78 'budget restore' project bike (7 of 9) and this should be very similar on all GoldWings 1975 thru 1981.
This is where I'll be today. The lower right front of the engine, right behind the lower frame engine mount. What a place!

There is a neutral switch in there somewhere.....

First I removed the exhaust pipes from the right side of the engine. How you have to do yours will vary, depending on type and condition of the exhaust. You may need to drop the entire exhaust system rather than risk damaging a joint or weak spot. I was lucky and just had to remove the header pipes.

Then drain the oil.
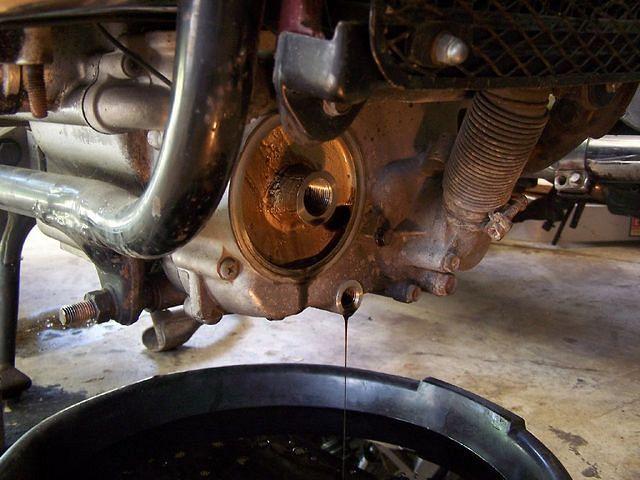
Now we can get to the task at hand, sorta... The 1000's have Phillips head screws holding the oil screen cover on, the 1100's have hex head bolts. Three of the screws I could access with a hand impact driver, the frontmost one is however impossible to get to with any type of screwdriver. The Honda manual shows an offset screwdriver to get to it, yeah right! I used a small pair of vice-grips to lock on to the head and break it loose.

Once loose, I backed it out by hand and removed the cover and screw together. I don't know on the 1100 bolt, but you may have to "flex" the frame at this point in order to get it out.

The screen wasn't really too bad, considering it's probably been there for 30 years.
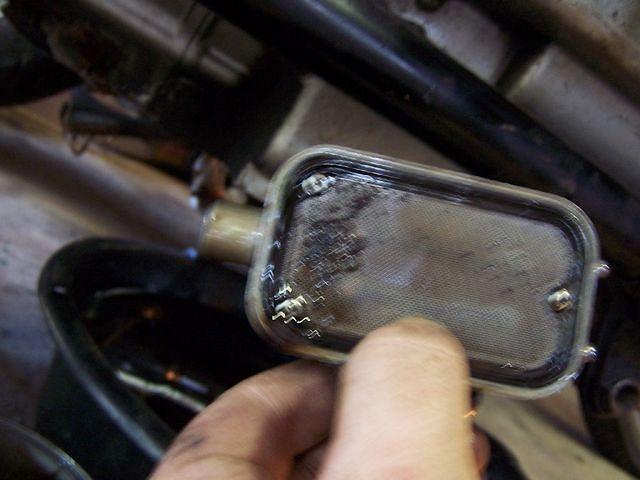
To "flex" the frame I removed the lower engine mounting bolt and loosened the front sub-frame bolts, probably a quarter inch or so. Then forced a large flat blade screwdriver between the frame mount and the engine. You don't need a whole lot, but you do need some. Now for the switch. A wrench to get the retaining bolt started, then backed it out by hand.
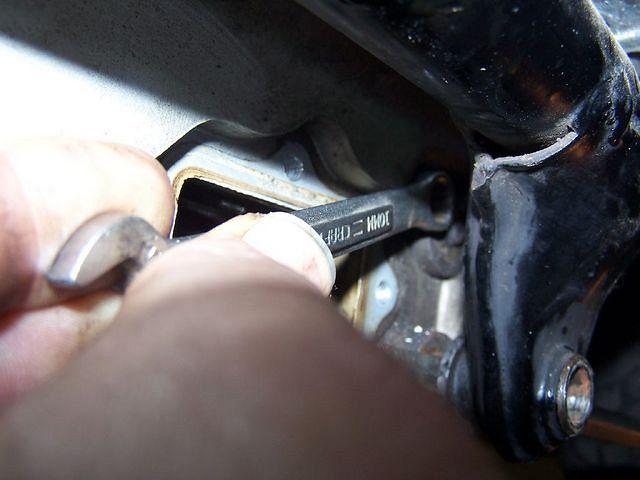
The flats on the switch go vertical when installed. Using a screwdriver, I lightly tapped the top of the flat to rotate the switch. Probably 75 to 80 degrees. Enough to grab the switch by the flats with pliers and wiggle it out. Once out rotate the switch to come out by the oil screen access. Now you can get a screwdriver to it to remove the wire.
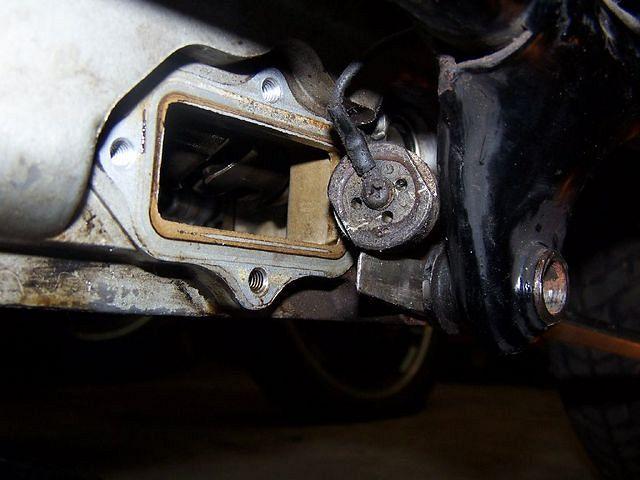
Total time so far, 45 minutes (your results may vary.)
Installation is reverse. Do yourself a favor and don't try a used one, been there done that.
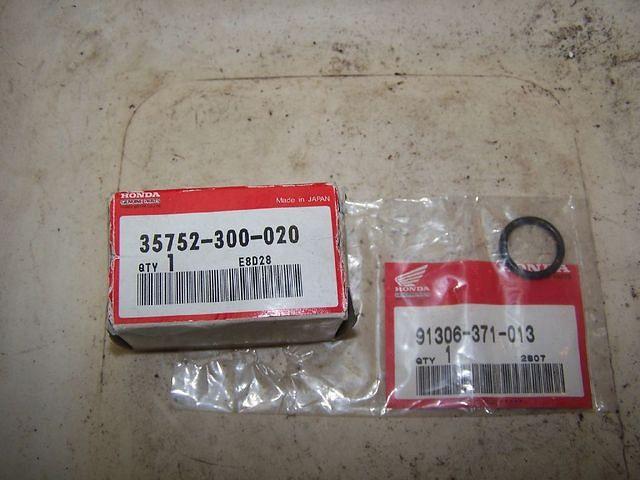
Don't forget to use a shorter bolt in the frontmost of the screen cover (for all 1000's and 1100's). Will make things a lot easier if you ever need to be there again. I think the manual says 3 mm shorter. Also when attaching the wire, hold the switch with the flats on the sides and the drain hole down. Attach the wire exiting up. Then when you install it, with the wire going up, the drain hole will be down.

This is all the tools I used. No special Honda tools (read expensive), and I used what I had.

Total time, including taking pictures and clean up, about 2 hours.
First I am NOT:
1. a photographer
2. a writer
3. an engineer
4. a trained motorcycle mechanic
Nor do I play one on TV and I did not stay at a Holiday Inn Express last night.
I have, however, replaced a neutral switch on a GL1000 without removing the engine. Here I am going to attempt to repeat that procedure and document with pictures and a narrative. I will be using my 78 'budget restore' project bike (7 of 9) and this should be very similar on all GoldWings 1975 thru 1981.
This is where I'll be today. The lower right front of the engine, right behind the lower frame engine mount. What a place!

There is a neutral switch in there somewhere.....

First I removed the exhaust pipes from the right side of the engine. How you have to do yours will vary, depending on type and condition of the exhaust. You may need to drop the entire exhaust system rather than risk damaging a joint or weak spot. I was lucky and just had to remove the header pipes.

Then drain the oil.

Now we can get to the task at hand, sorta... The 1000's have Phillips head screws holding the oil screen cover on, the 1100's have hex head bolts. Three of the screws I could access with a hand impact driver, the frontmost one is however impossible to get to with any type of screwdriver. The Honda manual shows an offset screwdriver to get to it, yeah right! I used a small pair of vice-grips to lock on to the head and break it loose.

Once loose, I backed it out by hand and removed the cover and screw together. I don't know on the 1100 bolt, but you may have to "flex" the frame at this point in order to get it out.

The screen wasn't really too bad, considering it's probably been there for 30 years.

To "flex" the frame I removed the lower engine mounting bolt and loosened the front sub-frame bolts, probably a quarter inch or so. Then forced a large flat blade screwdriver between the frame mount and the engine. You don't need a whole lot, but you do need some. Now for the switch. A wrench to get the retaining bolt started, then backed it out by hand.

The flats on the switch go vertical when installed. Using a screwdriver, I lightly tapped the top of the flat to rotate the switch. Probably 75 to 80 degrees. Enough to grab the switch by the flats with pliers and wiggle it out. Once out rotate the switch to come out by the oil screen access. Now you can get a screwdriver to it to remove the wire.

Total time so far, 45 minutes (your results may vary.)
Installation is reverse. Do yourself a favor and don't try a used one, been there done that.

Don't forget to use a shorter bolt in the frontmost of the screen cover (for all 1000's and 1100's). Will make things a lot easier if you ever need to be there again. I think the manual says 3 mm shorter. Also when attaching the wire, hold the switch with the flats on the sides and the drain hole down. Attach the wire exiting up. Then when you install it, with the wire going up, the drain hole will be down.

This is all the tools I used. No special Honda tools (read expensive), and I used what I had.

Total time, including taking pictures and clean up, about 2 hours.


