
so decided to install a new one.
Here goes:
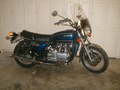
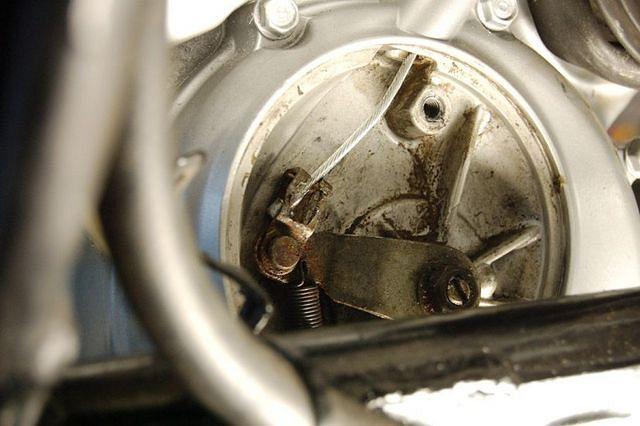
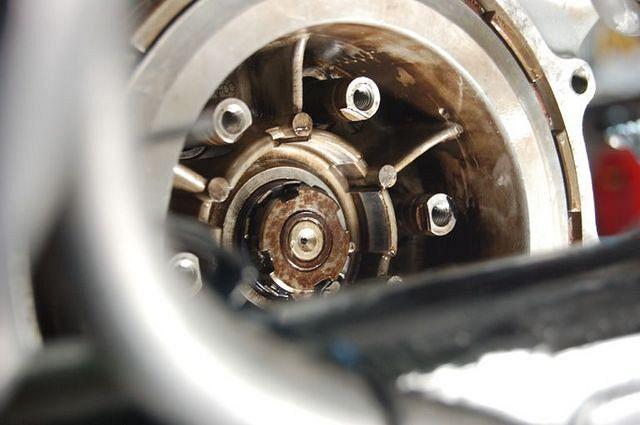
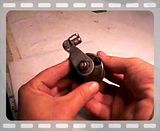
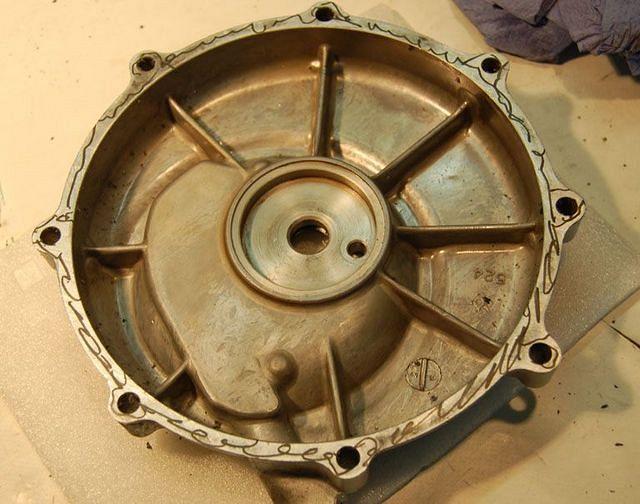
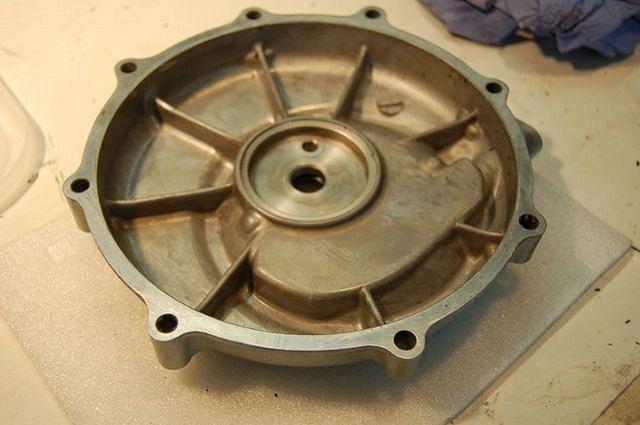
This is the set-up I refer to
NOTE: this is for the GL1000.
A few things that will come in real handy
when dong this job with the engine IN frame;
...a lift. Oh no , I wouldn't wonna do this lying on the floor;
everything is a bit tricky to get at, and it takes a while to do this stuff:

..a good selection of 10mm spanners, wrenches etc.

You don't strictly NEED all this stuff but I say;
the more the merrier ; there's a LOT of 10mm bolts
and some are hard to get at
..good light

preferably coming from below
Drain engine oil.
You still gonna need a container/rags under the clutch housing
as even when engine is drained, there's still oil in the clutch-housing.
It has it's own reservoir (and it's own scavenge pump).
Remove mufflers if you run the standard system.
The cross-pipe is gonna be in the way.
(Mine does not have the standard set-up, so I didn't remove it)
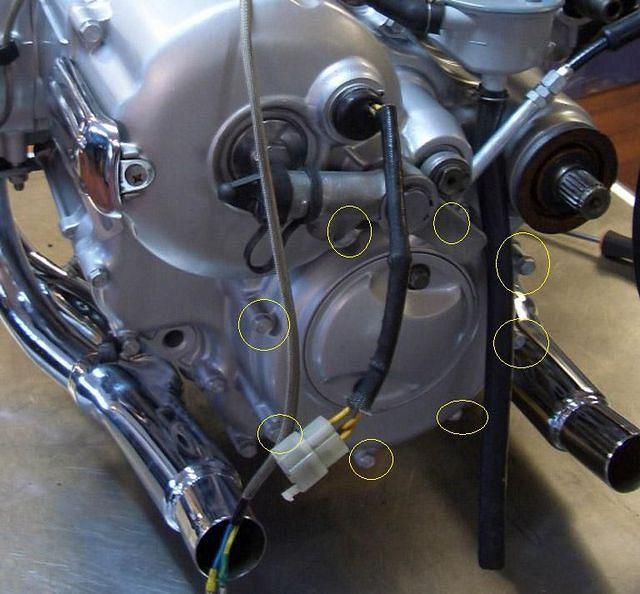
Remove the lifter cover (two screws)

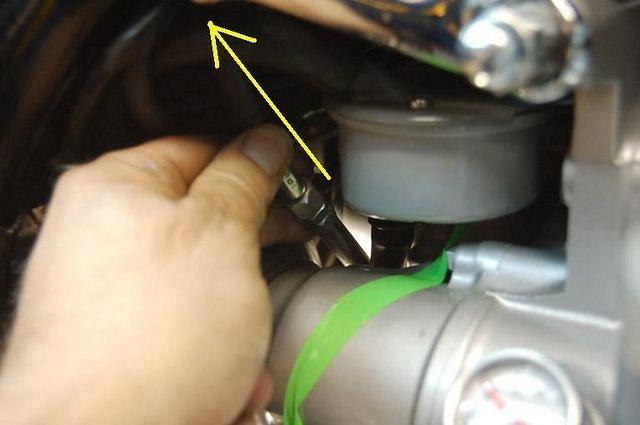
..loosen clutch cable at the handle
and here where it goes into the clutch:

..disengage cable from the lifter:
...pull out cable from clutch housing
...remove the 8 bolts that holds the clutch cover
(shown here with engine out of frame)
It's an old habit;
I always make a cardboard thing for the bolts
so I know which will goes where, when assembling

...with the cover removed,
loosen the lifter-plate bolts.

IMPORTANT !!!!!!
Remove the bolts in small increments
alternating bolts in a criss-cross pattern
to avoid breaking the plate
(At least two of our honored members here
didn't do this, and as a result they broke the plate !!!)
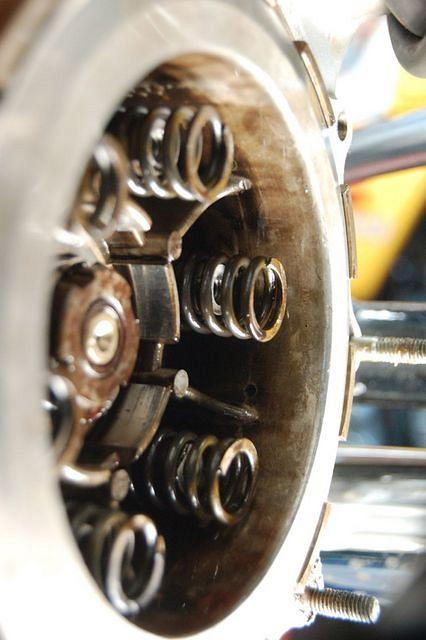
..remove lifter plate and the springs
Open the lock tap securing the central nut.
Remember; it looks like this:
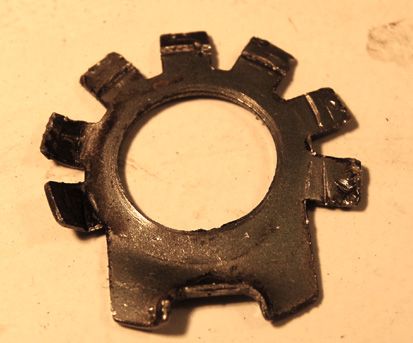
so don't forget to open ALL the little 'tabs'
Now, to remove the bolt a couple of
Honda special tools are called for, (more on that later)
but really all you have to do is
put a large screwdrive to the bolt
like this

..and give it a good firm wack !
That's it. At least it was for me.
..remove lock tab

..pull out the cluch center (holding back the clutch plates)

...and remove it by handling it OVER the frame cross-tube

..and down, between cross-tube and tire.
Inspect the clutch center for cracks and excessive wear.
..then remove the clutch plates

..remove pressure plate

Inspect in for cracks etc.
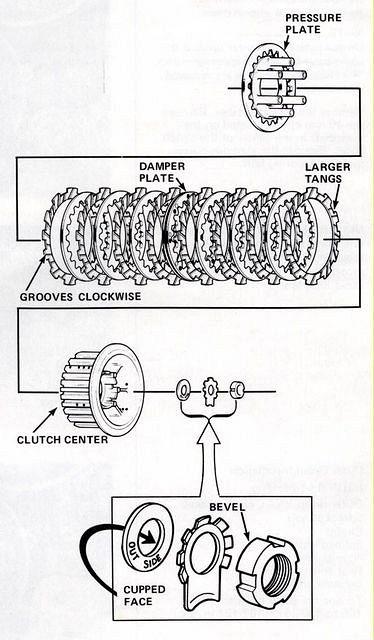
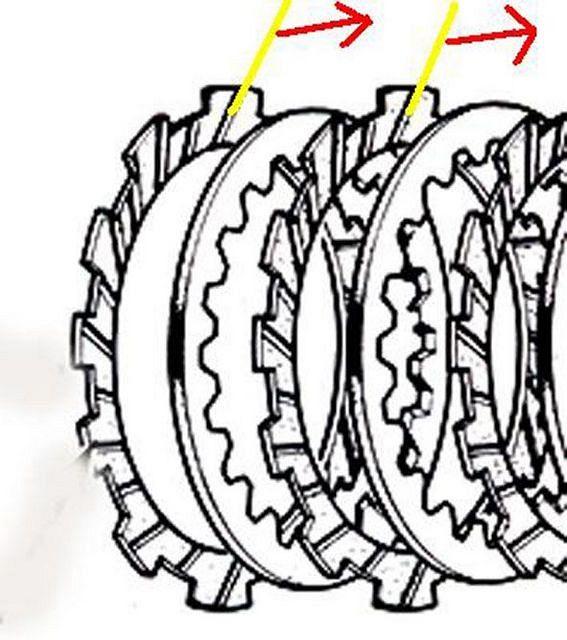
Here's what came out.
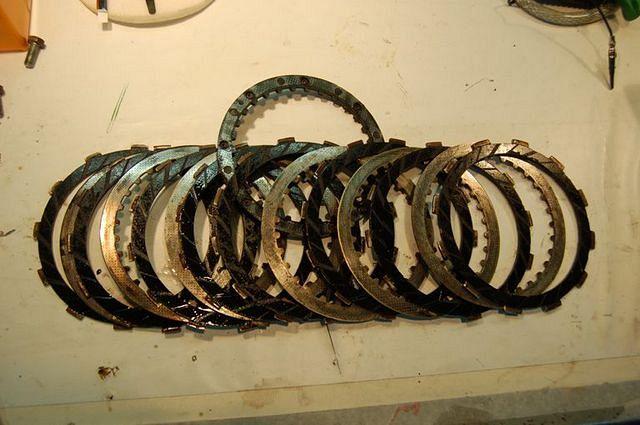
NOTE the order of the plates and where the damper-plate goes.
See diagram at the start of the thread.
NOTE that the first one that came out has larger 'tangs'
Check the free length of the springs
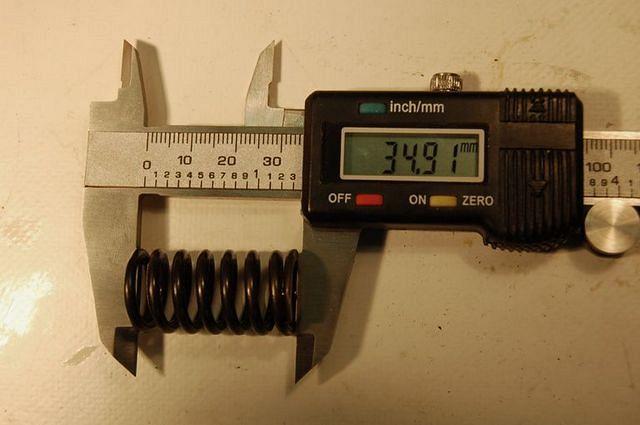
The service limit is 34.2mm, so these are fine.
As the clutch had trouble coping with the
power of the blown engine I opted for a set of stronger
springs:
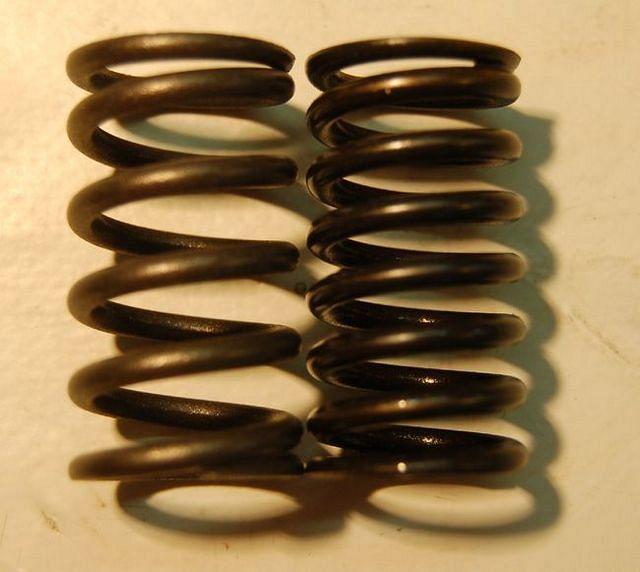
These (on the left) are 10% stronger than standard.
Made by EBC (model CSK 10) and cost approx. 17$ for a set.
There are others made by Barnett and Lucas.
If, for some reason you want to keep your friction plates,
you must check for scoring and discoloration and
you're gonna check the thickness:

service limit is 3.2mm, so these are fine
(but it would be kind'a stupid not to renew them.)
For the same reason as above I went for a set of
performance clutch friction plates:

..these are, as you can see, from Barnett
Check the discs for warpage, by holding them down
with two fingers and inserting different feeler gauges

..service limit is 0.3mm
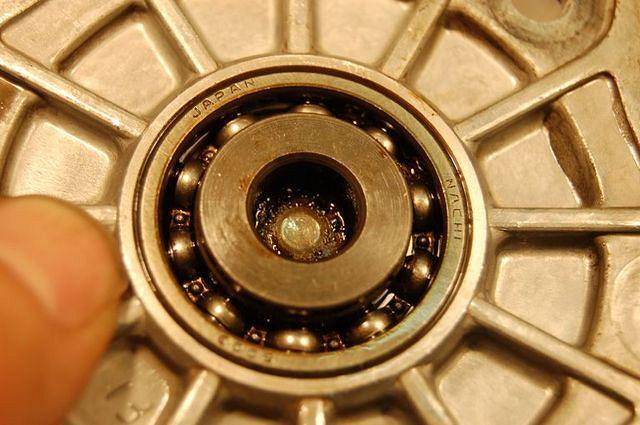
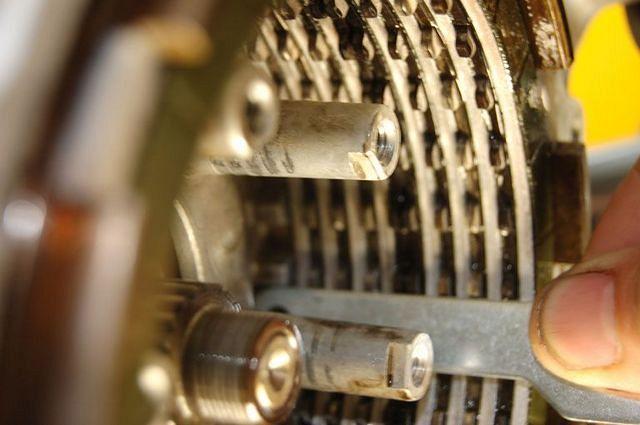
Check the release bearing
Check the function of the lifter-thingy
To see how to check it:
click the image below to watch a video of how the lifter works
when pulling the the clutch cable
(which will press the clutch plates apart, disengaging the clutch)
Check if lifter arm, moves freely

and check the oil-seal below the arm

..is it 'tight' around the shaft?
If not: replace.
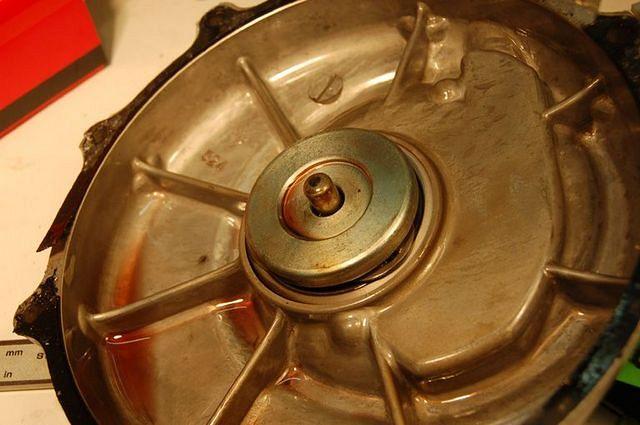
Check the OUTER drum (still in there , in the engine)

...for nicks, cuts and indentations.
The bad news is that, if it's not OK,
you'll have to pull the engine out of the frame to re-new it.
Bummer !
Time to put things back together:
Pressure plate goes in
make sure it's seated right
Clutch plates goes in, in the RIGHT order
(see above)
after the friction plates have been in an oil-bath for like 10 minutes

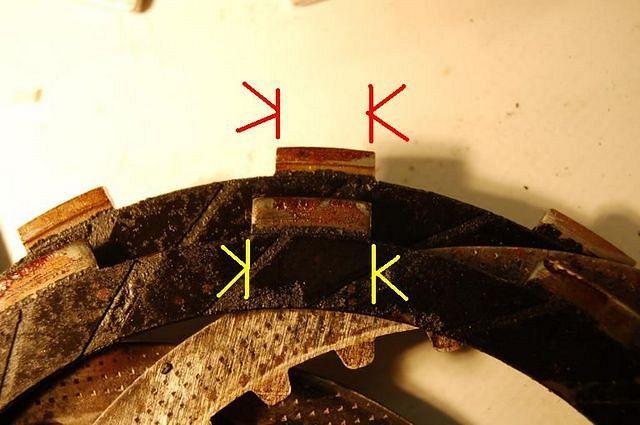
..if you use standard friction-plates:
NOTE that the grooves must 'radiate' clockwise like this
Now for some reason (that I can't recall now)
I couldn't get in the whole package (plates AND clutch center)
so I had to first insert the plates AND THEN the center
after aligning the tangs
[EDIT:] at this point please check Randakks brilliant
tips on how to install the plates here: CLICK
Obviously, he found the solution that I couldn't figure out
.-)
and after a LOT of fiddling I got the center in

Make absolutely sure it's in ALL THE WAY

..it must be flush with the edge of the 'outer drum' edge
..insert thick 'washer'
remembering that the cupped face goes like this:

...then the lock-thingy and the bevel/central bolt

Using the special Honda clutch holder and the Honda
socket wrench (more on that later):
torque to 380 to 420 kg-cm / 28-30 ft-lb)
and lock the lock-thingy.
...springs goes in

..using a strong light and 'feeling' with a thin screwdriver
make SURE the springs are seated right

..on the plate-lifter
Install the 6 bolts
NOTE:
Tighten the bolts in small increments
alternating bolts in a criss-cross pattern
to avoid breaking the plate
..and torque to 100-140 kg-cm / 87-121 in-lbs
Install the clutch cover with a new gasket
and torque the 8 bolts to
100-140 kg-cm / 87-121 in-lbs
Install cable and lifter cover.
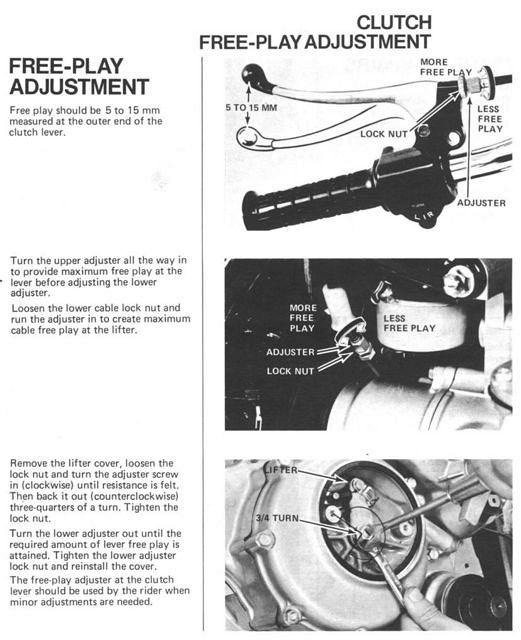
Adjust the cable free-play.
New engine oil. Check the level,
and re-check after start-up.
THAT's IT
.-)
Useful info and links:
PARTS:
For clutch parts, friction plates/gasket/springs etc.
our friend Frenchy at his Moon Place:
Clutch parts
Don't know if he has the stronger springs but here's the parts #
...from Barnett:
Spring kit: 501-56-06015
Friction plate kit: 302-35-10002
and if needed
Tempered Steel Metal Plates kit: 401-35-078024
The oil-seal on the lifter-arm shaft comes from Honda:
('superseded) parts#:
91202-KFL-841 / Oil Seal 13.8 x 24 x 5mm)
'old' Honda parts#:
91202-216-003 / Oil seal 14 x 24 x 5mm
Price around 4$
TOOLS:
You can make that spacial Honda tool used for tightening
the central nut/bevel.
Here's a drawing provided by Member Whiskerfish:
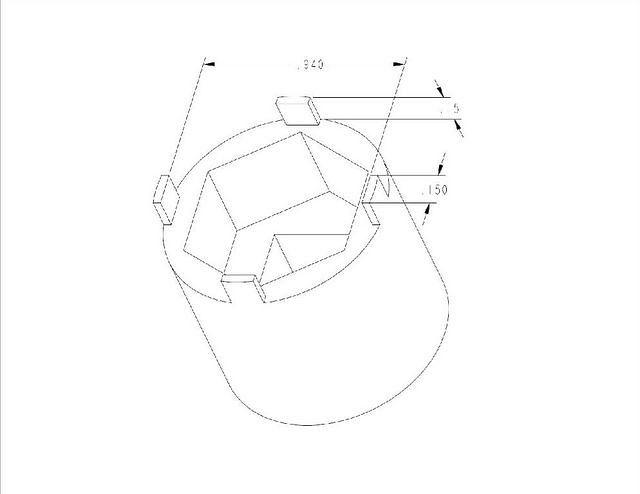
and a photo of what he made:

Member Doncoyote11 used
"...a disk brake adjuster tool found at any auto parts store. This thing looks like a cube with various sized pins sticking out of it that goes onto a 3/8" drive extension. I had to try a few different sides to get one that fit close enough. You may have to hold pressure against it to keep it from slipping...."
and Member Domscorpiorlg informs that a suitable tool is
available from
(click) Motorcycle Toolchest
(Talk to 'Michael')
or you can get the Honda tool HC 41304. (if it's available?)
Or order from Amazon "Motion Pro 08-0015 Oil Filter and Clutch Hub Spanner 24mm ID" for $13 shipped Edit by Fred Camper March 3, 2023
Now for the 'holder' required to hold the clutch while
tightening the bolt/bevel, I really don't know.
(Honda tool# HC41303).
Maybe someone has an idea for that ?
I , myself was too much in a hurry for all this;
..put a big bolt in my vice,
..put a nut on it
..tightened/torqued it to 400 kg-cm
and whacked it back and forth using a screwdriver/hammer,
with the screwdriver whacked into a 'slit' in the nut.
(checking the torque a couple of times)
This gave me a 'feeling' of how much force was needed to
give the central bolt/bevel the right torque using the screw-driver method.
Then I applied that force when installing the bolt/bevel.
I'm NOT recommending this...just telling you
.-)
TIPS:
Be anal about cleaning the surfaces before installing
the clutch cover

..old habit from my time struggling with British bikes and cars,
I always do this when putting together surfaces behind which
oil in contained
Using a marker-pen I scribble on the surface
..then take it to a big thick piece of glass on which
I've taped some very fine (1000 and 1200) abrasive paper

..until all trace of the markings are gone
...meaning the surface is perfectly flat
and will hold the oil better.
Probably not necessary here but........hey, I won't hurt !
TECH:
IF your old clutch friction discs have disintegrated
the engine must be cleaned and flushed of debris.
(NO fun)

and here' what your screen probably looks like:

....and finally
CLUCH ADJUSTMENT
HAVE FUN !