Bike of the Year voting in the Clubhouse
https://ngwclub.com/forum/viewtopic.php?t=78995#p828493

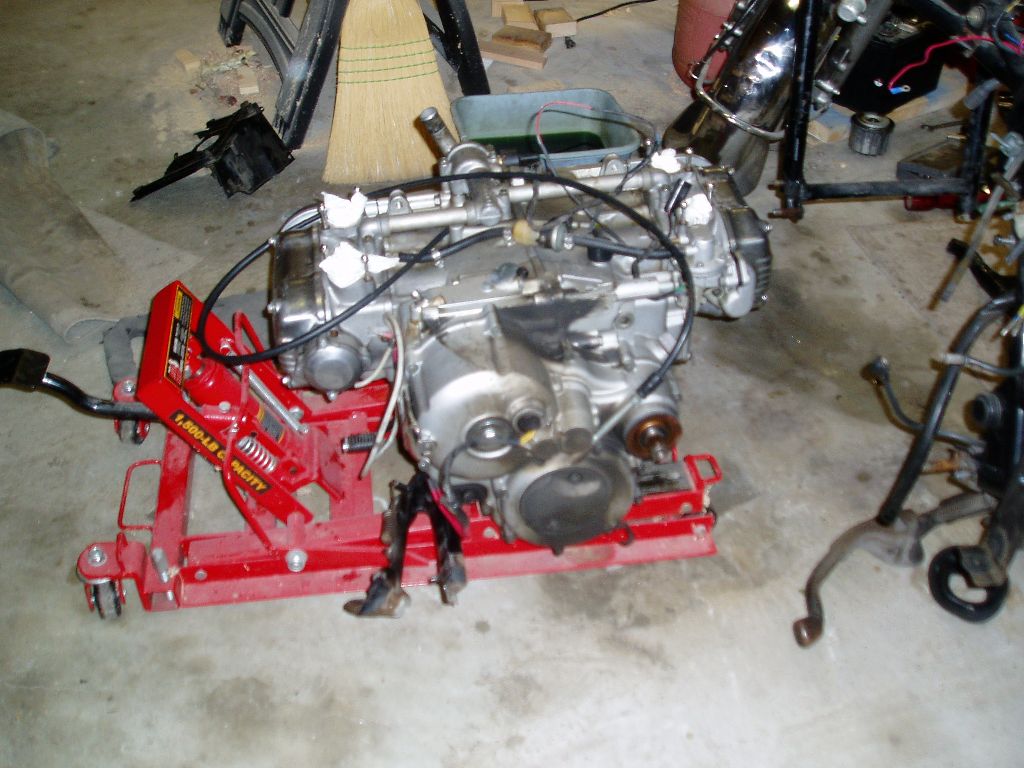
Engine removal

Post your "How To", or share tips and tricks about maintenance related to four cylinder Wings. Only registered users can read this forum.

Moderators: Whiskerfish, Forum Moderators

Post Reply
User avatar
Whiskerfish
President
President
Posts: 37559
Joined: Thu Feb 16, 2006 9:34 pm
My Album: http://www.ngwclub.com/gallery/v/wingmans/whiskerfish/
Location: Norfolk Va

Engine removal

#1

Post by Whiskerfish »

Carbs and exhaust removed previously. Remove any Fairing supports and crash bars and horns now.

Image

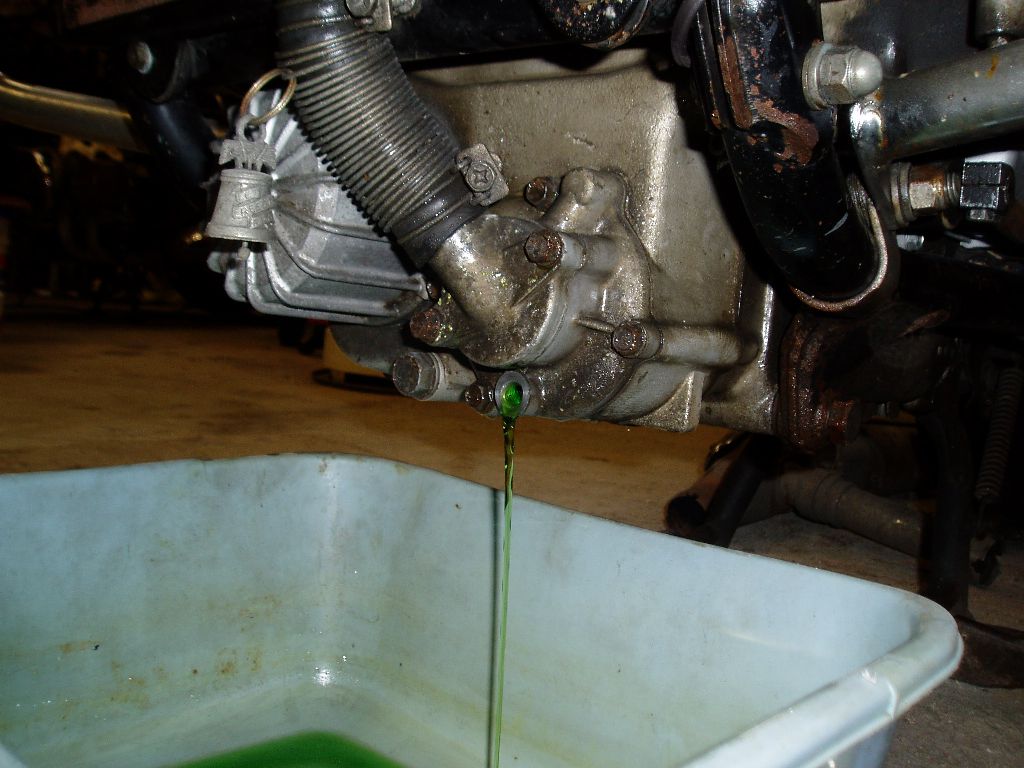
Drain Coolant
Image

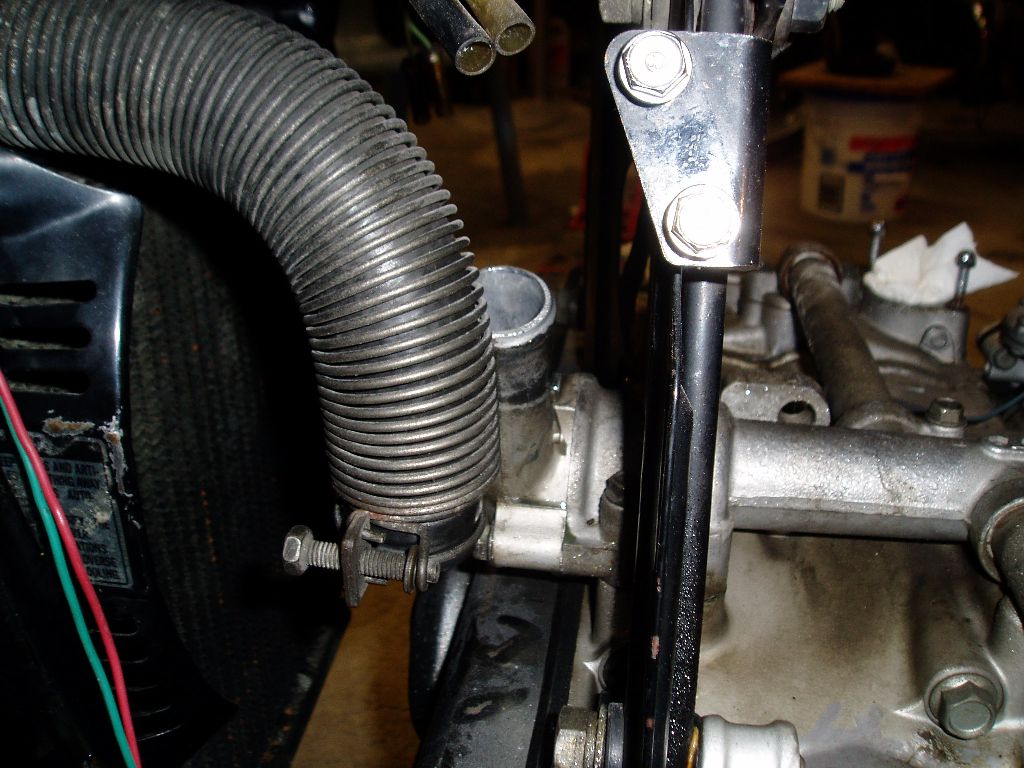
Disconnect upper hose
Image

Disconnect lower rad housing and seperate from pump housing
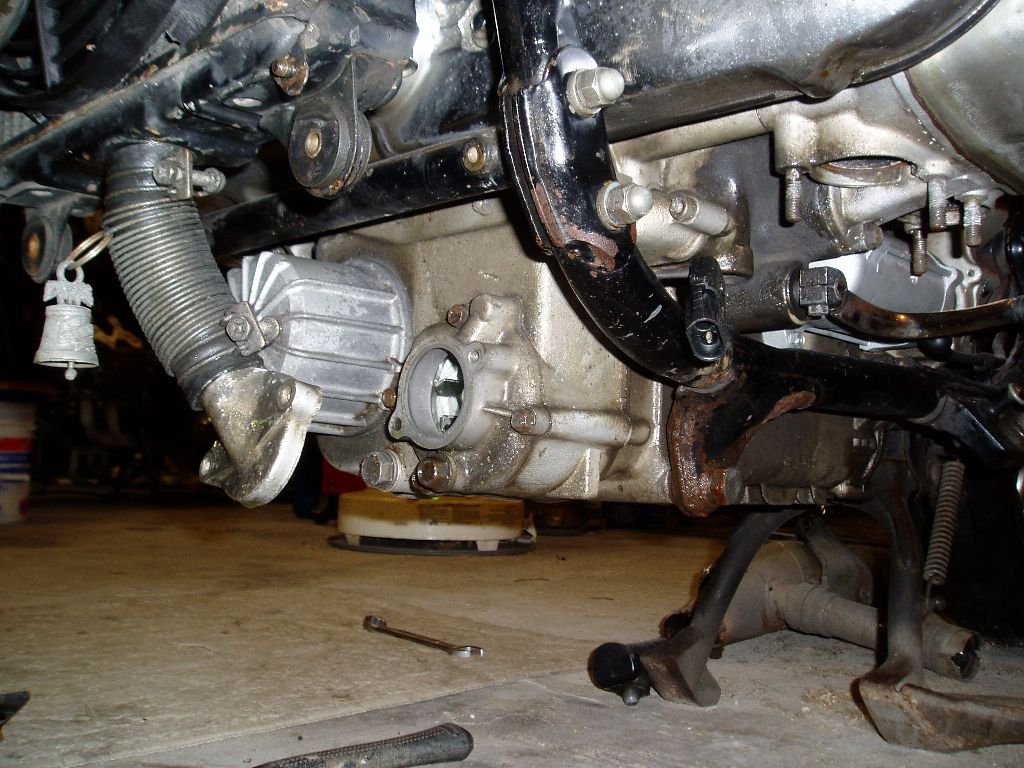
Image

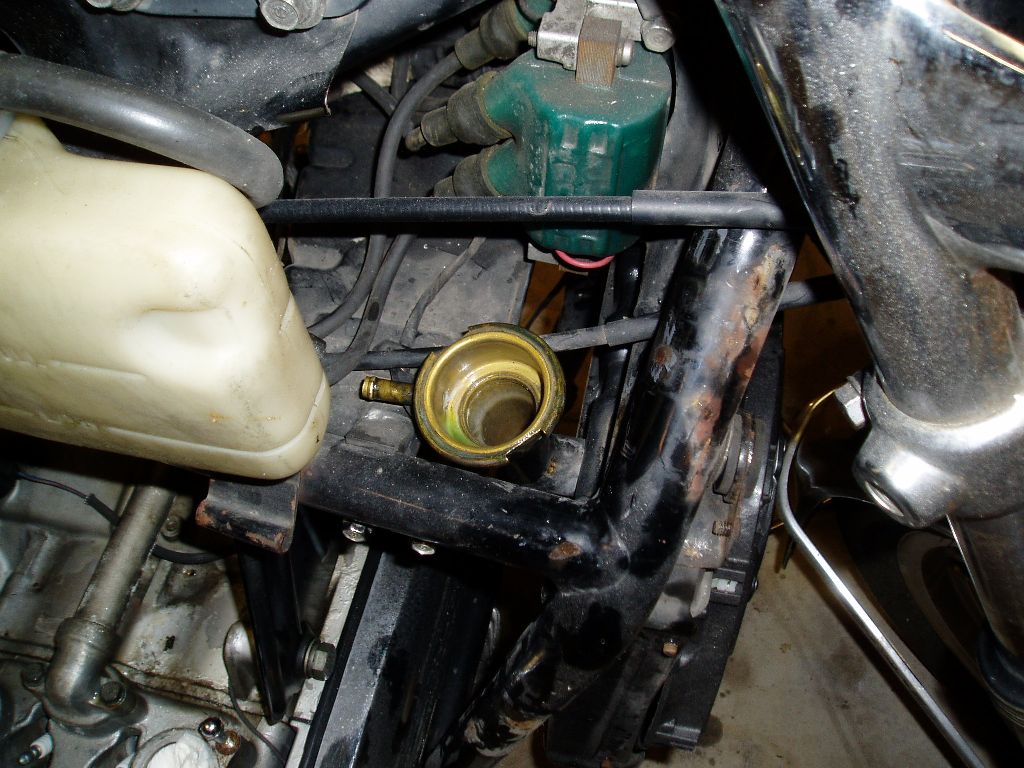
Disconnect wiring to Rad fan and overflow hose to expansion tank. Remove Rad Cap and remove radiator. Yes my fan is a bit different. Stock applications you look behind the rad next to the fan for the wiring connector.
Image


Drain Oil, Remove oil filter and Belt covers.
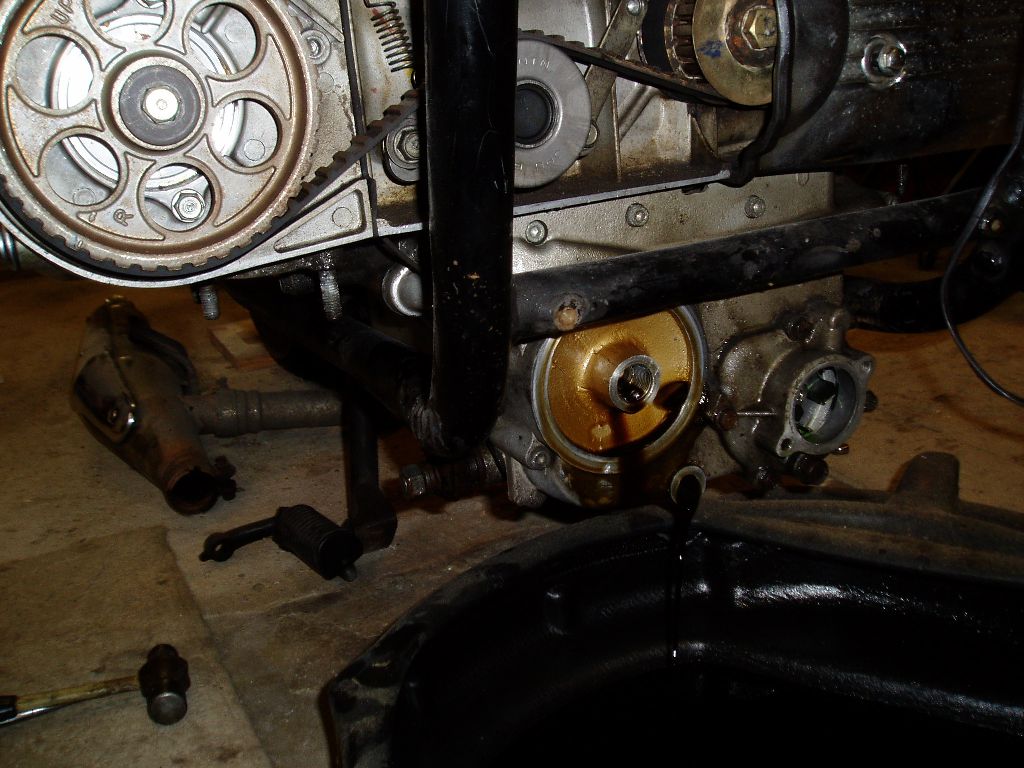
Image

Disconnect Tach Cable and Fuel line, I elected to disconnect the Clutch cable from the bike and take it out with the engine in this situation.
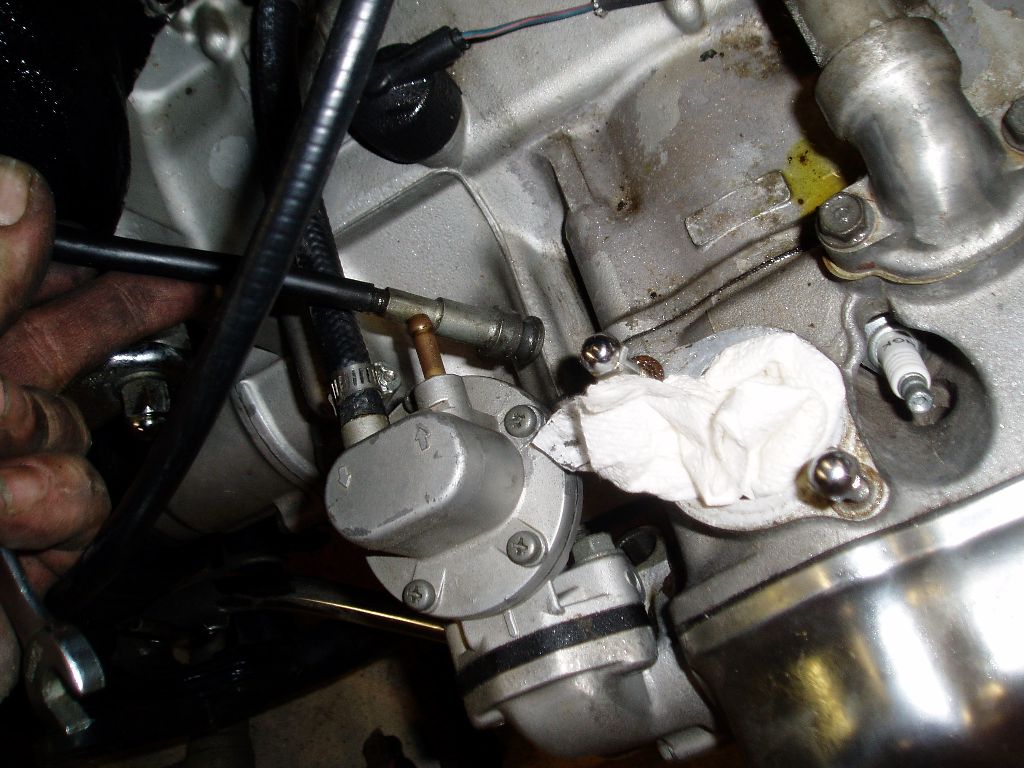
Image

Disconnect Fuel Filter from Fuel Tank and remove
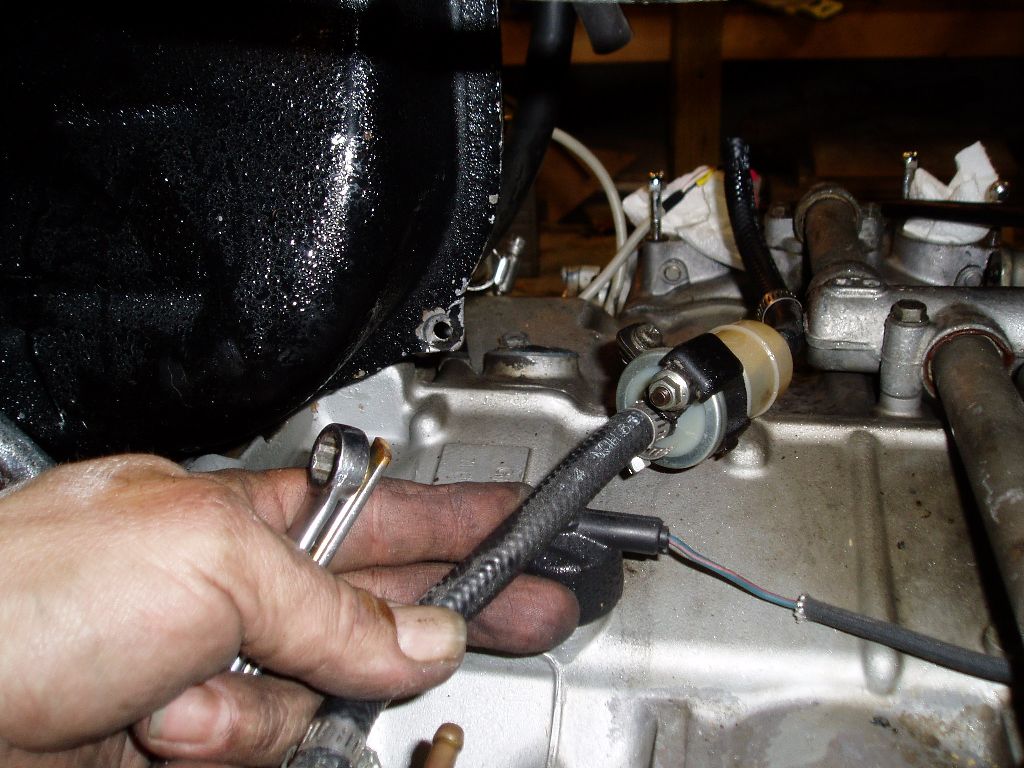
Image

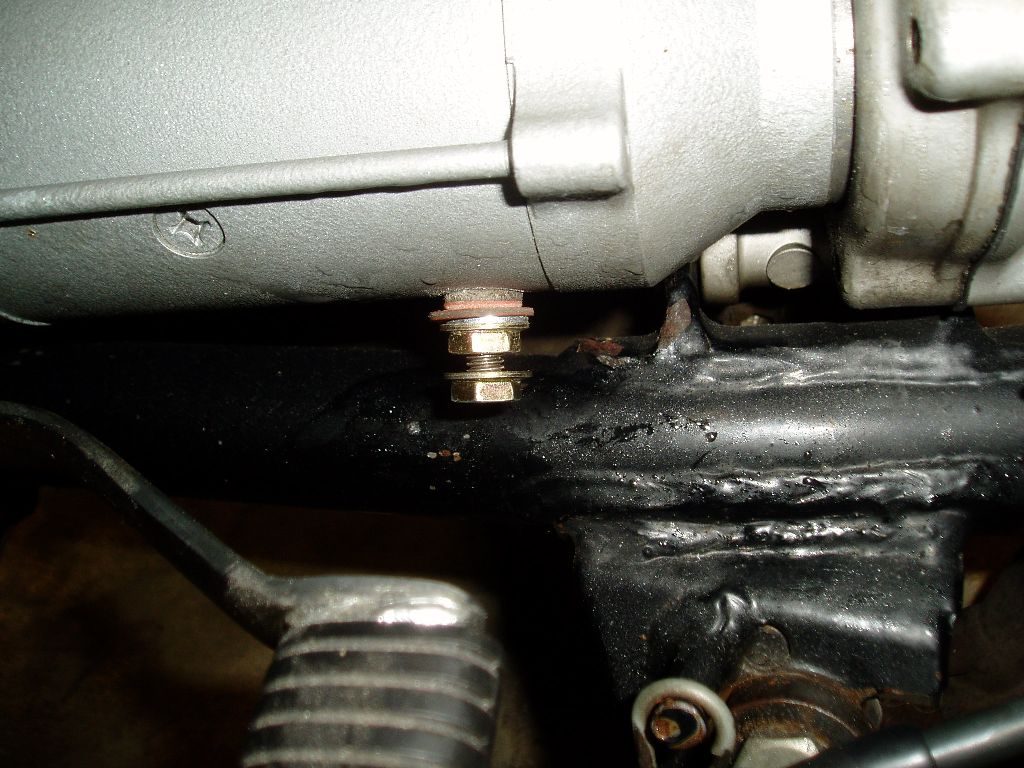
Disconnect Starter hot wire. Make sure to use wrench to hold stud from turning while removing outer nut.
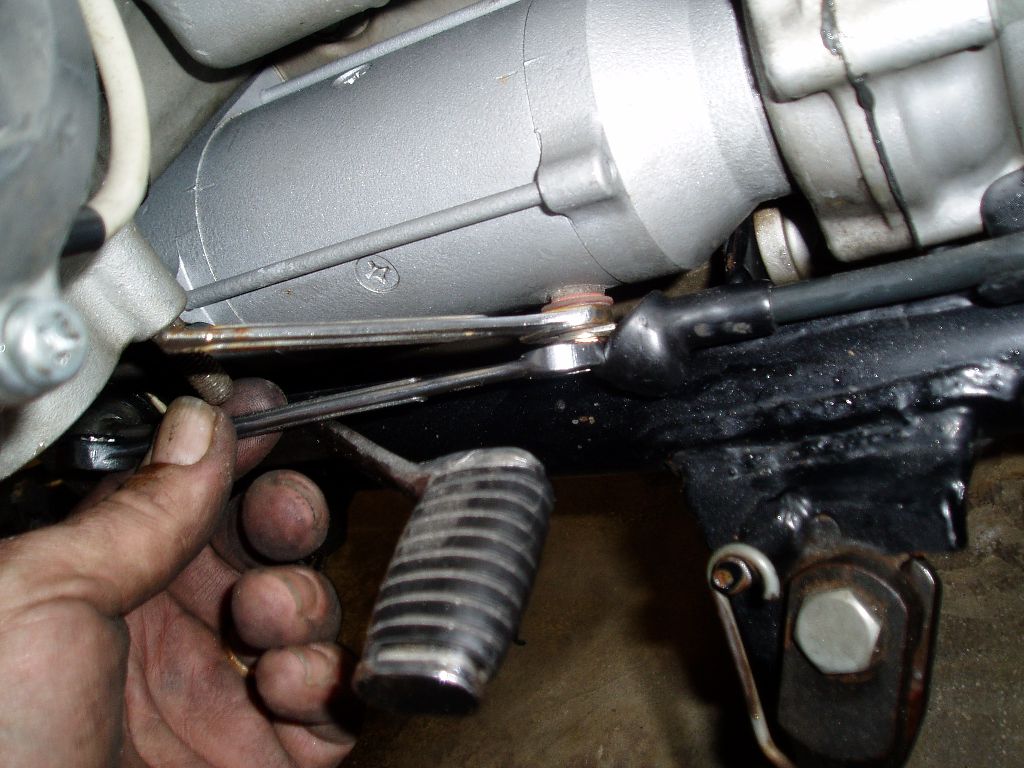
Image
Image

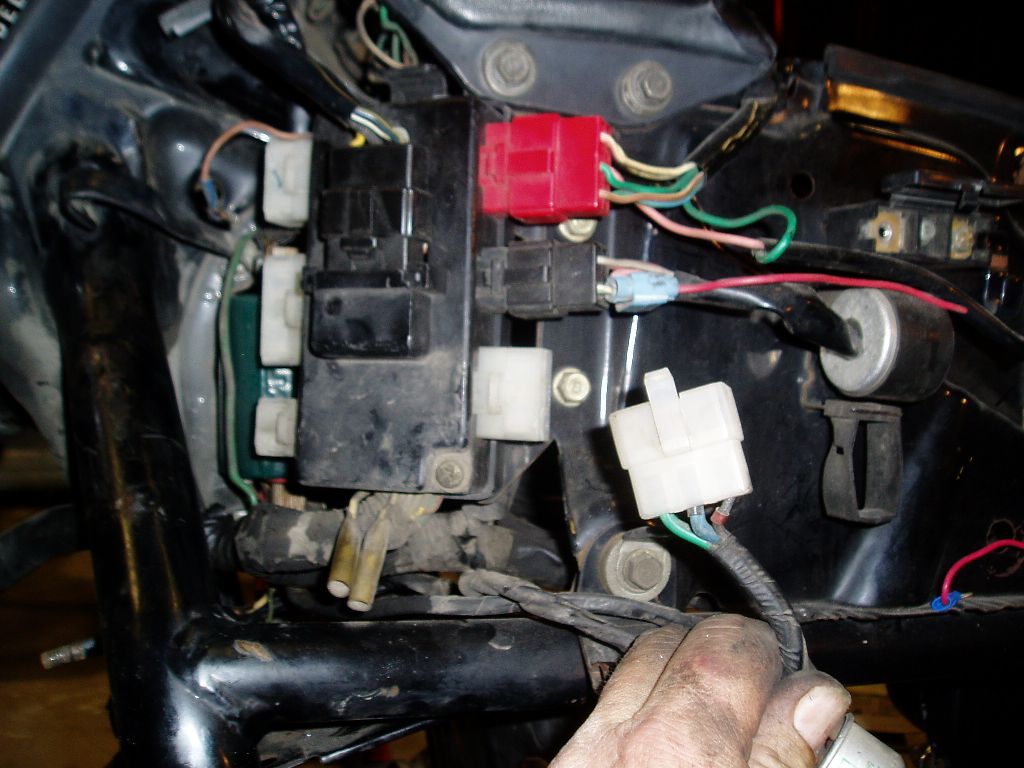
Disconnect the electronic ignition or Point cable wiring.
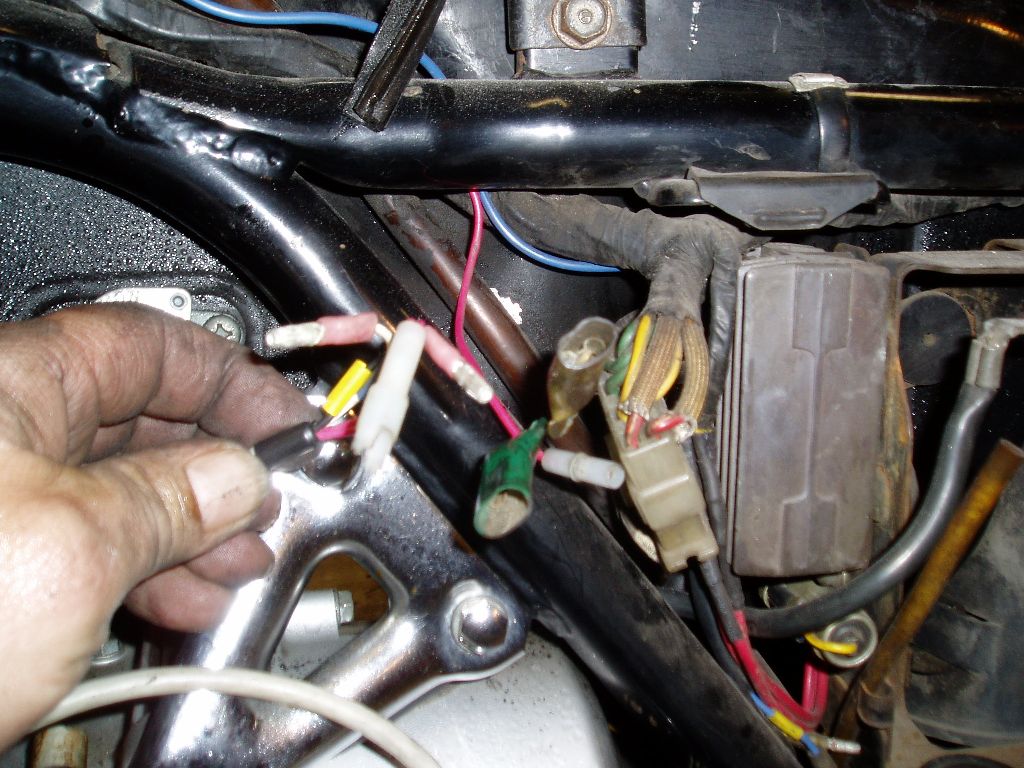
Image

On a 78/79 you remove this connector to disconnect the engine harness. On a 75 you will have to disconnect the wires individually. On a 1977, there is the same connector shown, located above the heat shield that can be disconnected once that is gone.
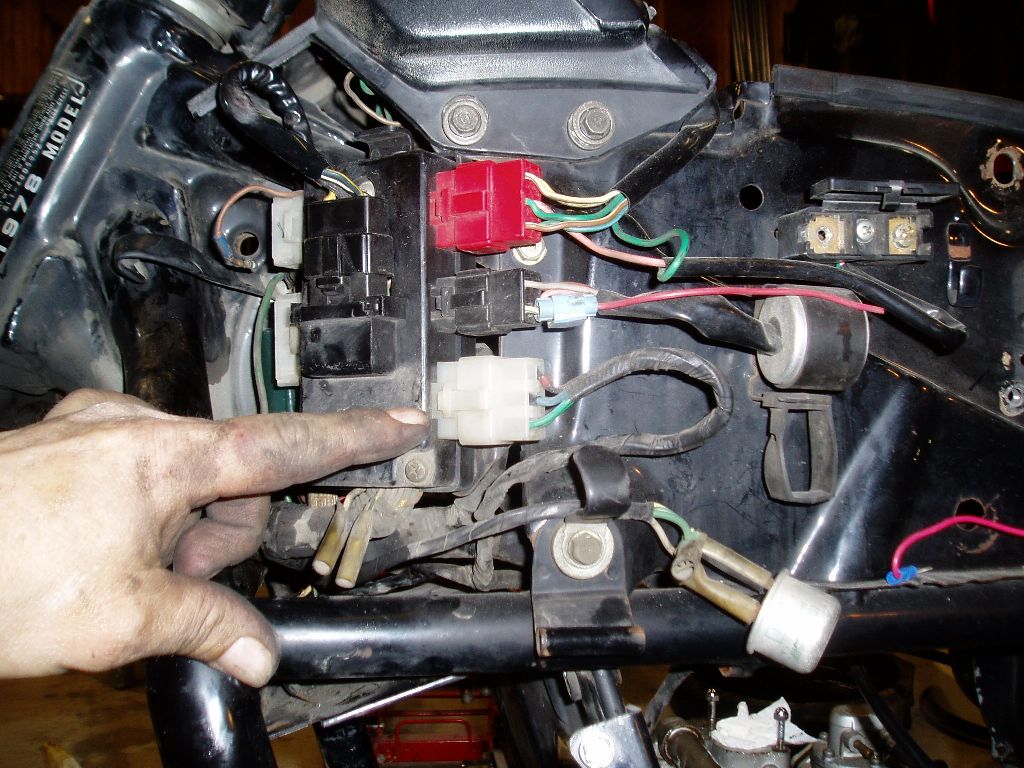
Image
Image

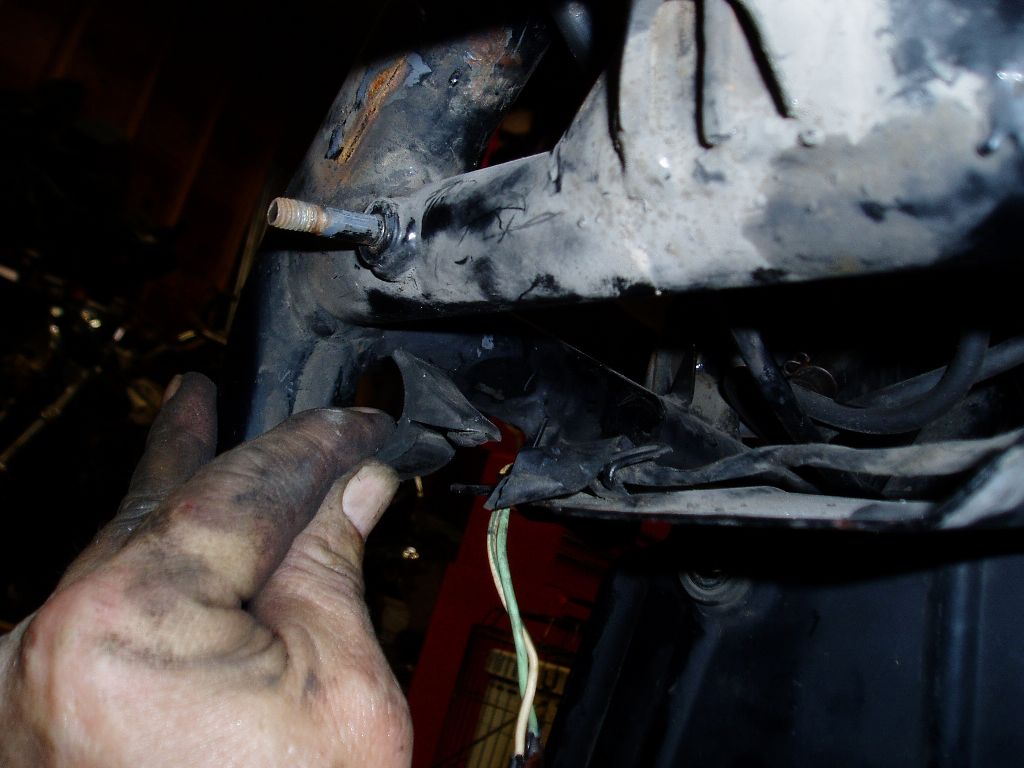
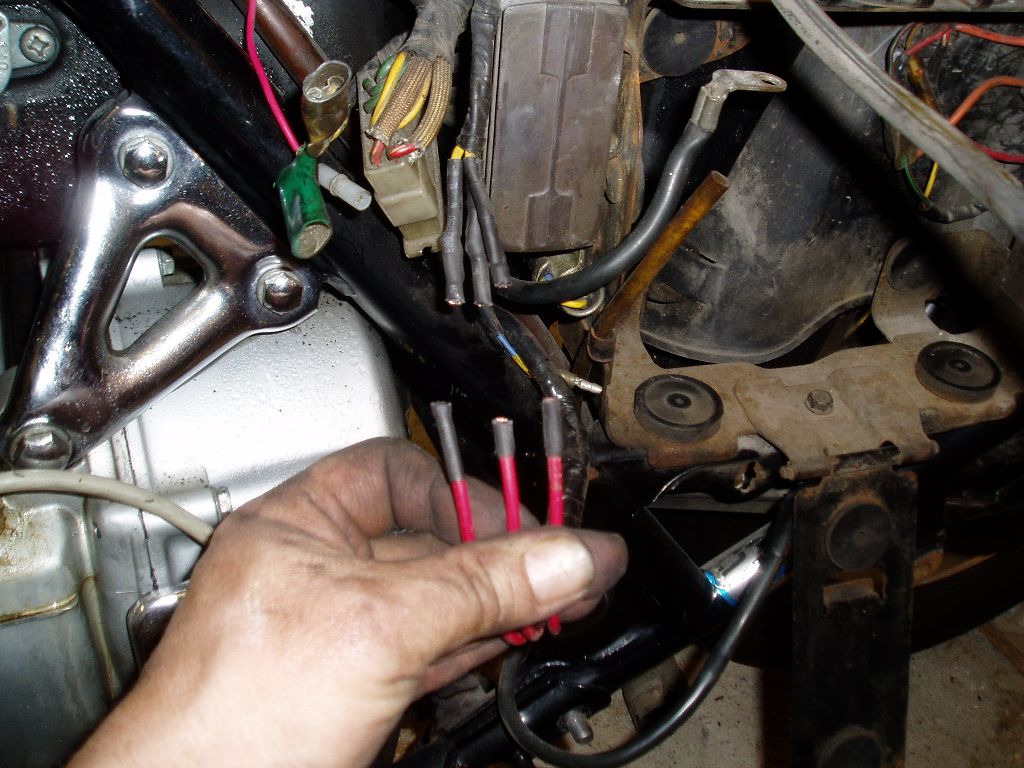
Disconnect or cut the three Yellow wires from the stator. (yes mine are red due to a modification I did)
Image
"Agreement is not a requirement for Respect" CDR Michael Smith USN (Ret) 2017
"The book is wrong, this whole Conclusion is Fallacious" River Tam
"Yea I do dance awkwardly, and I am having more fun than you" Taylor Swift
2008 GL1800 IIIA "TH3DOG"
1984 GL1200 Standard
1975/6/7/8/9 Arthur Fulmer Dressed Road bike
1975 Naked Noisy and Nasty in town bike

Psst. oh and by the way CHANGE YOUR BELTS!!!!
User avatar
Whiskerfish
President
President
Posts: 37559
Joined: Thu Feb 16, 2006 9:34 pm
My Album: http://www.ngwclub.com/gallery/v/wingmans/whiskerfish/
Location: Norfolk Va

#2

Post by Whiskerfish »

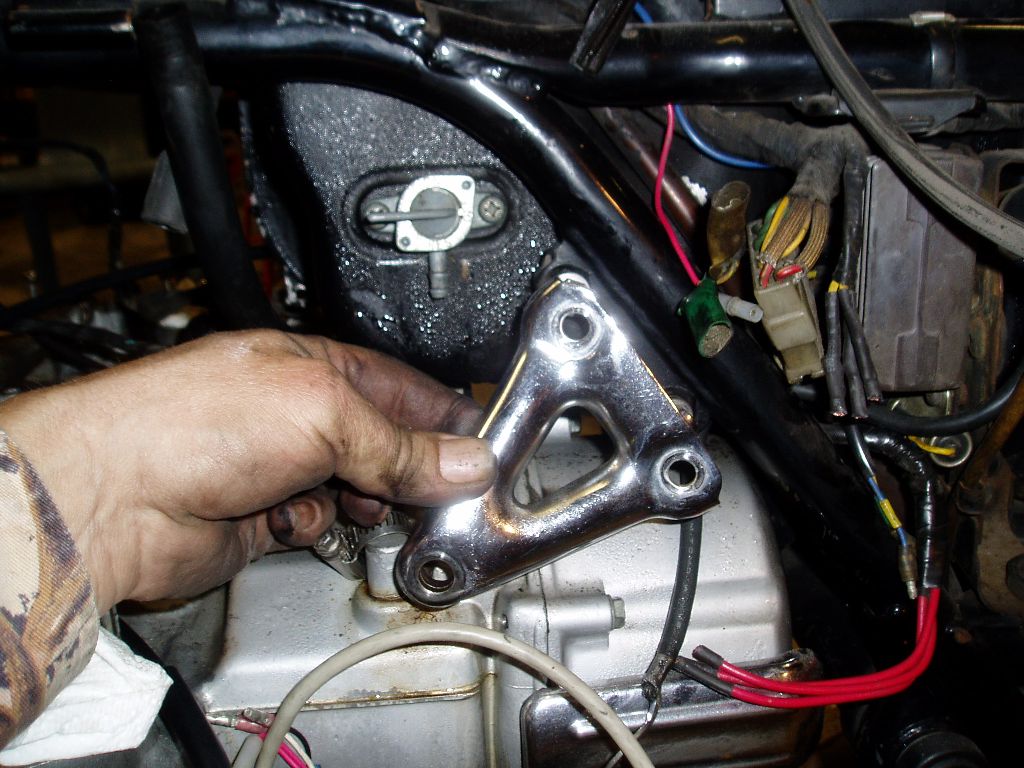
Remove the forward upper bolts and the bolts to the frame for the heat shield. Carefully remove the Heat shield. Ensure to note where the rubber anti chaf gromets go between the heat shield and the frame
Image
It does require some wiggling but it will come out without being bent!!
Image

Remove the upper rear engine hangers. Take care not to loose the long bolt, OEM replacement is liike $26.00!!
Image

Disconnect and remove the rear Brake Switch, then remove Right and Left hand lower engine mount bolt.
Image

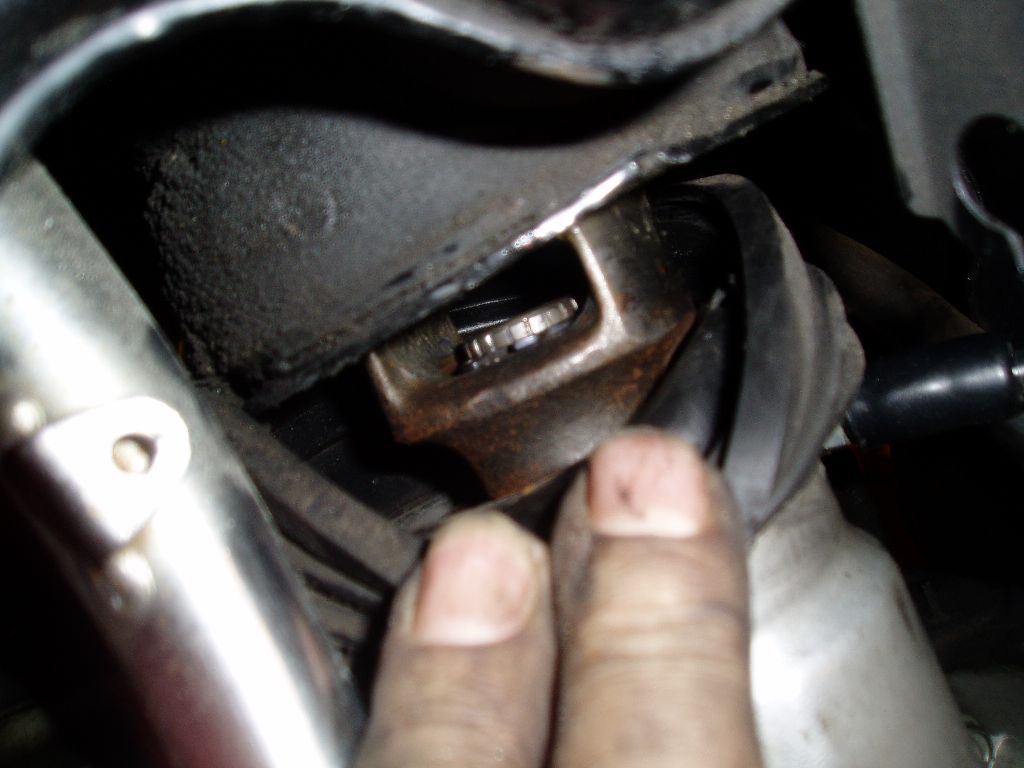
Slide the driveshaft rubber boot FORWARD and rotate rear wheel until the snap ring is in view. If you pull the boot rearward, the view is too poor for removal of the clip.
Image

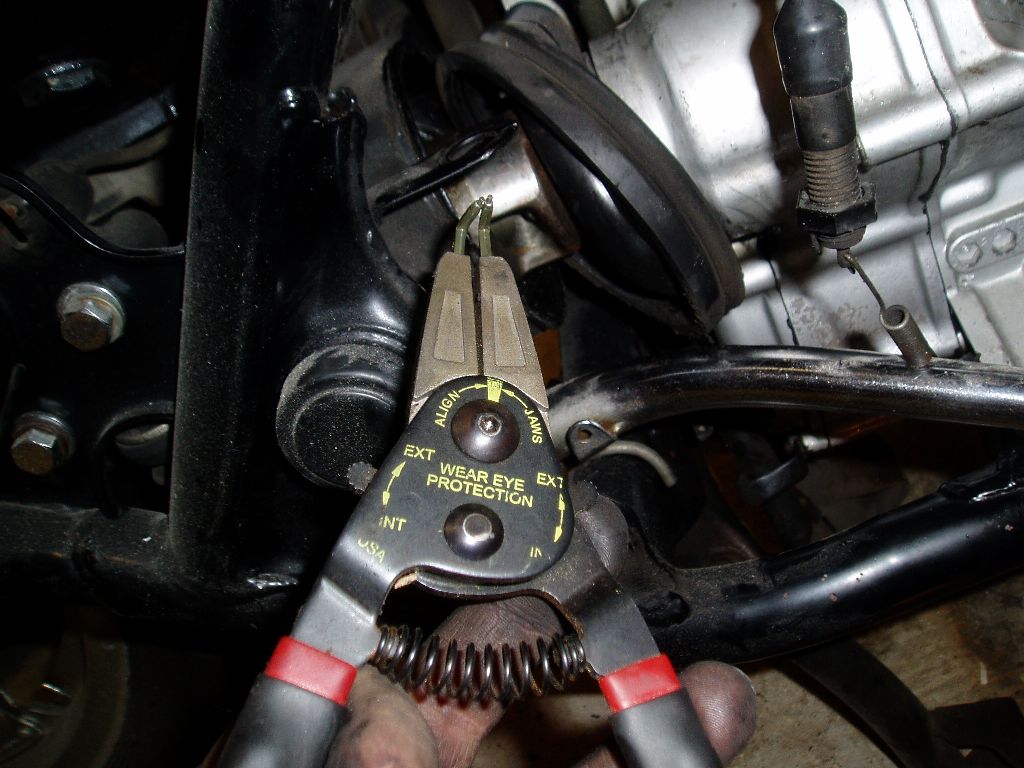
Good 90 degree snap-ring pliers are almost a must for this job. The length after the bend has to be the shortest one in your toolbox. ADT 90 degree from a local shop works well, very similar to Amazon: Circlip Plier, Snap Pliers Ergonomic Vinyl Handle Internal External Heavy Duty for Repairing(5.5inch) Brand: Uxsiya
Image
Image

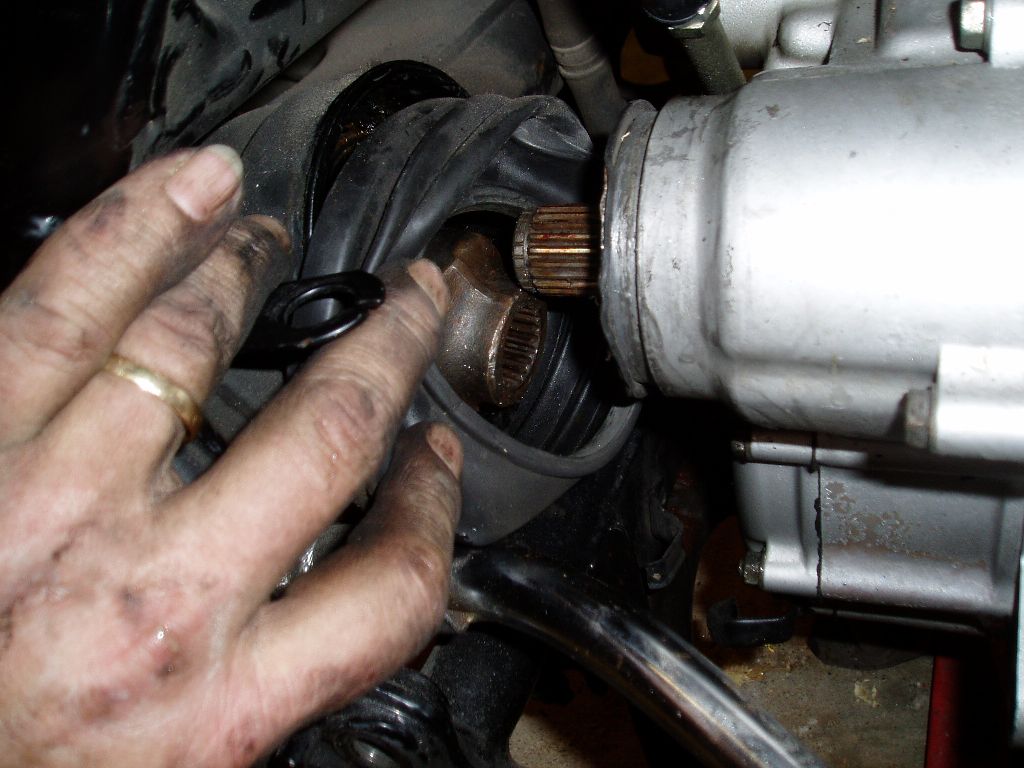
Now slide the boot back and push the drive shaft back along the spline. It will not have enough room to disconnect yet.
Image

Place your support. A Bike Jack works very nice. A floor style car jack also works well, Position the jack pick up points to avoid frame contact as shown in the photo below.
Image

Do a thourough final inspection to make sure all wires and cables are clear and will not snag when you are at a critical point.

Take slight tension with the jack and remove the "removable frame section" from the left side of the bike. The cross bolt may require some adjustment of the jack. When the frame section is gone you need to wiggle the engine out of the mounts on the right hand side so it can move forward a hair to disconnect the driveshaft. If the fuel tank is installed the engine will not have clearance to go up high enough to get clear of the right hand mounts. you need to work it down and forward. It only takes like a 1/4 inch to seperate the drive shaft.


Image

Lower the engine slightly and slide out the left side.
Image
"Agreement is not a requirement for Respect" CDR Michael Smith USN (Ret) 2017
"The book is wrong, this whole Conclusion is Fallacious" River Tam
"Yea I do dance awkwardly, and I am having more fun than you" Taylor Swift
2008 GL1800 IIIA "TH3DOG"
1984 GL1200 Standard
1975/6/7/8/9 Arthur Fulmer Dressed Road bike
1975 Naked Noisy and Nasty in town bike

Psst. oh and by the way CHANGE YOUR BELTS!!!!
User avatar
Roady
Member Relations &_Graphics
Posts: 11957
Joined: Wed Jun 20, 2007 2:35 pm
Location: Port St. John, FL

#3

Post by Roady »

That's very nice, WF. Great pics and well explained. Thank you.

Just a couple of questions ...

Did you do that removal for this writeup, or vice versa?

And, that shirt still fits you? I outgrew mine 20 years ago!

Image
User avatar
sunnbobb
Facebook Admin
Facebook Admin
Posts: 21299
Joined: Thu Jan 10, 2008 4:09 pm
My Album: http://www.ngwclub.com/gallery/v/wingmans/sunnbobb/
Location: LaConner, WA

#4

Post by sunnbobb »

Great job Whisker! I would have added the technical language involved during the circlip removal, but this is a family oriented website...
I found the end of the internet

---- Bradshaw Bikes custom polishing for your wing. Visit us on facebook!

1978 Learning Experience
1980 County Road Hauler "Brain Damage"
1978 Cafe Custom Gl1000 "Vyper"
1977 Bulldog Inspired "Vaincre"
1981 Street Fighter GL1100 "No Quarter"
1983 Supercharged Street Drag "Anubis" (in worx)
1983 gl1100 mint restoration "Kristen"
1985 Aspencade..pondering.
User avatar
Whiskerfish
President
President
Posts: 37559
Joined: Thu Feb 16, 2006 9:34 pm
My Album: http://www.ngwclub.com/gallery/v/wingmans/whiskerfish/
Location: Norfolk Va

#5

Post by Whiskerfish »

Roady not sure exactly what the question means? I took the pics Wednesday late afternoon when I pulled the engine and did the write up last night.There are quite a few pics I did not use here http://www.ngwclub.com/gallery/v/wingma ... ne-Removal If you want to do "you're thing" to this please feel free. I do not have the patience to do what you do :lol:

If you look at the pics I did not use you will see that I had to do some things a bit differently on this removal. The Cross bolt under the engine was seized in the engine. I soaked and beat it for a while then I decided it was easier to just get out the sawzall and remove the opposite side frame.

Sunnbobb
A good pair of circlip pliers takes the need for "technical terms" away :lol: :lol: :lol: :lol: :lol:
"Agreement is not a requirement for Respect" CDR Michael Smith USN (Ret) 2017
"The book is wrong, this whole Conclusion is Fallacious" River Tam
"Yea I do dance awkwardly, and I am having more fun than you" Taylor Swift
2008 GL1800 IIIA "TH3DOG"
1984 GL1200 Standard
1975/6/7/8/9 Arthur Fulmer Dressed Road bike
1975 Naked Noisy and Nasty in town bike

Psst. oh and by the way CHANGE YOUR BELTS!!!!
ElPiloto
True Blue Steel Biker
Posts: 2085
Joined: Fri Apr 06, 2007 4:01 pm
Location: Southern Arizona

#6

Post by ElPiloto »

It looks to me that the driveshaft snap ring is worn out. Or, is that just an optical illusion made by the flash?

One thing I do when pulling an engine is to inspect every single nut, bolt, bracket etc., to see what needs replacing and what just needs clean up.
"Some Cats Got it, Some Cats Ain't"
User avatar
Whiskerfish
President
President
Posts: 37559
Joined: Thu Feb 16, 2006 9:34 pm
My Album: http://www.ngwclub.com/gallery/v/wingmans/whiskerfish/
Location: Norfolk Va

#7

Post by Whiskerfish »

ElPiloto wrote:It looks to me that the driveshaft snap ring is worn out. Or, is that just an optical illusion made by the flash?

One thing I do when pulling an engine is to inspect every single nut, bolt, bracket etc., to see what needs replacing and what just needs clean up.
Actually the snap ring was good. Must a optical Delusion ;) but that brings up a excellent point. For something that is that much of a PITA to change plan ahead and have a new one ready to go! They don't cost much at all and do deform very easily.

Yes under normal situations the very next step would be a thourough cleaning and inspection for damaged or worn components. This one in particular is getting parted out.
"Agreement is not a requirement for Respect" CDR Michael Smith USN (Ret) 2017
"The book is wrong, this whole Conclusion is Fallacious" River Tam
"Yea I do dance awkwardly, and I am having more fun than you" Taylor Swift
2008 GL1800 IIIA "TH3DOG"
1984 GL1200 Standard
1975/6/7/8/9 Arthur Fulmer Dressed Road bike
1975 Naked Noisy and Nasty in town bike

Psst. oh and by the way CHANGE YOUR BELTS!!!!
User avatar
roncar
Vice President
Vice President
Posts: 4856
Joined: Sat Jan 05, 2008 4:30 pm
My Album: http://www.ngwclub.com/gallery3/index.p ... s/roncarGL
Location: Lakeland, Florida

#8

Post by roncar »

Whiskerfish wrote:If you look at the pics I did not use you will see that I had to do some things a bit differently on this removal. The Cross bolt under the engine was seized in the engine. I soaked and beat it for a while then I decided it was easier to just get out the sawzall and remove the opposite side frame.

Sunnbobb
A good pair of circlip pliers takes the need for "technical terms" away :lol: :lol: :lol: :lol: :lol:
But a frozen bolt adds the "technical terms" back in. Image


Image

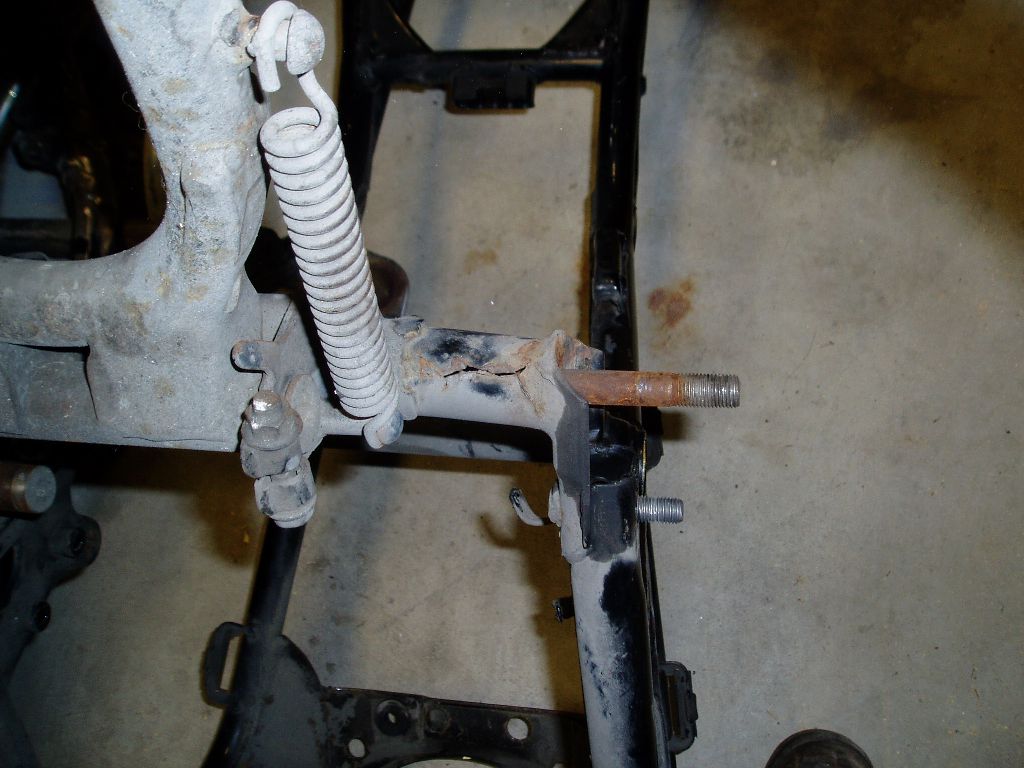
Now that everything's out of the way, how about some nice close ups of that centerstand cross member? Maybe with some of a good one for comparison. Thats scary.

Image
"I periodically misspell words just to annoy the word police."

Image
User avatar
Whiskerfish
President
President
Posts: 37559
Joined: Thu Feb 16, 2006 9:34 pm
My Album: http://www.ngwclub.com/gallery/v/wingmans/whiskerfish/
Location: Norfolk Va

#9

Post by Whiskerfish »

Image
"Agreement is not a requirement for Respect" CDR Michael Smith USN (Ret) 2017
"The book is wrong, this whole Conclusion is Fallacious" River Tam
"Yea I do dance awkwardly, and I am having more fun than you" Taylor Swift
2008 GL1800 IIIA "TH3DOG"
1984 GL1200 Standard
1975/6/7/8/9 Arthur Fulmer Dressed Road bike
1975 Naked Noisy and Nasty in town bike

Psst. oh and by the way CHANGE YOUR BELTS!!!!
User avatar
Roady
Member Relations &_Graphics
Posts: 11957
Joined: Wed Jun 20, 2007 2:35 pm
Location: Port St. John, FL

#10

Post by Roady »

WF ... I just asked that because there'd been talk about us needing an engine removal tutorial and up pops yours. Great timing.

I wouldn't touch a thing in your writeup, it's excellent.
User avatar
peteybug
Silver Member
Silver Member
Posts: 787
Joined: Sun Feb 10, 2008 2:20 pm
Location: northern new york

#11

Post by peteybug »

Great job Whiskerfish, nice pic's. If your parting out I might be interested in that little (bell) hanging on lower radiator hose looks custom to me. Is it to warn critters that are in the road? biggrin Again a great job action1 action1
love new ideas for old wing's. AS I have three and am always working on them

[img]http://i253.photobucket.com/albums/hh55/peteybug8/motorcycle040-1.jpg[/img][img]http://i253.photobucket.com/albums/hh55/peteybug8/motorcycle037-1-1.jpg[/img][img]http://i253.photobucket.com/albums/hh55/peteybug8/3%20wings/Townworkandbikes036-1.jpg[/img]
User avatar
Sagebrush
Run Executive
Run Executive
Posts: 6535
Joined: Wed Aug 15, 2007 10:35 pm
My Album: http://www.ngwclub.com/gallery/v/wingmans/album269/
Location: Raleigh, NC

#12

Post by Sagebrush »

Whisker, is this the engine from your bagger? If so why are you parting it out?
Dean Spalding
Raleigh, NC

"Two things are infinite: the universe and human stupidity; and I'm not sure about the universe." - Albert Einstein

'82 Yellow GL1100
'81 Blue GL1100

My Gallery
My 1100 Build Thread
User avatar
sodbuster
Gold Member
Gold Member
Posts: 1378
Joined: Sun Jul 09, 2006 10:34 pm
Location: S. Haven, Mn

#13

Post by sodbuster »

peteybug wrote:If your parting out I might be interested in that little (bell) hanging on lower radiator hose looks custom to me. Is it to warn critters that are in the road?
Actually those are known as "Rider" bells or "Guardian" bells ....... True Story

http://wapedia.mobi/en/Biker%27s_bell
'06 H-D Road King
'99 Valkyrie Standard - TOTALED :(
'83 GL1100 Standard - SOLD
'82 CB900F - Black & Red - SOLD
User avatar
Whiskerfish
President
President
Posts: 37559
Joined: Thu Feb 16, 2006 9:34 pm
My Album: http://www.ngwclub.com/gallery/v/wingmans/whiskerfish/
Location: Norfolk Va

#14

Post by Whiskerfish »

Dean

Yes that is my Bagger. She has been sent off to the happy roads in the sky! I thought about repairing the centerstand support but as bad as that was corroded I was concerned about the rest of the lower frame. Well as it turns out the rest of the frame was solid. I did not find that out until I took the sawzall to it. The engine was tired and the primary chain was making too much noise no matter how tight she was tunned. She had somewhere between 160 and 170,000 miles and it was time to replace her. My Black bike will be my new touring bike wearing the Bagger's "clothing". I have wanted to build a 75 for the street so once this conversion is complete I will start on that. Once the parts I need come in I should have this wrapped up in just a day or 2. All the hard stuff is done.


Peteybug

No that bell was given to me by a special Lady friend to help keep the gremlins off me and my bike. It is something I will always Treasure. It will transfer over to the "new" dresser.
"Agreement is not a requirement for Respect" CDR Michael Smith USN (Ret) 2017
"The book is wrong, this whole Conclusion is Fallacious" River Tam
"Yea I do dance awkwardly, and I am having more fun than you" Taylor Swift
2008 GL1800 IIIA "TH3DOG"
1984 GL1200 Standard
1975/6/7/8/9 Arthur Fulmer Dressed Road bike
1975 Naked Noisy and Nasty in town bike

Psst. oh and by the way CHANGE YOUR BELTS!!!!
User avatar
peteybug
Silver Member
Silver Member
Posts: 787
Joined: Sun Feb 10, 2008 2:20 pm
Location: northern new york

#15

Post by peteybug »

That very sweet Whiskerfish crying1 glad to see you are a sentimental old furt. tumb2 . Glad it was explaned to me what it was. I gotta get one of them :evil:
love new ideas for old wing's. AS I have three and am always working on them

[img]http://i253.photobucket.com/albums/hh55/peteybug8/motorcycle040-1.jpg[/img][img]http://i253.photobucket.com/albums/hh55/peteybug8/motorcycle037-1-1.jpg[/img][img]http://i253.photobucket.com/albums/hh55/peteybug8/3%20wings/Townworkandbikes036-1.jpg[/img]
Post Reply
  • Similar Topics
    Replies
    Views
    Last post

Return to “How To 4-Wings (Tutorials Only)”