STRIPPED THREAD RENEWAL

Post your "How To", or share tips and tricks about maintenance related to four cylinder Wings. Only registered users can read this forum.

Moderators: Whiskerfish, Forum Moderators

Post Reply
User avatar
Old Fogey
Honored Life Member
Honored Life Member
Posts: 7759
Joined: Mon Aug 27, 2007 11:31 pm
Location: Glasgow, Scotland
Contact:

STRIPPED THREAD RENEWAL

#1

Post by Old Fogey »

Although this subject comes up regularly I don't remember seeing anything about what it is or how it's done, so I though that a pictorial tutorial would be useful.

Thread renewal is a way of replacing a stripped thread with a coil of (usually) stainless steel carefully manufactured to mimic the dimensions of the original thread once installed.

It is a relatively simple procedure once you know how ( as are most things) but could be daunting to someone with little knowledge and some stripped threads!

There are various kits on the market, Helicoil being the best known (and usually the most expensive). Your local tool store should be able to help or there is always the ubiquitous eBay.
Usually each kit is for a dedicated size of thread.
The threads being renewed here are the 6mm x1mm for the rocker box screws.

OK, HERE WE GO!

Image

The tools you will need. Thread renewal kit, drill, hammer, tap wrench, small screwdriver, thread lock solution, grease.

Image

Make sure to cover everything with cloths or paper towels pushed into all the crevices to stop the swarf getting into places it shouldn't.
It still will, so be anal when cleaning up after you have finished the job!

Image

Image

Check out how deep the drill has to go with the small screwdriver.

Image

Transfer that dimension to the drill. I used a bit of masking tape ; if you have a drill collar so much the better.

Image

Image

This is the bit that usually goes wrong so check, check, check again. Borrow a friend's eyes so that you check from the top and they check from the side.
You need to be 90 degrees both ways!

Hold the drill very firmly and use a slow speed because it will likely try to grab!
A dab of grease on the flutes will help lubricate it and also trap some of the swarf.

A good tip. If I'm drilling down an existing hole in a soft metal such as aluminium I dull the cutting edges of the drill with a sharpening stone :-? to reduce the chance of it grabbing (note! Dull not blunt!)

Image

A little grease on the end of the tap will help lubricate it and trap some of the swarf.

Image

You'll need you friend again when you go to tap out the hole. Very easy to run off with a tap so make doubly sure it's at 90 degrees.

Image

Loads of swarf trapped but there will still be more down there. Use the small screwdriver with some grease to remove the rest.

Image

The new coil is slipped over the installation tool with the coil tang towards the bottom of the tool.

Image

In this instance we want the top of the coil to be slightly below the surface so the installation tool collar is set as above.

Image

Put a little thread lock solution in the outside of the coil before inserting it.

Image

Screw the coil into the hole slowly down to the stop collar.
REMEMBER. YOU CAN SCREW IT IN FURTHER IF NEED BE; YOU CANNOT SCREW IT BACK OUT IF IT'S TOO DEEP!

Image

Once the coil is in place use the thin metal rod to knock the installation tang off the coil.

Image

Finally, check that the intended bolt fits the new thread.

Only another seven to do! To give you an idea (admittedly I've done this kind of thing before) all eight were done in about half an hour.

Time for clean-up and the job is done!
Last edited by Old Fogey on Wed Jun 24, 2009 10:38 pm, edited 1 time in total.
"Impossible Is Just a Level of Difficulty!..."
If I'd wanted you to understand, I would have explained it better! (Johann Cruyff)
I’d give my right arm to be ambidextrous! :-D
User avatar
Roady
Member Relations &_Graphics
Posts: 11957
Joined: Wed Jun 20, 2007 2:35 pm
Location: Port St. John, FL

#2

Post by Roady »

Most excellent writeup, John.

I haven't had the good fortune to need this on my bike but I'm happy the info is now available.

Suggesting this for ShopTalk.
User avatar
CYBORG
Moderator
Moderator
Posts: 24763
Joined: Mon Jan 14, 2008 12:52 pm
Location: Muskegon mich

#3

Post by CYBORG »

VERY WELL DONE. who makes the kit you used. haven't seen those install tools before.
1978 custom GL1000
1977 custom with 1200 engine
1985 gl1200
User avatar
FirstYearDeek
True Blue Steel Biker
Posts: 2543
Joined: Sun Aug 10, 2008 4:41 pm
Location: Terre Haute, Indiana

#4

Post by FirstYearDeek »

In the states, you can find them at Fastenal.

-Deek
"Eat, drink and be merry. For tomorrow we die."

1975 GL 1000 (First Year) under the knife; soon to be a cafe' inspired "Boss" of a freedom machine.
User avatar
sunnbobb
Facebook Admin
Facebook Admin
Posts: 21301
Joined: Thu Jan 10, 2008 4:09 pm
My Album: http://www.ngwclub.com/gallery/v/wingmans/sunnbobb/
Location: LaConner, WA

#5

Post by sunnbobb »

Excellent tutorial!
I found the end of the internet

---- Bradshaw Bikes custom polishing for your wing. Visit us on facebook!

1978 Learning Experience
1980 County Road Hauler "Brain Damage"
1978 Cafe Custom Gl1000 "Vyper"
1977 Bulldog Inspired "Vaincre"
1981 Street Fighter GL1100 "No Quarter"
1983 Supercharged Street Drag "Anubis" (in worx)
1983 gl1100 mint restoration "Kristen"
1985 Aspencade..pondering.
User avatar
sodbuster
Gold Member
Gold Member
Posts: 1378
Joined: Sun Jul 09, 2006 10:34 pm
Location: S. Haven, Mn

#6

Post by sodbuster »

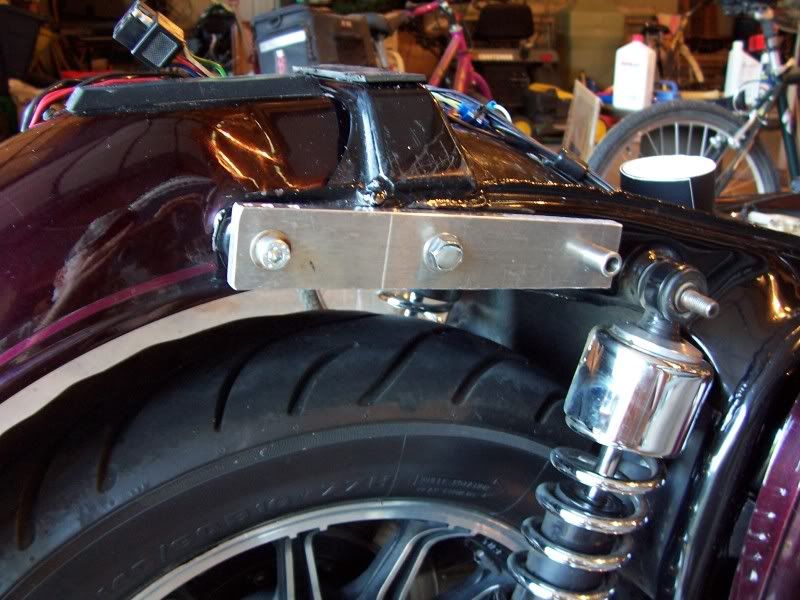
Another way to keep the drill bit straight is to use a drill bushing. I made a small fixture to drill two holes into the frame when I mounted my saddle bag brackets. The hole for the bushing was done on a drill press and bushing loctited into place. Drill to bushing I.D. is very close fit and keeps the drill bit straight .... ;)

Image
'06 H-D Road King
'99 Valkyrie Standard - TOTALED :(
'83 GL1100 Standard - SOLD
'82 CB900F - Black & Red - SOLD
User avatar
Whiskerfish
President
President
Posts: 37580
Joined: Thu Feb 16, 2006 9:34 pm
My Album: http://www.ngwclub.com/gallery/v/wingmans/whiskerfish/
Location: Norfolk Va

#7

Post by Whiskerfish »

Excellent presentation John. It will be a great addition to ShopTalk.
"Agreement is not a requirement for Respect" CDR Michael Smith USN (Ret) 2017
"The book is wrong, this whole Conclusion is Fallacious" River Tam
"Yea I do dance awkwardly, and I am having more fun than you" Taylor Swift
2008 GL1800 IIIA "TH3DOG"
1984 GL1200 Standard
1975/6/7/8/9 Arthur Fulmer Dressed Road bike
1975 Naked Noisy and Nasty in town bike

Psst. oh and by the way CHANGE YOUR BELTS!!!!
User avatar
sodbuster
Gold Member
Gold Member
Posts: 1378
Joined: Sun Jul 09, 2006 10:34 pm
Location: S. Haven, Mn

#8

Post by sodbuster »

Oops .... Sorry John, but I should have acknowledged the fact on how well your tutorial was before I added any comments .. :oops:

Great execution and good use of pictures. An inspiration to others on how to make an excellent "How To" post. tumb2
'06 H-D Road King
'99 Valkyrie Standard - TOTALED :(
'83 GL1100 Standard - SOLD
'82 CB900F - Black & Red - SOLD
ElPiloto
True Blue Steel Biker
Posts: 2085
Joined: Fri Apr 06, 2007 4:01 pm
Location: Southern Arizona

#9

Post by ElPiloto »

Well done.

I have 2 suggestions. After cleaning the shavings out of the hole with grease on a probe, I always rinse the grease out with lacquer thinner or acetone before putting the Helicoil in with LocTite.

Also, I have found that heavy duty aluminum foil and masking tape are easier to work with to cover exposed engine parts.
"Some Cats Got it, Some Cats Ain't"
User avatar
Old Fogey
Honored Life Member
Honored Life Member
Posts: 7759
Joined: Mon Aug 27, 2007 11:31 pm
Location: Glasgow, Scotland
Contact:

#10

Post by Old Fogey »

ElPiloto wrote:Well done.

I have 2 suggestions. After cleaning the shavings out of the hole with grease on a probe, I always rinse the grease out with lacquer thinner or acetone before putting the Helicoil in with LocTite.

Also, I have found that heavy duty aluminum foil and masking tape are easier to work with to cover exposed engine parts.
Good suggestions EP!

Yeah, I should really have degreased the holes as you say. Even a blast with aerosol carb cleaner will usually do the trick.

And using foil also eliminates the risk of the cloth getting caught up in the drill.
"Impossible Is Just a Level of Difficulty!..."
If I'd wanted you to understand, I would have explained it better! (Johann Cruyff)
I’d give my right arm to be ambidextrous! :-D
User avatar
Bufobufo
Chrome Member
Chrome Member
Posts: 131
Joined: Sun Jun 21, 2009 5:00 pm
Location: Teddington England

UK supplier for thread repair - KWIKFAST

#11

Post by Bufobufo »

I had most of my carb float bowl screws pulled, the last mech must have been heavy handed. I bought an M4 kit the same as shown in Old Fogeys excellent write up from Kwikfast, called ArmaCoil. Go for the Eco kit if you dont want a fancy box.
Make sure you order more inserts as you will need them and their postage charges hurt!
www.qwikfast.co.uk/catalogue/

And look after than drill, mine has escaped to live with all the others and will take ages to find again.
JohnR - 76 GL 1000 Yellow Bird - in Cold Old England.
Bobalou
Zinc Member
Zinc Member
Posts: 36
Joined: Mon May 31, 2010 1:10 am
Location: Yacolt WA

Re: STRIPPED THREAD RENEWAL

#12

Post by Bobalou »

Excellent write up. Hope your around! I do realize this isn't a current post but I thought it is worth the comments. Actually splains well eenuff to make me feel I know how! Good job.
:crosso action1 anim-cheers1
User avatar
Old Fogey
Honored Life Member
Honored Life Member
Posts: 7759
Joined: Mon Aug 27, 2007 11:31 pm
Location: Glasgow, Scotland
Contact:

Re: STRIPPED THREAD RENEWAL

#13

Post by Old Fogey »

Bobalou wrote:Excellent write up. Hope your around! I do realize this isn't a current post but I thought it is worth the comments. Actually splains well eenuff to make me feel I know how! Good job.
:crosso action1 anim-cheers1
Thank you! Yeah, still very much a round! But I'm trying to loose the weight! :-D
"Impossible Is Just a Level of Difficulty!..."
If I'd wanted you to understand, I would have explained it better! (Johann Cruyff)
I’d give my right arm to be ambidextrous! :-D
User avatar
ericheath
Honored Life Member
Honored Life Member
Posts: 9597
Joined: Wed Jul 29, 2009 11:20 am
Location: Winnipeg, Manituba

Re: STRIPPED THREAD RENEWAL

#14

Post by ericheath »

Great tutorial, and now to strip this thread, John, what exhaust header do you have on the Wing in the tutorial? I have not seen that on a Wing.
Whatever I suggest here should be given ample time for a moderator to delicately correct. I apologize in advance.
77 WING, 1200 engine with 77 heads, cams, gl1100 foot pegs, Magna V65 front end, 764A carbs, [-gone Suzuki M109 monoshock--, replaced with gl1100 shocks] gl 1200 swing arm, gl1500 final drive, wheel and rear brakes Valkyrie seat, Meanstreak tank, Sportster pipes, Power Arc ignition off crank.
77 Wing. black
83 Wing, in pieces
"Continuing education is important even if the subject matter is fairly useless (as in this case)."---Greg Foresi
User avatar
Old Fogey
Honored Life Member
Honored Life Member
Posts: 7759
Joined: Mon Aug 27, 2007 11:31 pm
Location: Glasgow, Scotland
Contact:

Re: STRIPPED THREAD RENEWAL

#15

Post by Old Fogey »

ericheath wrote:Great tutorial, and now to strip this thread, John, what exhaust header do you have on the Wing in the tutorial? I have not seen that on a Wing.
Motad stainless system. You can see it better here.

Image
"Impossible Is Just a Level of Difficulty!..."
If I'd wanted you to understand, I would have explained it better! (Johann Cruyff)
I’d give my right arm to be ambidextrous! :-D
Post Reply
  • Similar Topics
    Replies
    Views
    Last post

Return to “How To 4-Wings (Tutorials Only)”