remove rear break sticking

Post your "How To", or share tips and tricks about maintenance related to four cylinder Wings. Only registered users can read this forum.

Moderators: Whiskerfish, Forum Moderators

Post Reply
User avatar
peteybug
Silver Member
Silver Member
Posts: 787
Joined: Sun Feb 10, 2008 2:20 pm
Location: northern new york

remove rear break sticking

#1

Post by peteybug »

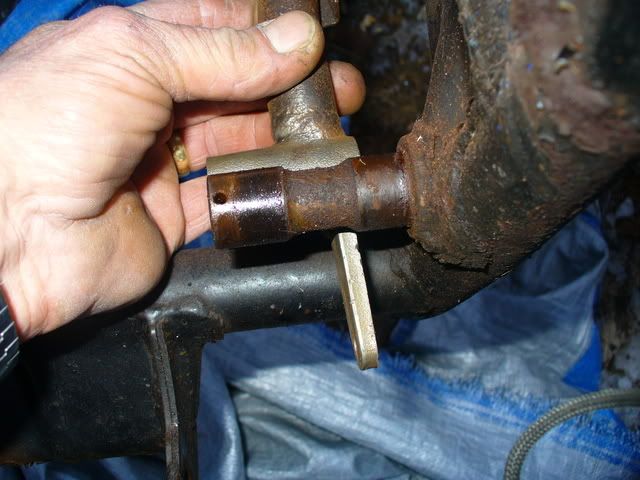
This was done on a stripped frame for clarity. Tools needed. Drill, drillbit 13/64, TAP 1/4-28, oil, rapidtap fluid, 1/4 grease fitting (zert) and sandpaper. First you have to remove rear break pedal from bike. You have to remove a small cotterkey and a large washer to remove pedal(no pic sorry) You can remove pedal from master cylinder(cotterpin & and small pin) or you can leave it as is and pull cylinder and all. Its up to you. When you get it off you will notice shaft has a groove.

Image

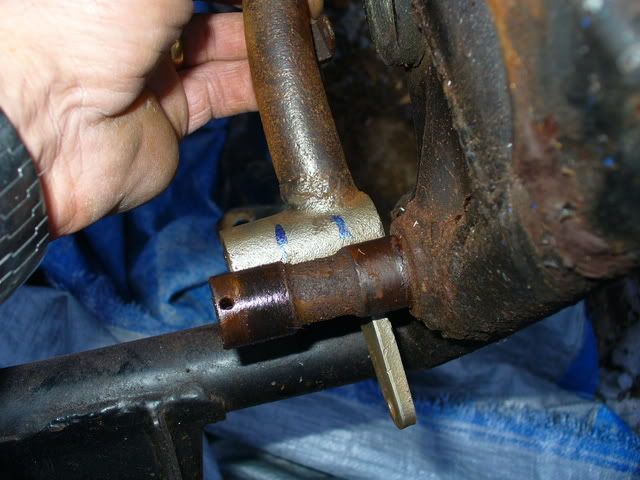
this is area where you will want grease fitting. put a mark on peddle where groove is.
Image

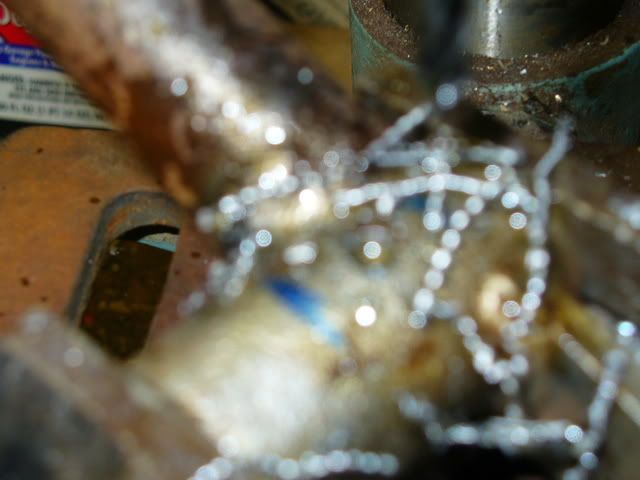
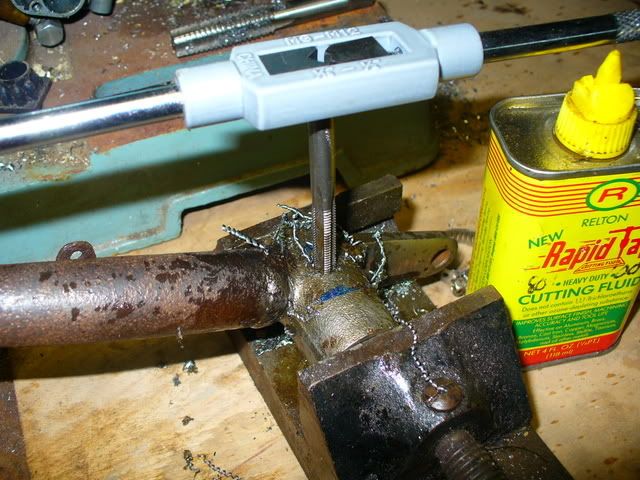
I have found that putting grease fitting on the bottom of the peddle makes it easier to get at. Now set up your 13/64 drill bit in your drill and drill hole in pedal tube make sure to use oil so bit stays lubed. Next take your 1/4-28 tap and tap out.
Image

Image

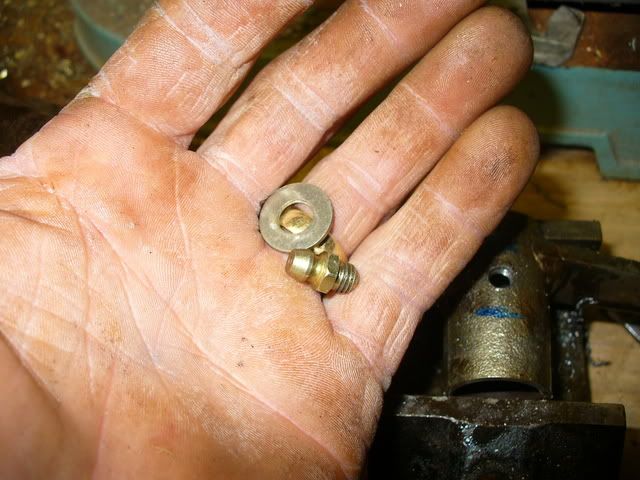
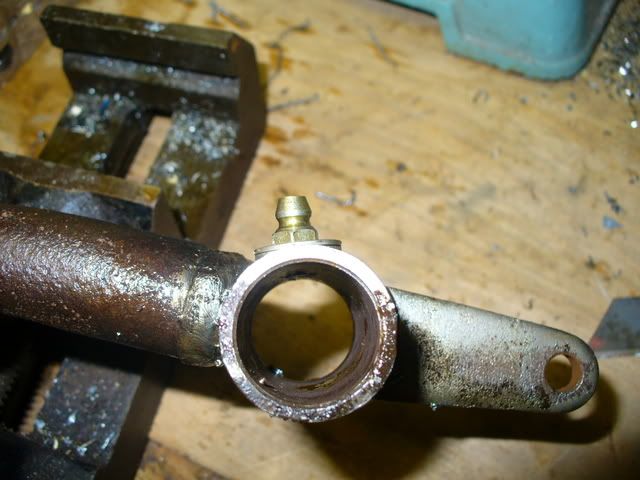
Now you have threads to screw in fitting. Take emerypaper or sand paper clean out hole and make smooth. Do the same to shaft. Take grease fitting and washer and screw in.
Image

Image

The reason I used 2 washers was because fitting sticks in to far so pedal will not go back on without it. Or you can put pedal on then use just the fitting. Now put back on bike and put break unit back together. Now sock some grease to it and you should have no more problem with sticky pedal. You will notice I drilled hole on top of this pedal :oops: had to go get a 90degree fitting.
love new ideas for old wing's. AS I have three and am always working on them

[img]http://i253.photobucket.com/albums/hh55/peteybug8/motorcycle040-1.jpg[/img][img]http://i253.photobucket.com/albums/hh55/peteybug8/motorcycle037-1-1.jpg[/img][img]http://i253.photobucket.com/albums/hh55/peteybug8/3%20wings/Townworkandbikes036-1.jpg[/img]
User avatar
Whiskerfish
President
President
Posts: 37581
Joined: Thu Feb 16, 2006 9:34 pm
My Album: http://www.ngwclub.com/gallery/v/wingmans/whiskerfish/
Location: Norfolk Va

#2

Post by Whiskerfish »

Good stuff!!!

On another subject I had a second fuel pump crap out on me today. All your parts are laid out on the bench for in the morning :-D :-D
"Agreement is not a requirement for Respect" CDR Michael Smith USN (Ret) 2017
"The book is wrong, this whole Conclusion is Fallacious" River Tam
"Yea I do dance awkwardly, and I am having more fun than you" Taylor Swift
2008 GL1800 IIIA "TH3DOG"
1984 GL1200 Standard
1975/6/7/8/9 Arthur Fulmer Dressed Road bike
1975 Naked Noisy and Nasty in town bike

Psst. oh and by the way CHANGE YOUR BELTS!!!!
User avatar
peteybug
Silver Member
Silver Member
Posts: 787
Joined: Sun Feb 10, 2008 2:20 pm
Location: northern new york

#3

Post by peteybug »

Good luck :lol: I am having great success with the new spring. Running low on craped out pumps to rebuild.
love new ideas for old wing's. AS I have three and am always working on them

[img]http://i253.photobucket.com/albums/hh55/peteybug8/motorcycle040-1.jpg[/img][img]http://i253.photobucket.com/albums/hh55/peteybug8/motorcycle037-1-1.jpg[/img][img]http://i253.photobucket.com/albums/hh55/peteybug8/3%20wings/Townworkandbikes036-1.jpg[/img]
User avatar
FirstYearDeek
True Blue Steel Biker
Posts: 2543
Joined: Sun Aug 10, 2008 4:41 pm
Location: Terre Haute, Indiana

#4

Post by FirstYearDeek »

Awesome! Way faster than pulling it off, packing it and re-attaching it.

-Deek
"Eat, drink and be merry. For tomorrow we die."

1975 GL 1000 (First Year) under the knife; soon to be a cafe' inspired "Boss" of a freedom machine.
User avatar
WingerDave
Silver Member
Silver Member
Posts: 644
Joined: Mon Sep 12, 2005 7:22 am
My Album: http://www.ngwclub.com/gallery/v/wingmans/album225/
Location: The Netherlands

#5

Post by WingerDave »

Damn......... there's that Rapid Tap again !!!! :-D

Dave.
If it ain't broke, don't fix it.

'80-'81 GL 1100 Hybrid Vetter Interstate 90K km
1989 GL1500 58K mls

Previous bikes

1973 Suzuki GT 500
1975 BMW R60/6
1982 Suzuki GS 550
1980 GL1100 (frame went to current bike, rest parted out)
1983 GL1100 Interstate
User avatar
Roady
Member Relations &_Graphics
Posts: 11957
Joined: Wed Jun 20, 2007 2:35 pm
Location: Port St. John, FL

#6

Post by Roady »

Great. This is linked on ShopTalk now.

Thanks, peteybug!
User avatar
kitbutterfield
Silver Member
Silver Member
Posts: 511
Joined: Thu Apr 16, 2009 5:39 pm

#7

Post by kitbutterfield »

NOTE:
Anyone doing this modification should probably consider one thing, before drilling...
Look at where your large shaft spring seats.
Mark your hole location outside of that area, while still allowing grease to penetrate the shaft cutout area.

I learned this lesson, the hard way.
I had to fill my first hole with marine epoxy & drill in a new location.

Live...Make mistakes...Learn...CYA.
:-D
KB
1976 GL1000 Nudewing
User avatar
Miky-Biky
Cast Iron Member
Cast Iron Member
Posts: 62
Joined: Mon Aug 24, 2009 5:56 am
Location: Belgium

#8

Post by Miky-Biky »

Thanks for sharing this modification :idea:

Grtzz, Miky.
There are two types of motorcyclists, those who fell and others who are yet to fall.
Apologize for my Google english!
1978 Honda GL1000 K2
1997 BMW R1100RT
rtcadman
Tin Member
Tin Member
Posts: 15
Joined: Fri Jan 01, 2010 6:15 pm
Location: Chittenango N. Y.

Re: remove rear break sticking

#9

Post by rtcadman »

I'm having trouble getting rear :x :x brake pedal off the pin. It was set up when I bought the bike. I've slowly been working it back and forth - with a hammer, sprayed WD-40. Today I even heated it w/ propane torch and got out the pickle fork. It is still there! Am I missing something?
Rick
User avatar
Whiskerfish
President
President
Posts: 37581
Joined: Thu Feb 16, 2006 9:34 pm
My Album: http://www.ngwclub.com/gallery/v/wingmans/whiskerfish/
Location: Norfolk Va

Re: remove rear break sticking

#10

Post by Whiskerfish »

There is a cotter Key and a large washer that have to be removed before it will slide off the shaft
"Agreement is not a requirement for Respect" CDR Michael Smith USN (Ret) 2017
"The book is wrong, this whole Conclusion is Fallacious" River Tam
"Yea I do dance awkwardly, and I am having more fun than you" Taylor Swift
2008 GL1800 IIIA "TH3DOG"
1984 GL1200 Standard
1975/6/7/8/9 Arthur Fulmer Dressed Road bike
1975 Naked Noisy and Nasty in town bike

Psst. oh and by the way CHANGE YOUR BELTS!!!!
User avatar
Miky-Biky
Cast Iron Member
Cast Iron Member
Posts: 62
Joined: Mon Aug 24, 2009 5:56 am
Location: Belgium

Re: remove rear break sticking

#11

Post by Miky-Biky »

Whiskerfish has it right, only the cotter key, a washer and a pile of rust keep the pedal in place. If you wish to make this modification by Peteybug, watch out where you drill the hole, leave space for the spring!

Image

Grtzz, M.
There are two types of motorcyclists, those who fell and others who are yet to fall.
Apologize for my Google english!
1978 Honda GL1000 K2
1997 BMW R1100RT
rtcadman
Tin Member
Tin Member
Posts: 15
Joined: Fri Jan 01, 2010 6:15 pm
Location: Chittenango N. Y.

Re: remove rear break sticking

#12

Post by rtcadman »

Thanks for the replies. I had already removed washer, cotter pin, and spring. I guess it is just "set up". My next step might be a torch!! I'm getting the frame powder coated Sat.
Rick
User avatar
Whiskerfish
President
President
Posts: 37581
Joined: Thu Feb 16, 2006 9:34 pm
My Album: http://www.ngwclub.com/gallery/v/wingmans/whiskerfish/
Location: Norfolk Va

Re: remove rear break sticking

#13

Post by Whiskerfish »

Soak it with penetrate and work it. Eventually it should slide off.
"Agreement is not a requirement for Respect" CDR Michael Smith USN (Ret) 2017
"The book is wrong, this whole Conclusion is Fallacious" River Tam
"Yea I do dance awkwardly, and I am having more fun than you" Taylor Swift
2008 GL1800 IIIA "TH3DOG"
1984 GL1200 Standard
1975/6/7/8/9 Arthur Fulmer Dressed Road bike
1975 Naked Noisy and Nasty in town bike

Psst. oh and by the way CHANGE YOUR BELTS!!!!
rtcadman
Tin Member
Tin Member
Posts: 15
Joined: Fri Jan 01, 2010 6:15 pm
Location: Chittenango N. Y.

Re: remove rear break sticking

#14

Post by rtcadman »

It gave in to the up & down wrench - hammer!!
Thanks.
Rick
freedom
Zinc Member
Zinc Member
Posts: 36
Joined: Thu Oct 12, 2017 2:53 am
Location: Chicago, IL

Re: remove rear break sticking

#15

Post by freedom »

The pictures by Peteybug show an error message right? My rear brake pedal is stuck and I found this thread but without pictures it is not much help. Hopefully he can post the pictures again. Thanks in advance.
Post Reply
  • Similar Topics
    Replies
    Views
    Last post

Return to “How To 4-Wings (Tutorials Only)”