Neutral Switch Disassembly-Revisited

Post your "How To", or share tips and tricks about maintenance related to four cylinder Wings. Only registered users can read this forum.

Moderators: Whiskerfish, Forum Moderators

Post Reply
User avatar
roncar
Vice President
Vice President
Posts: 4856
Joined: Sat Jan 05, 2008 4:30 pm
My Album: http://www.ngwclub.com/gallery3/index.p ... s/roncarGL
Location: Lakeland, Florida

Neutral Switch Disassembly-Revisited

#1

Post by roncar »

I've been looking into cleaning the neutral switch for a while. I found a pictorial on the web ( http://rides.webshots.com/album/79679901dYHJLG ) but I had issues with the 'dual allen wrenches' on disassembly.

Image

Messed up the holes to the point of destruction (center switch.)

Image

Gotta be a better way. Tried chemicals and heat and wound up destroying the switch.

Image

My biggest issue seemed to be getting the allen wrenches to stay 'upright' in the holes while applying pressure to unscrew the 'top'. My solution was to sacrifice an allen wrench to make a 'tool'. The black wrench (hardened?) snapped in the vice while bending and the piece fell into my shop's black hole (you guys keep an eye out for it in your shops. I'm curious how far it went.) So I went to a cheep silver one that bent without breaking.

Image

Now we're in business!
"I periodically misspell words just to annoy the word police."

Image
User avatar
roncar
Vice President
Vice President
Posts: 4856
Joined: Sat Jan 05, 2008 4:30 pm
My Album: http://www.ngwclub.com/gallery3/index.p ... s/roncarGL
Location: Lakeland, Florida

Re: Neutral Switch Disassembly-Revisited

#2

Post by roncar »

As I had already successfully disassembled the other 2 switches testing my 'tool', I pulled a fresh switch to do this walk through.

Image

Clean off first.

Image

Then get on it. First chip away the epoxy around the edge. I used a small common screwdriver for this.

Image

Image

Insert tool in opposing holes,

Image

..and get the wrench on it.

Image

Once started, finish removing by hand.

Image

Image

Image

And washed off.

Image
"I periodically misspell words just to annoy the word police."

Image
User avatar
Roady
Member Relations &_Graphics
Posts: 11957
Joined: Wed Jun 20, 2007 2:35 pm
Location: Port St. John, FL

Re: Neutral Switch Disassembly-Revisited

#3

Post by Roady »

Very creative.

I do like making tools. Sure beats overpaying for seldom used ones. :-)
User avatar
roncar
Vice President
Vice President
Posts: 4856
Joined: Sat Jan 05, 2008 4:30 pm
My Album: http://www.ngwclub.com/gallery3/index.p ... s/roncarGL
Location: Lakeland, Florida

Re: Neutral Switch Disassembly-Revisited

#4

Post by roncar »

As the shaft in the center is near inaccessible, I gently viced it up and rocked the 'bell' off the shaft.

Image

Image

Now you can easily clean the shaft as well as the contacts. Once cleaned to your satisfaction, reassemble.

Image

Image

Just as an FYI, this is how the switch lines up in neutral

Image

And in gear. That black area is plastic or some other insulator.

Image

Got some little friends occupying my shop. 'Mama' ain't happy when I walk by.

Image
"I periodically misspell words just to annoy the word police."

Image
User avatar
Hal
True Blue Steel Biker
Posts: 2822
Joined: Fri Sep 24, 2010 5:00 pm
Location: France

Re: Neutral Switch Disassembly-Revisited

#5

Post by Hal »

Just followed this and it's easy enough.

I didn't fancy removing the bell from the shaft myself as I was worried it'd be too loose when replaced, so after cleaning with petrol I used cotton-wool buds and metal polish spinning the buds between the shaft and the bell. Then made sure there was no cotton fibre still in there and clean with petrol.

I tested it with a continuity tester and it's working fine.

Only thing I'm slightly concerned about is the mention of 'epoxy' as the seal on the surface.....I used Araldite, but I'm not sure the original is actually epoxy glue, as it seems to come off surprisingly easily with a fine screwdriver....in fact some of mine was already missing.

I'll do the one on the spares bike next.

I also took the advice offered here and changed the Allen head bolts for hex....so the oil screen can be removed with the engine in the frame!
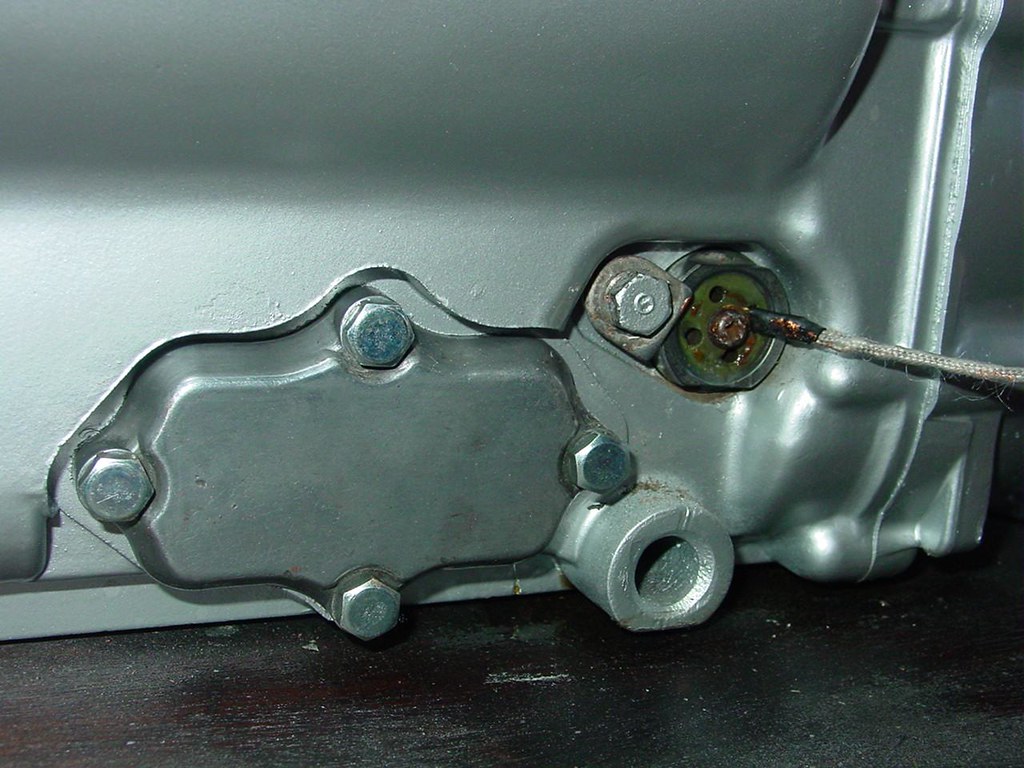
Image

I had installed the neutral switch wrong in the photo, so I re-fitted it correctly....I put a smear of Vaseline on the body so it doesn't stick in the oil seal like before, and copper grease on the threads of all the bolts and the cable screw.
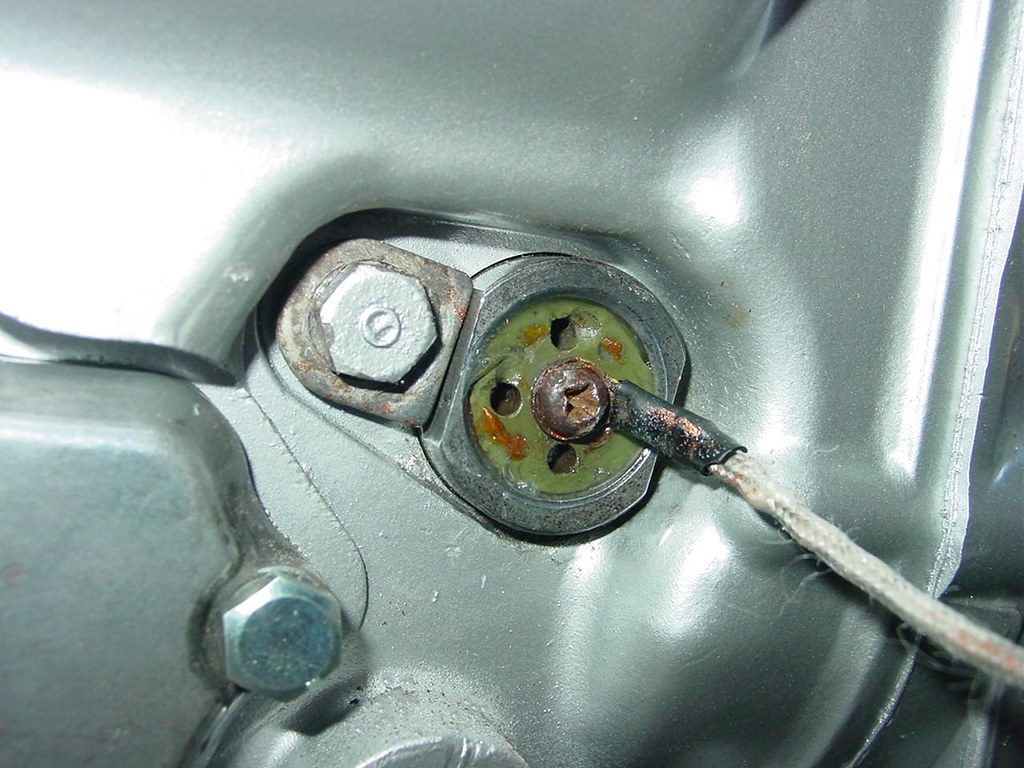
Image
Last edited by Hal on Thu Jun 07, 2012 12:20 pm, edited 1 time in total.
"The Moving Finger writes, and having writ, moves on,
nor all your Piety nor Wit
can lure it back to cancel half a line...

so....probably best use Tipp-Ex in future?"

1977 GL1000 in bits
1978 SR 500 Yam
1995 Harley Sportster/Buell street-tracker
1992 Grinnall Scorpion SC3 prototype
2002 Caterham SV 220 Evo (4 wheeled motorcycle) :mrgreen:


Hal's Nalbum
User avatar
roncar
Vice President
Vice President
Posts: 4856
Joined: Sat Jan 05, 2008 4:30 pm
My Album: http://www.ngwclub.com/gallery3/index.p ... s/roncarGL
Location: Lakeland, Florida

Re: Neutral Switch Disassembly-Revisited

#6

Post by roncar »

Hal wrote:I didn't fancy removing the bell from the shaft myself as I was worried it'd be too loose when replaced, so after cleaning with petrol I used cotton-wool buds and metal polish spinning the buds between the shaft and the bell. Then made sure there was no cotton fibre still in there and clean with petrol.
I thought about that, but with the big metal ball holding the shaft and the spring applying pressure inside the bell, where's it going to go even if it's loose?
Hal wrote:Only thing I'm slightly concerned about is the mention of 'epoxy' as the seal on the surface.....I used Araldite, but I'm not sure the original is actually epoxy glue, as it seems to come off surprisingly easily with a fine screwdriver....in fact some of mine was already missing
I'm not sure exactly what it is. It's purpose seems to be to assist in keeping it from unscrewing. But as Old Fogey found out, lock-tite on the screw will overpower whatever it is (at least on a NEW switch.) http://www.ngwclub.com/forum/viewtopic. ... 21#p190021
"I periodically misspell words just to annoy the word police."

Image
User avatar
Hal
True Blue Steel Biker
Posts: 2822
Joined: Fri Sep 24, 2010 5:00 pm
Location: France

Re: Neutral Switch Disassembly-Revisited

#7

Post by Hal »

I didn't even consider the fact that the bell is held by spring pressure but you're right....and it'd be much easier cleaning the shaft properly with it off.

Not read Fogey's tale...I'll check it now.... :mrgreen:
"The Moving Finger writes, and having writ, moves on,
nor all your Piety nor Wit
can lure it back to cancel half a line...

so....probably best use Tipp-Ex in future?"

1977 GL1000 in bits
1978 SR 500 Yam
1995 Harley Sportster/Buell street-tracker
1992 Grinnall Scorpion SC3 prototype
2002 Caterham SV 220 Evo (4 wheeled motorcycle) :mrgreen:


Hal's Nalbum
Paul Narramore
Titanium Member
Titanium Member
Posts: 367
Joined: Wed Dec 17, 2014 6:18 am
Location: Aylesford, Kent, UK

Re: Neutral Switch Disassembly-Revisited

#8

Post by Paul Narramore »

Aren't aluminium vice jaws popular in the US? anim-cheers1
Present bikes -

BMW R100/7
1989 BMW R100GS-Paris Dakar
MZ ETZ250 Trials
1977 Honda GL1000 GoldWing
Post Reply
  • Similar Topics
    Replies
    Views
    Last post

Return to “How To 4-Wings (Tutorials Only)”