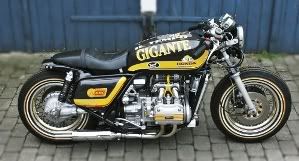
The NGW Project Bike. Clutch renewal. Engine in frame.

This Is Strictly For The "How To" Sticky's

Moderator: Whiskerfish

Locked
User avatar
octane
SUPER BIKER!!!!
SUPER BIKER!!!!
Posts: 3763
Joined: Sat Jun 11, 2005 3:24 pm
Location: Denmark

The NGW Project Bike. Clutch renewal. Engine in frame.

#1

Post by octane »

With the blower instaled the clutch just couldn't cope
so decided to install a new one.

Here goes:

This is the set-up I refer to
NOTE: this is for the GL1000.

Image


A few things that will come in real handy
when dong this job with the engine IN frame;

...a lift. Oh no , I wouldn't wonna do this lying on the floor;
everything is a bit tricky to get at, and it takes a while to do this stuff:

Image


..a good selection of 10mm spanners, wrenches etc.
Image
You don't strictly NEED all this stuff but I say;
the more the merrier ; there's a LOT of 10mm bolts
and some are hard to get at


..good light
Image
preferably coming from below


Drain engine oil.
You still gonna need a container/rags under the clutch housing
as even when engine is drained, there's still oil in the clutch-housing.
It has it's own reservoir (and it's own scavenge pump).


Remove mufflers if you run the standard system.
The cross-pipe is gonna be in the way.
(Mine does not have the standard set-up, so I didn't remove it)

Remove the lifter cover (two screws)

Image


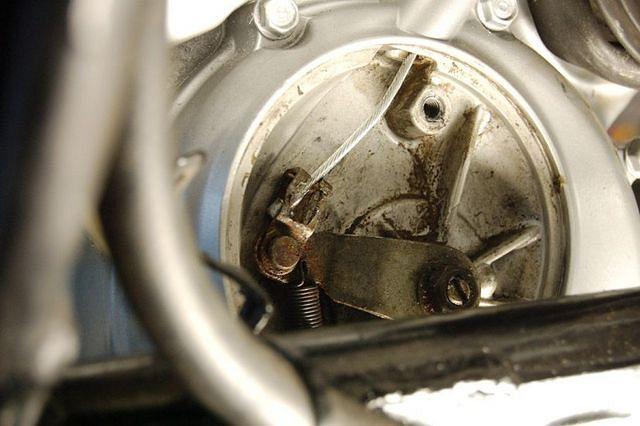
..loosen clutch cable at the handle
and here where it goes into the clutch:
Image


..disengage cable from the lifter:
Image


...pull out cable from clutch housing
Image


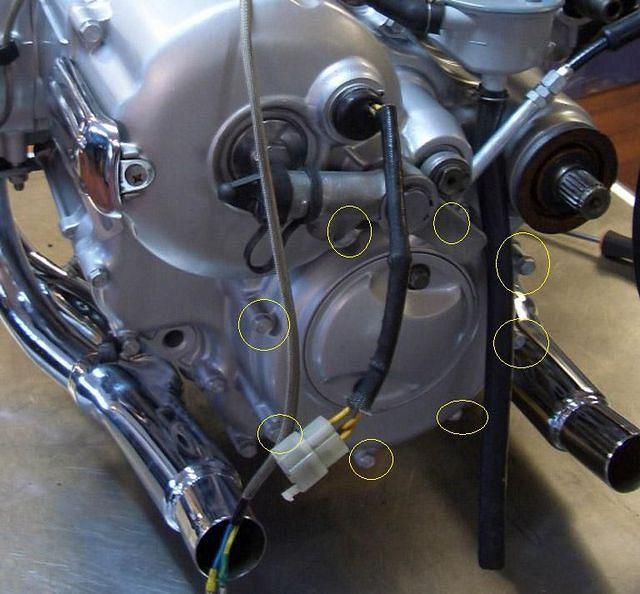
...remove the 8 bolts that holds the clutch cover
(shown here with engine out of frame)
Image


It's an old habit;
I always make a cardboard thing for the bolts
so I know which will goes where, when assembling
Image


...with the cover removed,
loosen the lifter-plate bolts.
Image
IMPORTANT !!!!!!
Remove the bolts in small increments
alternating bolts in a criss-cross pattern
to avoid breaking the plate


(At least two of our honored members here
didn't do this, and as a result they broke the plate !!!)


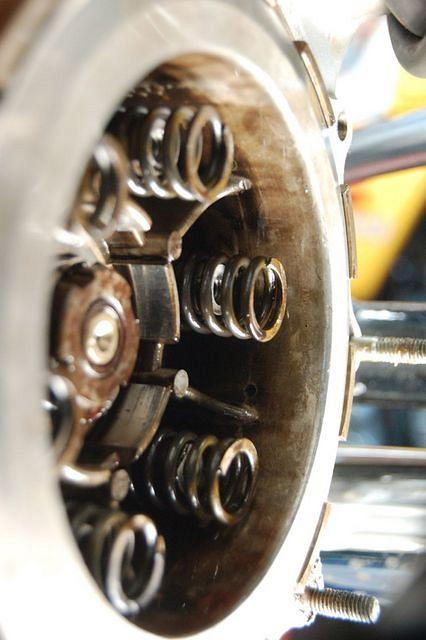
..remove lifter plate and the springs
Image


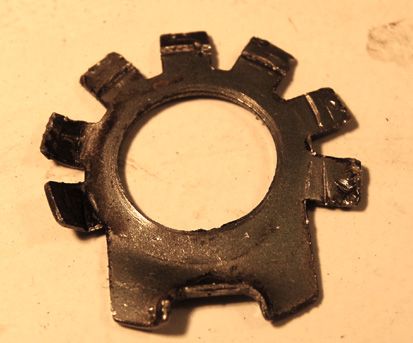
Open the lock tap securing the central nut.
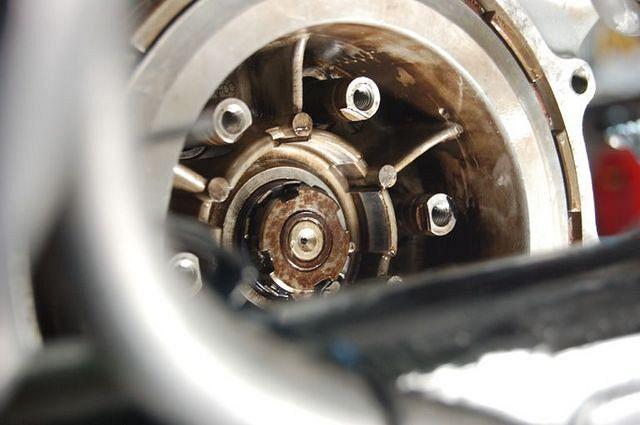
Image
Remember; it looks like this:
Image
so don't forget to open ALL the little 'tabs'


Now, to remove the bolt a couple of
Honda special tools are called for, (more on that later)
but really all you have to do is
put a large screwdrive to the bolt
like this
Image
..and give it a good firm wack !
That's it. At least it was for me.


..remove lock tab
Image


..pull out the cluch center (holding back the clutch plates)
Image


...and remove it by handling it OVER the frame cross-tube

Image
..and down, between cross-tube and tire.

Inspect the clutch center for cracks and excessive wear.


..then remove the clutch plates

Image


..remove pressure plate

Image
Inspect in for cracks etc.


Here's what came out.
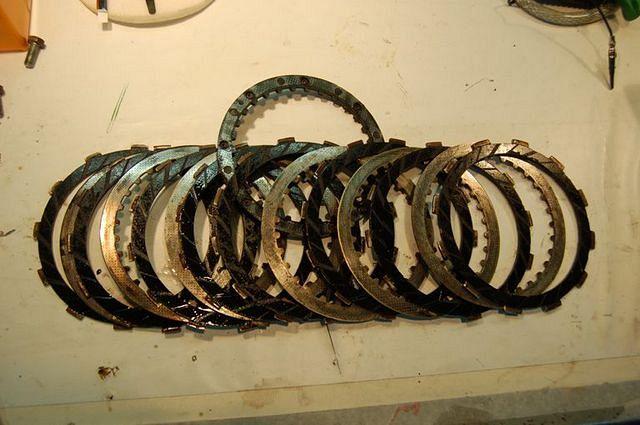
Image
NOTE the order of the plates and where the damper-plate goes.
See diagram at the start of the thread.


NOTE that the first one that came out has larger 'tangs'
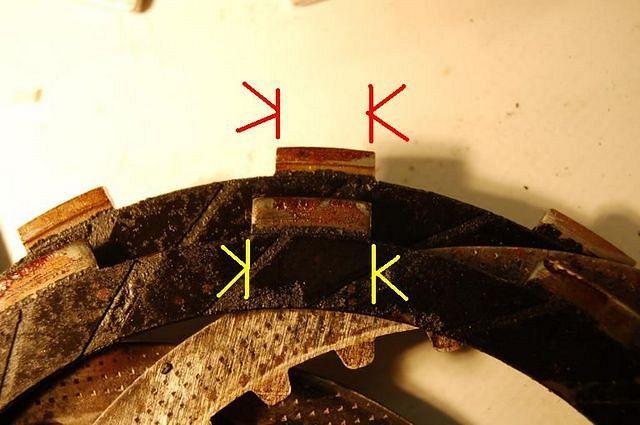
Image


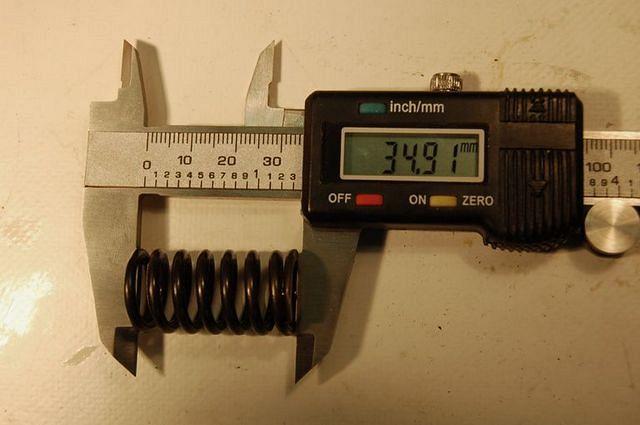
Check the free length of the springs
Image

The service limit is 34.2mm, so these are fine.


As the clutch had trouble coping with the
power of the blown engine I opted for a set of stronger
springs:
Image

These (on the left) are 10% stronger than standard.
Made by EBC (model CSK 10) and cost approx. 17$ for a set.
There are others made by Barnett and Lucas.


If, for some reason you want to keep your friction plates,
you must check for scoring and discoloration and
you're gonna check the thickness:
Image

service limit is 3.2mm, so these are fine
(but it would be kind'a stupid not to renew them.)

For the same reason as above I went for a set of
performance clutch friction plates:
Image

..these are, as you can see, from Barnett


Check the discs for warpage, by holding them down
with two fingers and inserting different feeler gauges
Image

..service limit is 0.3mm


Check the release bearing
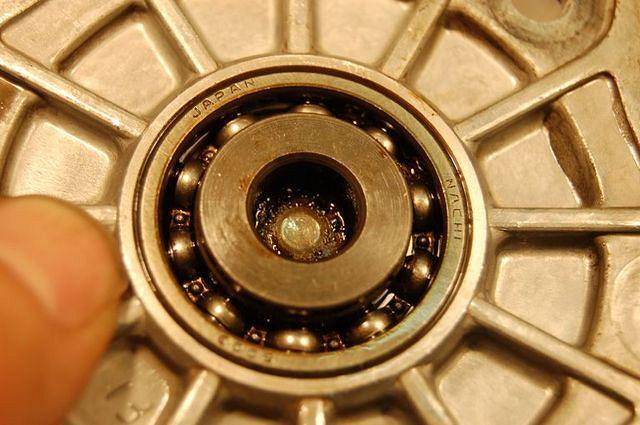
Image


Check the function of the lifter-thingy
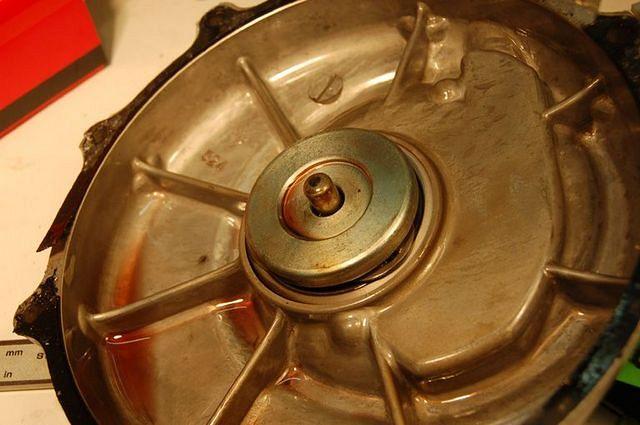
Image


To see how to check it:
click the image below to watch a video of how the lifter works
when pulling the the clutch cable
(which will press the clutch plates apart, disengaging the clutch)
Image


Check if lifter arm, moves freely
Image


and check the oil-seal below the arm
Image
..is it 'tight' around the shaft?
If not: replace.


Check the OUTER drum (still in there , in the engine)
Image
...for nicks, cuts and indentations.
The bad news is that, if it's not OK,
you'll have to pull the engine out of the frame to re-new it.
Bummer !


Time to put things back together:

Pressure plate goes in
Image
make sure it's seated right


Clutch plates goes in, in the RIGHT order
(see above)
after the friction plates have been in an oil-bath for like 10 minutes
Image


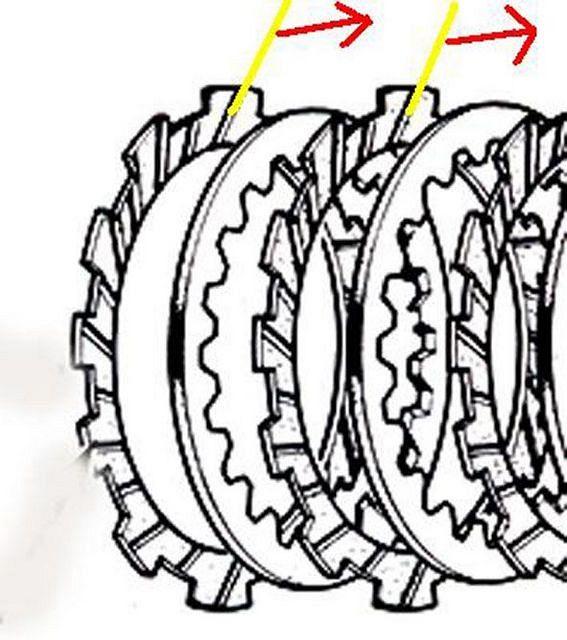
..if you use standard friction-plates:
NOTE that the grooves must 'radiate' clockwise like this
Image


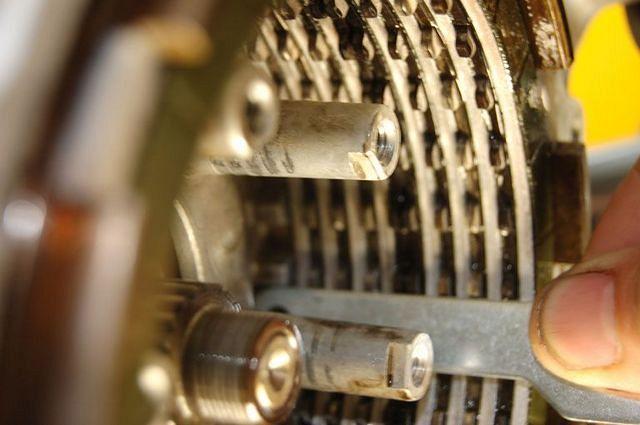
Now for some reason (that I can't recall now)
I couldn't get in the whole package (plates AND clutch center)
so I had to first insert the plates AND THEN the center
after aligning the tangs


[EDIT:] at this point please check Randakks brilliant
tips on how to install the plates here: CLICK

Obviously, he found the solution that I couldn't figure out
.-)

Image


and after a LOT of fiddling I got the center in
Image


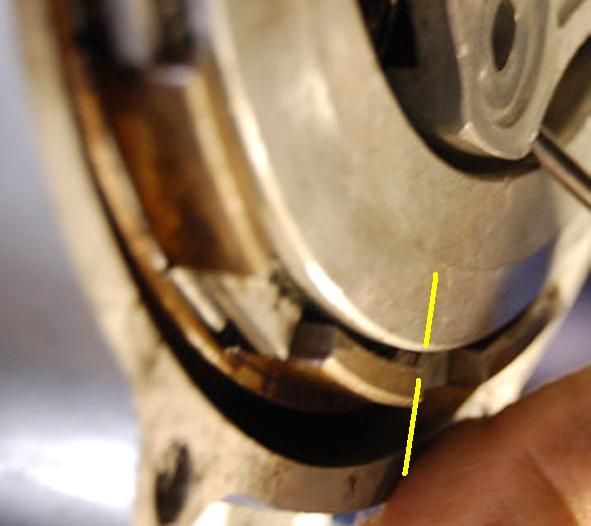
Make absolutely sure it's in ALL THE WAY
Image
..it must be flush with the edge of the 'outer drum' edge


..insert thick 'washer'
Image

remembering that the cupped face goes like this:
Image


...then the lock-thingy and the bevel/central bolt
Image

Using the special Honda clutch holder and the Honda
socket wrench (more on that later):
torque to 380 to 420 kg-cm / 28-30 ft-lb)

and lock the lock-thingy.


...springs goes in
Image


..using a strong light and 'feeling' with a thin screwdriver
make SURE the springs are seated right
Image
..on the plate-lifter

Install the 6 bolts

NOTE:
Tighten the bolts in small increments
alternating bolts in a criss-cross pattern
to avoid breaking the plate

..and torque to 100-140 kg-cm / 87-121 in-lbs


Install the clutch cover with a new gasket
and torque the 8 bolts to
100-140 kg-cm / 87-121 in-lbs

Install cable and lifter cover.


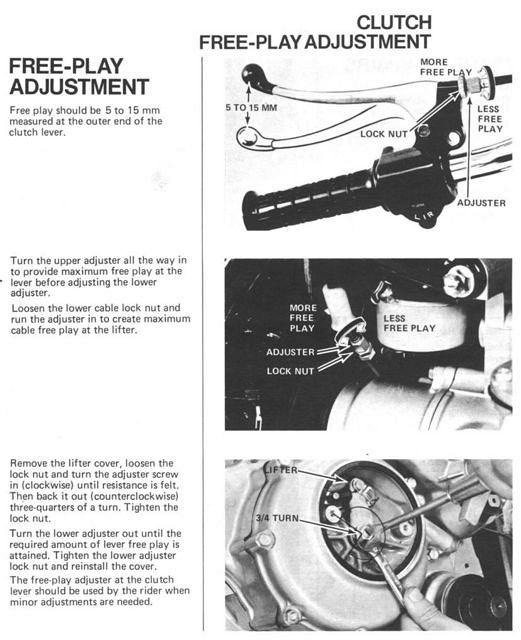
Adjust the cable free-play.


New engine oil. Check the level,
and re-check after start-up.


THAT's IT
.-)


Useful info and links:


PARTS:

For clutch parts, friction plates/gasket/springs etc.
our friend Frenchy at his Moon Place:
Clutch parts

Don't know if he has the stronger springs but here's the parts #
...from Barnett:
Spring kit: 501-56-06015
Friction plate kit: 302-35-10002
and if needed
Tempered Steel Metal Plates kit: 401-35-078024


The oil-seal on the lifter-arm shaft comes from Honda:
('superseded) parts#:
91202-KFL-841 / Oil Seal 13.8 x 24 x 5mm)
'old' Honda parts#:
91202-216-003 / Oil seal 14 x 24 x 5mm

Price around 4$


TOOLS:

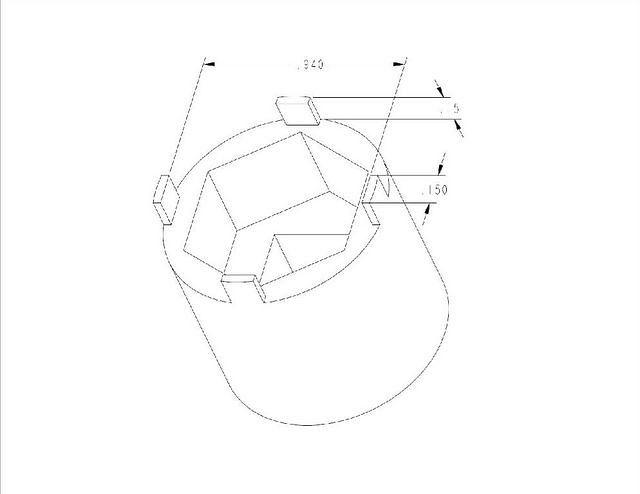
You can make that spacial Honda tool used for tightening
the central nut/bevel.

Here's a drawing provided by Member Whiskerfish:
Image

and a photo of what he made:
Image


Member Doncoyote11 used
"...a disk brake adjuster tool found at any auto parts store. This thing looks like a cube with various sized pins sticking out of it that goes onto a 3/8" drive extension. I had to try a few different sides to get one that fit close enough. You may have to hold pressure against it to keep it from slipping...."

and Member Domscorpiorlg informs that a suitable tool is
available from
(click) Motorcycle Toolchest
(Talk to 'Michael')


or you can get the Honda tool HC 41304. (if it's available?)

Or order from Amazon "Motion Pro 08-0015 Oil Filter and Clutch Hub Spanner 24mm ID" for $13 shipped Edit by Fred Camper March 3, 2023

Now for the 'holder' required to hold the clutch while
tightening the bolt/bevel, I really don't know.
(Honda tool# HC41303).
Maybe someone has an idea for that ?

I , myself was too much in a hurry for all this;

..put a big bolt in my vice,
..put a nut on it
..tightened/torqued it to 400 kg-cm
and whacked it back and forth using a screwdriver/hammer,
with the screwdriver whacked into a 'slit' in the nut.
(checking the torque a couple of times)

This gave me a 'feeling' of how much force was needed to
give the central bolt/bevel the right torque using the screw-driver method.
Then I applied that force when installing the bolt/bevel.
I'm NOT recommending this...just telling you
.-)


TIPS:

Be anal about cleaning the surfaces before installing
the clutch cover
Image

..old habit from my time struggling with British bikes and cars,
I always do this when putting together surfaces behind which
oil in contained

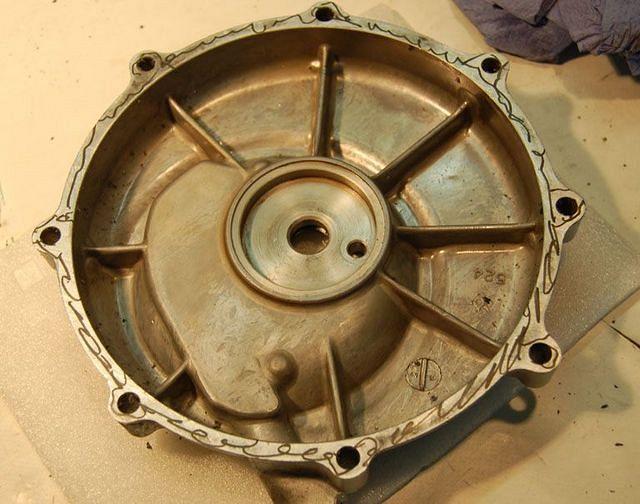
Using a marker-pen I scribble on the surface
Image

..then take it to a big thick piece of glass on which
I've taped some very fine (1000 and 1200) abrasive paper

Image


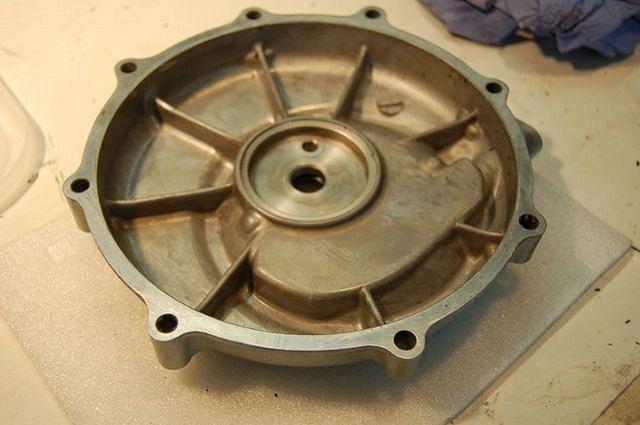
..until all trace of the markings are gone
Image

...meaning the surface is perfectly flat
and will hold the oil better.
Probably not necessary here but........hey, I won't hurt !


TECH:

IF your old clutch friction discs have disintegrated
the engine must be cleaned and flushed of debris.

(NO fun)

Image
Image


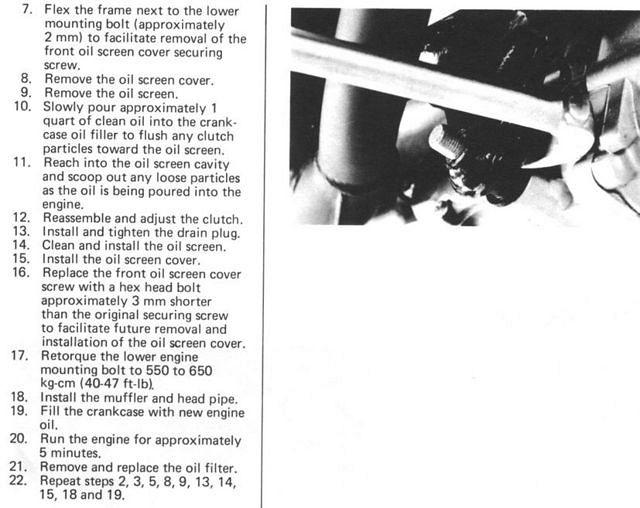
and here' what your screen probably looks like:
Image


....and finally
CLUCH ADJUSTMENT

Image


HAVE FUN !
Last edited by octane on Thu Mar 13, 2008 7:25 pm, edited 17 times in total.
Da' Supercharged Bulldog

Image

"A designer knows he has achieved perfection
not when there is nothing left to add
but when there is nothing left to take away"

Antoine de Saint-Exupery
User avatar
Zryder
True Blue Steel Biker
Posts: 2954
Joined: Tue Dec 14, 2004 2:12 pm
My Album: http://www.ngwclub.com/gallery/v/wingmans/zryder/

#2

Post by Zryder »

WOW Octane I can't tell you how much I feel blessed we have you here . I personally and very humbly Thank You once again for all you do . tumb2 Keep On Keeping On .

Gary ... aka ... Zryder
1982 GL 1100 std. Custom Image
To my album ; http://www.ngwclub.com/gallery/v/wingmans/zryder/
User avatar
rcmatt007
Treasurer
Treasurer
Posts: 31490
Joined: Fri Oct 21, 2005 12:48 pm
My Album: http://www.ngwclub.com/gallery/v/wingmans/rcmatt007/
Location: New River Valley, Virginia

#3

Post by rcmatt007 »

very helpful.... and yes, it is SOOOOOOO easy to break the plate (having done it) and mother-honda has obsoleted the part, so the only fix is a bike breaker (got mine from frenchy!)
-Rodger-
all it takes for evil to prosper is the want of a few good men to do nothing-Edmund Burke
The question is not how much time do you have, it is what you do with the time that you have Gandalf
"One of the greatest dignities of humankind is that each successive generation is invested in the welfare of each new generation." Fred Rodgers
"it takes 10,000 hours to become an expert" ancient saying
78 constantly modified/customized since 1978, BOTM June 2015 de-evolving this very moment viewtopic.php?f=30&t=65511
76 Ltd "cookies bike" ALMOST DONE
79 project, finished, FOR SALE
'86 1200 (Beth's)(FOR SALE) with motorvation sidecar (sidecar sold) , July 2017 BOTM
'17 HD Road king and 08 HD Heritage softail (Beth's) (FOR SALE). I guess you can say we have MBS
User avatar
bandiso
Billet Alum. Member
Billet Alum. Member
Posts: 276
Joined: Thu Sep 28, 2006 9:19 am
Location: BARCELONA Spain
Contact:

#4

Post by bandiso »

Hi Octane, B R I L L I A N T as ever.
Thanks for working for us.
Image

http://goldwinggl1000.blogspot.com

My Album in NGW Gallery:
http://www.ngwclub.com/gallery3/index.p ... ns/bandido

TAPAS & RIOJA WINE FOR FREE WHEN VISITING BARCELONA ( NOT A JOKE )
User avatar
mmstingray
Titanium Member
Titanium Member
Posts: 323
Joined: Tue Jul 12, 2005 12:43 pm
Location: Taunton MA
Contact:

#5

Post by mmstingray »

Good grief, Octane. You're just amazing, man.
ICC
1977 GL1000 Wingray

http://www.nakedgoldwings.com/gallery/MMStingray-1977-GL1000
User avatar
Rat
Photo Gallery Admin
Photo Gallery Admin
Posts: 15730
Joined: Fri Oct 21, 2005 9:59 pm
My Album: https://www.ngwclub.com/gallery/v/wingmans/rat/
RIP: cookie, KyPM, Roady
Location: Toronto .... Canada

You ARE the man.

#6

Post by Rat »

Great stuff.

THE LEGEND GROWS. :shock:

Gord :P
"I'd rather Ride than Shine"
‘14 KLR650 ... not a rat ... yet
‘84 GL1200i ‘R2B6' (Rat to Be 6, the last, adopted by twowings)
My Original 'RAT' was a hybrid '82 CB900/1100F
User avatar
1CrazyMoFo
Honored Life Member
Honored Life Member
Posts: 5151
Joined: Thu Aug 31, 2006 9:53 pm
Location: Eugene, Oregon
Contact:

#7

Post by 1CrazyMoFo »

Well, written, easy to understand......Octane have you thought about writing a book? Something along the lines of "How to keep your Volkswagen alive for the complete idiot".

Wow, a big screwdriver and a hammer, Octane (sniff) I Love You Man!!!

Peace,
Frank
The truth about Ape Hangers, yes they are very slimming.
User avatar
muser3
Billet Alum. Member
Billet Alum. Member
Posts: 217
Joined: Thu Apr 14, 2005 10:36 am

#8

Post by muser3 »

Thanks Octane! This will probably be my next project.
Sooooo well done!! :-D :-D
Lee
Muser3

The older I get the better I was.

East Texas
77 GL1000 Naked
78 GL1000 Vetter Fairing
80 R100RT
94 R1100RSL Black
94 R1100RSL Pearl Silver
Boxers All
82 Suzuki GS1100 gone to new OK home.
User avatar
clockcycle
Billet Alum. Member
Billet Alum. Member
Posts: 297
Joined: Thu May 17, 2007 11:09 am
Location: Miami, FL USA
Contact:

#9

Post by clockcycle »

Nice, wow that's ALOT of patience required there..

Image

Looks similar to the lockring/nut for a bicycle bottom bracket. I used to use the screwdriver hammer method.

Image

Is that the same or similar tool needed to remove the fork triple tree nut?

Image
Clockcycle
1979 Honda Goldwing GL 1000
Gallery http://www.nakedgoldwings.com/gallery/album171
Random notable guru quote; There are other possibilities, but they are "freakish" in nature.
User avatar
octane
SUPER BIKER!!!!
SUPER BIKER!!!!
Posts: 3763
Joined: Sat Jun 11, 2005 3:24 pm
Location: Denmark

#10

Post by octane »

Guys!..thanks for your kind words.
1CrazyMoFo wrote:.......Octane have you thought about writing a book? Something along the lines of "How to keep your Volkswagen alive for the complete idiot"...
Hi Frank, I've been asked that before
.-)

Like this

Image

so it would be:


Image


...mmmmmm now that would be fun!
User avatar
octane
SUPER BIKER!!!!
SUPER BIKER!!!!
Posts: 3763
Joined: Sat Jun 11, 2005 3:24 pm
Location: Denmark

#11

Post by octane »

clockcycle wrote:..

Is that the same or similar tool needed to remove the fork triple tree nut?

Image
Nope.
For that you'd use this:

Image

or a big scr..............naaa, never mind
.-)
User avatar
1CrazyMoFo
Honored Life Member
Honored Life Member
Posts: 5151
Joined: Thu Aug 31, 2006 9:53 pm
Location: Eugene, Oregon
Contact:

#12

Post by 1CrazyMoFo »

Octane,
Well, looks like you have the cover of the book set up, so what's holding you back!!! I know I'd buy a copy.
Peace,
Frank
The truth about Ape Hangers, yes they are very slimming.
User avatar
Whiskerfish
President
President
Posts: 37615
Joined: Thu Feb 16, 2006 9:34 pm
My Album: http://www.ngwclub.com/gallery/v/wingmans/whiskerfish/
Location: Norfolk Va

#13

Post by Whiskerfish »

Absolutely outstanding work as always!!! Thank you Sir for you dedication to sharring your knowledge. I am sure that many old wings has been saved from the scrap yard from your postings.
"Agreement is not a requirement for Respect" CDR Michael Smith USN (Ret) 2017
"The book is wrong, this whole Conclusion is Fallacious" River Tam
"Yea I do dance awkwardly, and I am having more fun than you" Taylor Swift
2008 GL1800 IIIA "TH3DOG"
1984 GL1200 Standard
1975/6/7/8/9 Arthur Fulmer Dressed Road bike
1975 Naked Noisy and Nasty in town bike

Psst. oh and by the way CHANGE YOUR BELTS!!!!
User avatar
Brant
Board of Directors
Board of Directors
Posts: 10151
Joined: Fri Mar 25, 2005 11:31 am
My Album: http://www.ngwclub.com/gallery/v/wingmans/brant/
Location: Hastings, Nebraska, USA

#14

Post by Brant »

Thanks Octane. Outstanding.
83 GL 1100 bagger Ugly Betty
ALL WE WANT TO DO IS DRINK OUR ESPRESSO, RIDE OUR MACHINES, AND NOT BE HASSLED BY THE MAN
Owning a motorcycle is not a matter of life or death. It's much more important than that.
"Don't sweat the little things, guys, take care and appreciate all that you have around you!" - Fewman
NGWclub on Facebook
halbritt
Cast Iron Member
Cast Iron Member
Posts: 57
Joined: Sat Mar 25, 2006 7:03 am

#15

Post by halbritt »

I plead guilty to having broken two of the clutch lifter plates. The first time, I believe that one of the springs weren't seated correctly. The second time, I used too large of a torque wrench.

Have you tested the clutch yet? What is the lever pull effort like with the stronger springs?
Locked
  • Similar Topics
    Replies
    Views
    Last post

Return to “Octane's Corner”