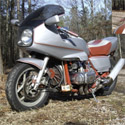
'86 SE-i That Followed Me Home
Moderators: Brant, Sagebrush, Forum Moderators
-
3KidsinAustin

- Chrome Member

- Posts: 162
- Joined: Sat Feb 08, 2025 5:04 pm
Throttle Cables
While the tank is still electrolysis-izing (patent-pending), I wanted to tackle the throttle cables as accessibility goes in the toilet once the tank is back in. (Same for the rear brake master cylinder, next on the list) The throttle was really slow to return to neutral position, so giving it a good clean and lube would be the first step before replacing cables. With cruise, the SE-i has three cables to play with. I removed them one by one and gave each first of healthy does of brake cleaner shot through my cable lube tool, then some dry lubricant spray. Upon disassembly, my problem child ended up being the cable that runs directly from the throttle to the intake manifold. Gave it some extra squirts and care, now all snaps open and shut like it should.
I spent time this morning detailing the ECU connector (C56), The 13-pin that feeds some of its lines (C51) and the 21-pin right off the relay/fuse box (C1). Wanted to know each color, where it goes and what it connects to. Will help for swapping in a Speeduino or any other changes I decide to make. Not 100% complete as I couldn't find all the colors in the wiring diagrams or manuals and haven't begun tracking them all down yet on the bike.
You do not have the required permissions to view the files attached to this post.
1985 Limited (SOLD) - Build Thread Here: https://goldwingdocs.com/forum/viewtopic.php?t=72752
1986 Aspencade (SOLD): viewtopic.php?p=829477#p829477
1986 SE-i (SOLD): viewtopic.php?p=831425#p831425
1984 Interstate (Future Project)
1986 Aspencade (SOLD): viewtopic.php?p=829477#p829477
1986 SE-i (SOLD): viewtopic.php?p=831425#p831425
1984 Interstate (Future Project)
-
3KidsinAustin
- Chrome Member
- Posts: 162
- Joined: Sat Feb 08, 2025 5:04 pm
Fuel Pump and Rear MC
The aftermarket pump replacement arrived yesterday (Airtex E8312 knockoff), identical to the one I used on my 85 resurrection. I remembered it being way too small for the original mounting bracket and using lots of rubber sheets to make up the difference. This time I designed a sleeve to make up the difference since I had the original pump and its rubber sheath that fit inside the bracket. Took a few test runs to make sure the pump was snug in the sleeve, but eventually came up with a nice solution. As you can tell, pink is still loaded in our 3D printer. I'll be picking up some ABS black soon, maybe on a Prime Day sale.
Other part I worked on today is the rear master cylinder. The piston is firm about its desire to remain inside the bore. After soaking for awhile in penetrant, I was able to tap it down a bit with a hammer and punch, so at least broke it free. However, my attempts to blow it out with compressed air as I've done previously on clutch and front brake MCs has been met with failure. I currently have it soaking with some penetrant sitting on the base of the piston (MC is sitting upside down) hoping it might soak through and give me a chance to blow it out. I haven't been able to 100% plug the second outlet, so going to pick up a bolt for that tomorrow and give it a shot. Otherwise, I'll resort to a grease gun and hope I can find the right zerk fitting.
You do not have the required permissions to view the files attached to this post.
1985 Limited (SOLD) - Build Thread Here: https://goldwingdocs.com/forum/viewtopic.php?t=72752
1986 Aspencade (SOLD): viewtopic.php?p=829477#p829477
1986 SE-i (SOLD): viewtopic.php?p=831425#p831425
1984 Interstate (Future Project)
1986 Aspencade (SOLD): viewtopic.php?p=829477#p829477
1986 SE-i (SOLD): viewtopic.php?p=831425#p831425
1984 Interstate (Future Project)
-
3KidsinAustin
- Chrome Member
- Posts: 162
- Joined: Sat Feb 08, 2025 5:04 pm
It Lives!!
Very exciting day today. I met with the Seller of the bike at a local coffee and cars and picked up a box of progressive front springs. He refused the extra money I wanted to give him, stating he would only take it once he finds the title. Not really about the money for either of us, he is just thrilled that it was getting worked on. Made his day when a few hours later I texted him the short clip that is copied below:
You do not have the required permissions to view the files attached to this post.
1985 Limited (SOLD) - Build Thread Here: https://goldwingdocs.com/forum/viewtopic.php?t=72752
1986 Aspencade (SOLD): viewtopic.php?p=829477#p829477
1986 SE-i (SOLD): viewtopic.php?p=831425#p831425
1984 Interstate (Future Project)
1986 Aspencade (SOLD): viewtopic.php?p=829477#p829477
1986 SE-i (SOLD): viewtopic.php?p=831425#p831425
1984 Interstate (Future Project)
-
theailer

- Chrome Member
- Posts: 193
- Joined: Wed Aug 09, 2023 10:28 am
Re: '86 SE-i That Followed Me Home
Following this thread 
Well written and interesting for sure.
Well written and interesting for sure.
-
3KidsinAustin
- Chrome Member
- Posts: 162
- Joined: Sat Feb 08, 2025 5:04 pm
Re: '86 SE-i That Followed Me Home
Thanks! Looking back at progress helps to keep me motivated, plus it serves as a reference guide when I start a new project and ask myself "how did I do that again...?"
Played with the cooling system today, removed the water pump housing and confirmed no play in the pump. Removed the thermostat and fan switch to confirm proper functioning, but want to wait for the wife to leave so she doesn't catch me heating up coolant on her cooktop. I'll post pics of my high-tech setup later on.
With the engine running, I ordered tires this morning and spent time this afternoon was dismounting the completely shot front tire from its wheel. Tire is datecoded Week 15, 2008 and is rotting away. This is the third tire I've done on three bikes, so getting a bit of a process around it. I found it is easier if the tire is older and crusty hard as it won't flex as much and drops into the center of the wheel when I compress it with a tie down and my floor jack. Once down in the center, the battle is almost won. This one went the easiest of the three but still took me about an hour to get off. Good thing nobody is paying labor here! I'm also really happy that the rear tire had already been taken off. Putting back on is lots easier. Next couple days will be spent cleaning and refinishing the wheels so they will look pretty with the new shoes.
You do not have the required permissions to view the files attached to this post.
1985 Limited (SOLD) - Build Thread Here: https://goldwingdocs.com/forum/viewtopic.php?t=72752
1986 Aspencade (SOLD): viewtopic.php?p=829477#p829477
1986 SE-i (SOLD): viewtopic.php?p=831425#p831425
1984 Interstate (Future Project)
1986 Aspencade (SOLD): viewtopic.php?p=829477#p829477
1986 SE-i (SOLD): viewtopic.php?p=831425#p831425
1984 Interstate (Future Project)
-
3KidsinAustin
- Chrome Member
- Posts: 162
- Joined: Sat Feb 08, 2025 5:04 pm
Cooling Test
Here is the setup I use to check thermostats and switches. From earlier projects, I have an Arduino Uno and a bunch of ds18b20 waterproof temperature senders. A program uploaded to the arduino measures the temperature and displays it every second. That way, I can track when the thermostat begins opening and gets fully extended. Not pictured is my voltmeter that gets clamped to the terminals of the fan switch and when set to continuity gives a loud squeal when the contacts close.
The thermostat is right with spec. The fan switch is a bit out of range (98-102 per FSM), mine opens at 103.5. Off by about 1%, so I'll live with it for the time being.
The thermostat is right with spec. The fan switch is a bit out of range (98-102 per FSM), mine opens at 103.5. Off by about 1%, so I'll live with it for the time being.
You do not have the required permissions to view the files attached to this post.
1985 Limited (SOLD) - Build Thread Here: https://goldwingdocs.com/forum/viewtopic.php?t=72752
1986 Aspencade (SOLD): viewtopic.php?p=829477#p829477
1986 SE-i (SOLD): viewtopic.php?p=831425#p831425
1984 Interstate (Future Project)
1986 Aspencade (SOLD): viewtopic.php?p=829477#p829477
1986 SE-i (SOLD): viewtopic.php?p=831425#p831425
1984 Interstate (Future Project)
-
3KidsinAustin
- Chrome Member
- Posts: 162
- Joined: Sat Feb 08, 2025 5:04 pm
Wheels, Wheels, Wheels
The last three days have been focused on two wheel projects for the bike. I'm breaking this into two posts as to get enough images posted.
Firstly, the refinishing of the front and rear wheels. The aluminum in both was fairly oxidized and rough, from damage from fluid draining down onto them and sitting outside for years. After scrubbing the inside of the rims where the tire bead sits to a nice, smooth finish (using Coarse 2 steel wool), I set about to make the outsides look nicer. I've used this process a couple of times - it is laborious to the extreme but leaves a nice result when done. I opted to forgo a show-quality finish like I did on my 85 Trans Am rims as each one of those took 16 hours to complete. Still, to work through this was three days of solid effort that I am glad is behind me!
The first step of my process is to knock down the machine marks on the rims using 220 and 320 grit on an orbital palm sander. This is a bit of a challenge given the inward curve of the spokes so requires some hand work as well. 220 takes the longest as you are grinding down the machined ribs from the factory. 320 goes quicker as do the later stages as you are mainly sanding out the marks left by the 220 paper.
Second, I move on to wetsanding - starting with 400 grit, then 600, 1000 and 2000. Similar to the 320, the focus is to remove the marks left from the prior sandpaper. When done, you are left with a smooth, semi-dull finish. I stop the process at 2000 and don't move on to using polishing compound as I am not looking for a mirror finish on the rims, but that would entail using finer and finer levels of compound.
Third is scuffing up the painted areas. For this, I return to the Coarse 2 grit of steel wool and work over all the painted areas. In all honestly, this step should probably be first as it would allow you to sand out any "oopsies" that take place with the steel wool on the finished areas. I just never remember to start with the steel wool and only think of it when I get done with the wet sanding. Fourth is masking, which honestly takes HOURS. I estimate that masking each side of the wheel takes an hour - so two hours to do one wheel and four for both. It got me thinking that - if I was doing this on a semi-regular basis - investing in a vinyl cutting machine and designing cutouts that could be laid over the spokes would be a real time saver. Use a new single-sided razor blade to make smooth, even cuts on the tape. Each blade should last for one side, although I went through six on the first wheel as I was getting rid of some of the 1000+ blades I seem to have in my tool drawer. While new, they were rusty and it showed. In hindsight, I should have thrown them out as it did take longer fighting with those blades... Lastly is the paint. I like sticking a dowel through the wheel and supporting it with jack stands. That way I can slowly spin the wheel and get into all the tight areas. My paint of choice has been Duplicolor Wheel coating, HWP102 Graphite, primarily because I have had a can on my shelf for a few years. I used it up on these wheels, so might try a different shade when I get to the 84. Here is a finished shot of the rear wheel. I'm going to wait several days for the paint to cure, then probably hit the bare areas with 2000 grit then a liquid sealant. Will see how the mood strikes me! That's the end of the wheel refinishing, now on to Wheel Project #2...
You do not have the required permissions to view the files attached to this post.
1985 Limited (SOLD) - Build Thread Here: https://goldwingdocs.com/forum/viewtopic.php?t=72752
1986 Aspencade (SOLD): viewtopic.php?p=829477#p829477
1986 SE-i (SOLD): viewtopic.php?p=831425#p831425
1984 Interstate (Future Project)
1986 Aspencade (SOLD): viewtopic.php?p=829477#p829477
1986 SE-i (SOLD): viewtopic.php?p=831425#p831425
1984 Interstate (Future Project)
-
3KidsinAustin
- Chrome Member
- Posts: 162
- Joined: Sat Feb 08, 2025 5:04 pm
Trigger Wheel
The second wheel project over the past few days has been painting timing marks on the original eight-spoke wheel. One of my expectations for this project is to potentially follow in the footsteps of what Rednaxs60 has been doing with his Limited, using a Speeduino to modernize and replace the Honda ECU. As near as I can tell from my brief running of the bike, the computer system is functioning as intended, with no error codes. However, a failure in any of the sensors or the computer itself could sideline the bike. Getting a few more cycles on the road with alternative systems could prove a benefit down the road as these bikes (and their riders!) aren't getting any younger. Plus, I'm a bit of an Arduino geek so this plays into another of my hobbies.
The only piece that needed to be constructed is a fixed timing pointer that can reside in the timing belt area. Using some very technical Cardboard-Aided-Design, I fabbed up a pointer that makes use of the two empty bolt holes above the crank pulley. While the carbureated bikes utilize two pulse generators, the fuel injected models only use one, so those holes are left empty. Next was scribing marks on the trigger wheel. I painted it in a white base coat, then - with the pointer firmly mounted, I scratched onto the wheel a mark aligning with TDC of #1 cylinder. Then I laid it upon a sheet I printed out with a degree wheel and timing marks I had penciled out in five degree increments to 40 degrees before TDC. After transferring the marks to the trigger wheel, I cut really thin pieces of tape and masked off each of the eight marks. Lastly, I hit it with a top coat of flat black paint. After drying, it turned out ok. I wrapped the tape around to the side of the trigger wheel as I believe that area might be the most visible with the cover off and the bike running. Here is what everything looks like all mounted. I haven't run the bike yet to test it out and not sure if it would mean much at this point as all the timing is set at the factory and not changeable.
The only piece that needed to be constructed is a fixed timing pointer that can reside in the timing belt area. Using some very technical Cardboard-Aided-Design, I fabbed up a pointer that makes use of the two empty bolt holes above the crank pulley. While the carbureated bikes utilize two pulse generators, the fuel injected models only use one, so those holes are left empty. Next was scribing marks on the trigger wheel. I painted it in a white base coat, then - with the pointer firmly mounted, I scratched onto the wheel a mark aligning with TDC of #1 cylinder. Then I laid it upon a sheet I printed out with a degree wheel and timing marks I had penciled out in five degree increments to 40 degrees before TDC. After transferring the marks to the trigger wheel, I cut really thin pieces of tape and masked off each of the eight marks. Lastly, I hit it with a top coat of flat black paint. After drying, it turned out ok. I wrapped the tape around to the side of the trigger wheel as I believe that area might be the most visible with the cover off and the bike running. Here is what everything looks like all mounted. I haven't run the bike yet to test it out and not sure if it would mean much at this point as all the timing is set at the factory and not changeable.
You do not have the required permissions to view the files attached to this post.
1985 Limited (SOLD) - Build Thread Here: https://goldwingdocs.com/forum/viewtopic.php?t=72752
1986 Aspencade (SOLD): viewtopic.php?p=829477#p829477
1986 SE-i (SOLD): viewtopic.php?p=831425#p831425
1984 Interstate (Future Project)
1986 Aspencade (SOLD): viewtopic.php?p=829477#p829477
1986 SE-i (SOLD): viewtopic.php?p=831425#p831425
1984 Interstate (Future Project)
-
CYBORG
- Moderator

- Posts: 25116
- Joined: Mon Jan 14, 2008 12:52 pm
- Location: Muskegon mich
Re: '86 SE-i That Followed Me Home
I can only DREAM of having that much time to play with my toys 
1978 custom GL1000
1977 custom with 1200 engine
1985 gl1200
1977 custom with 1200 engine
1985 gl1200
-
3KidsinAustin
- Chrome Member
- Posts: 162
- Joined: Sat Feb 08, 2025 5:04 pm
Rear Master Cylinder and Fork Issue
It certainly helps keep the crazies from running rampant in my head!
Been working on the rear master cylinder the past few days. The grease trick worked great for getting the stuck piston out, but it sure took a lot of work to get it cleaned up! Grease was everywhere, took lots of baths in the buzz bath, compressed air, brake cleaner and lots of paper towels to get it all out. Once done, I polished the bore with 1000 then 2000 grit sandpaper, painted the housing, and reassembled with new parts. The paint is regular flat black and turned out ok.
The last subassembly I wanted to take off the bike and work on is the front forks, and here I hit a major stumbling block. When I bought the bike, I noticed the fork dust caps were pushed about halfway up the fork tubes and were totally shot. Not a big deal, I thought, as I'd be replacing them and the fork seals anyway. However, I discovered that the snap rings were REALLY crusty and stuck in the bores. No fun!
Here is the spring compressor I built for the 85 Limited, nice to get to use it again. Very handy for safely getting the retaining nut off while under tension, although getting it threaded back on can be a bit of a challenge. The snap ring in the left fork had the eyelet broken at one end, but with lots of patience, penetrating fluid and an assortment of picks, I was able to get it removed from the fork and completely disassemble it. When I moved to the right fork, things went quickly sour. One ear was broken and the second snapped off as soon as I applied a bit of pressure to it. The ring is completely seized in its groove - I've been trying to persuade it to move with punches, hammer blows, penetrating oil and heat. So far, nothing. Going to keep working it over the weekend and see where I'm at. This might play into what to do about the lack of a title. While the Seller is still looking, after two weeks I'm losing confidence that he will find it. There are some parts bikes about 70 miles north of me that have titles for $250 apiece. I've been struggling mentally with the idea of doing a complete frame swap for a clear title, but if one of my forks is not usable, that might lean me towards that route versus getting a bonded title. I'm just dreading the idea of loading another non-running bike onto the trailer and the work required to strip it down.
If anyone has tips for getting that ring out, I'm all ears!!
You do not have the required permissions to view the files attached to this post.
1985 Limited (SOLD) - Build Thread Here: https://goldwingdocs.com/forum/viewtopic.php?t=72752
1986 Aspencade (SOLD): viewtopic.php?p=829477#p829477
1986 SE-i (SOLD): viewtopic.php?p=831425#p831425
1984 Interstate (Future Project)
1986 Aspencade (SOLD): viewtopic.php?p=829477#p829477
1986 SE-i (SOLD): viewtopic.php?p=831425#p831425
1984 Interstate (Future Project)
-
3KidsinAustin
- Chrome Member
- Posts: 162
- Joined: Sat Feb 08, 2025 5:04 pm
Forks: 0 - Me: 1
It took several blasts of heat, 24 hours of soaking, and some colorful language to remove this snap ring. I'll take it as a win and move on to the next step, whichever that might be. The top cup of the fork housing shows a few scars from the battle to remove the ring. I've sanded the edges smooth with 220 grit sandpaper so as to not damage the oil seal when it is fitted into place.
Whew! I'm pooped.
Whew! I'm pooped.
You do not have the required permissions to view the files attached to this post.
1985 Limited (SOLD) - Build Thread Here: https://goldwingdocs.com/forum/viewtopic.php?t=72752
1986 Aspencade (SOLD): viewtopic.php?p=829477#p829477
1986 SE-i (SOLD): viewtopic.php?p=831425#p831425
1984 Interstate (Future Project)
1986 Aspencade (SOLD): viewtopic.php?p=829477#p829477
1986 SE-i (SOLD): viewtopic.php?p=831425#p831425
1984 Interstate (Future Project)
-
julimike54
- Cast Iron Member

- Posts: 76
- Joined: Fri Dec 11, 2020 10:44 am
- Location: Euless

-
3KidsinAustin
- Chrome Member
- Posts: 162
- Joined: Sat Feb 08, 2025 5:04 pm
Dash Testing
I decided this morning to mount the main fairing to see what parts worked. When we brought the bike home, I had to pull the fairing while it sat on the truck to make it easier for unloading, so I'd never seen it in operation. Had several results:
The Good:
- Out of three bikes, this is the first one with a functioning radio. That was a surprise.
- Air compressor and controls work and the system builds pressure with my thumb plugging the front or rear outputs
- All the indicator lights on the side of the dash appear to light up when they were supposed to
- The digital dash works, but ...
The Bad:
- The dash is extremely dim. With all the lights off, it looks like this: The top of the screen is still legible, but by halfway down the digits pretty much vanish. If you look really closely, you can see the RPM as the engine idles and the little bars on the bottom fill up. It would be totally washed out in the daylight.
Been trying things to see if I can improve the contrast. Disconnected the three plugs behind the headlight to inspect for any burnt connections. Nope, all look good so I cleaned all the contacts and put some dielectric grease in the plugs. Also confirmed good grounds at the green and green/black wires.
This bike sat outside long enough to destroy the seat, backrest, and damage the plastics. I am wondering if the years out in the Texas sun damaged the LCD. I've seen them crack and spill black stuff inside the display, but never fade out like this.
The travel computer and air compressor panel behave the same - slightly visible at the top then washed out further down. Radio and voltmeter are both just dim.
Any suggestions?
You do not have the required permissions to view the files attached to this post.
1985 Limited (SOLD) - Build Thread Here: https://goldwingdocs.com/forum/viewtopic.php?t=72752
1986 Aspencade (SOLD): viewtopic.php?p=829477#p829477
1986 SE-i (SOLD): viewtopic.php?p=831425#p831425
1984 Interstate (Future Project)
1986 Aspencade (SOLD): viewtopic.php?p=829477#p829477
1986 SE-i (SOLD): viewtopic.php?p=831425#p831425
1984 Interstate (Future Project)
-
3KidsinAustin
- Chrome Member
- Posts: 162
- Joined: Sat Feb 08, 2025 5:04 pm
Re: '86 SE-i That Followed Me Home
It like the saying goes - "How do you eat an elephant?"
One bite at a time.
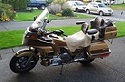
You have a good looking bike. I just resurrected an 86 Aspencade in the same color scheme, although the paint was not in as nearly as good shape and the pinstripe decals were really rough.
1985 Limited (SOLD) - Build Thread Here: https://goldwingdocs.com/forum/viewtopic.php?t=72752
1986 Aspencade (SOLD): viewtopic.php?p=829477#p829477
1986 SE-i (SOLD): viewtopic.php?p=831425#p831425
1984 Interstate (Future Project)
1986 Aspencade (SOLD): viewtopic.php?p=829477#p829477
1986 SE-i (SOLD): viewtopic.php?p=831425#p831425
1984 Interstate (Future Project)
-
Rednaxs60
- Gold Member

- Posts: 1127
- Joined: Mon Nov 30, 2015 11:14 pm
- Location: Victoria, BC, Canada
Re: '86 SE-i That Followed Me Home
Stay away fro julimike's bike, just kidding. He's apparently had it from new, be a great one for a new owner.
I know the dash is a bit weathered, but changing to a custom one would be a wiring puzzle nightmare. Thinking it would be better to find a good used one. The wiring on these 1200 FI models is significant.
Like your bike lift setup.
I know the dash is a bit weathered, but changing to a custom one would be a wiring puzzle nightmare. Thinking it would be better to find a good used one. The wiring on these 1200 FI models is significant.
Like your bike lift setup.
"When writing the Story of your life, don't let anyone else hold the pen."
Ernest
1985 GL1200 Limited Edition
2014 Can-Am Spyder RT LE
2021 Royal Enfield Himalayan (sold)
1995 GL1500 SE CDN Edition (sold)
2012 Suzuki DL1000 VStrom (sold)
Ontario 1985 GL1200 Limited Edition (sold)
2008 GL1800 (sold)
Ernest
1985 GL1200 Limited Edition
2014 Can-Am Spyder RT LE
2021 Royal Enfield Himalayan (sold)
1995 GL1500 SE CDN Edition (sold)
2012 Suzuki DL1000 VStrom (sold)
Ontario 1985 GL1200 Limited Edition (sold)
2008 GL1800 (sold)