79 Resto Mod
Moderators: Brant, Sagebrush, Forum Moderators
-
wingrider

- SUPER BIKER!!!!

- Posts: 3809
- Joined: Thu May 24, 2012 12:15 pm
- Location: Maple Lake, MN USA
Re: 79 Resto Mod
Great job so far! I think the side panels do look better lighter, but agree that the flame job should contrast. Nice way to hold the bags!
2002 1800 Wing
2001 Valkyrie Interstate
1978 1200 EFI Wing with Motorvation Coupe Royale sidecar
1977 1200 Wing cafe/bobber project
1974 Suzuki GT550
2001 Valkyrie Interstate
1978 1200 EFI Wing with Motorvation Coupe Royale sidecar
1977 1200 Wing cafe/bobber project
1974 Suzuki GT550
-
Marc

- Silver Member

- Posts: 705
- Joined: Thu Jul 15, 2010 1:20 am
- Location: Myrtle Point, OR
Re: 79 Resto Mod
I agree, the ivory as a background color on the side panels looks good and flows with the rest of the bike.
Shalom, Marc
1975 GL1000 "Dresser"
1976 GL1000 Project Bike
1979 GL1000 Naked
2007 Triumph Bonneville
1970 Norton Commando
1975 GL1000 "Dresser"
1976 GL1000 Project Bike
1979 GL1000 Naked
2007 Triumph Bonneville
1970 Norton Commando
-
fish

- SUPER BIKER!!!!
- Posts: 3110
- Joined: Wed Feb 18, 2009 1:50 pm
- Location: tucson
Re: 79 Resto Mod
Pokegama that is one beautiful bike...allmost too nice to take out on the road!
I want to express my opinion on your decision to retain the stock tail light and turnsignals...
I think it is smart!
IMHO
the fashionably tiny tailights and no (or tiny) turnsignals is/are unsafe!
I did some customization to the lighting on mine but I went big!
I eliminated the tail light and did some tricks to these so they are stop,tail & turnsignals.. yes I think smaller would look better BUT visibility is important to me
You do not have the required permissions to view the files attached to this post.
Timothy Mark Fisher
Catalina Arizona
"ride it.. don't be one of those guys who will fix it 'til it's broken" (JDVorchek)
"It is not logic or economics that drive a motorcyclist but passion!" (bugdaddy66)
"I fully agree with fish, well at least 27% of the time."(Casper)
"Why do you have to ruin a perfectly good thread with common sense"(Placerville)
"my best guess for an answer would be a stream of complex expletives" (Transitman)
"I like a cold beer with my beer" (OldeWing)
"Most of us like the sport of wrenching too." (fred camper)
"Now go ride the heck out of it, til mother says do your chores"(Gowing)
"I agree with Fish" (Salukispeed)
-
Pokegama

- Billet Alum. Member

- Posts: 286
- Joined: Wed Aug 24, 2011 11:39 pm
- Location: Grand Rapids, MN
Re: 79 Resto Mod
Fish, I agree 100%. The last thing I want is to be rear ended by someone. I actually like the looks of the factory lights on the back. The turn signals show up nicely behind the bags.
1979 GL1000....Ya gotta start somewhere!
August 2013 BOTM!
http://ngwclub.com/forum/viewtopic.php?f=30&t=38985
August 2013 BOTM!
http://ngwclub.com/forum/viewtopic.php?f=30&t=38985
-
Marc
- Silver Member
- Posts: 705
- Joined: Thu Jul 15, 2010 1:20 am
- Location: Myrtle Point, OR
Re: 79 Resto Mod
Fish I really like the idea of removing the large center light cluster in favor of two lights that do all the same things. Looking at the diagram it just takes a little rewiring right??? I also like your license plate mounting but I'm not sure if our Oregon State patrol would agree.
Shalom, Marc
1975 GL1000 "Dresser"
1976 GL1000 Project Bike
1979 GL1000 Naked
2007 Triumph Bonneville
1970 Norton Commando
1975 GL1000 "Dresser"
1976 GL1000 Project Bike
1979 GL1000 Naked
2007 Triumph Bonneville
1970 Norton Commando
-
Pokegama
- Billet Alum. Member
- Posts: 286
- Joined: Wed Aug 24, 2011 11:39 pm
- Location: Grand Rapids, MN
Re: 79 Resto Mod
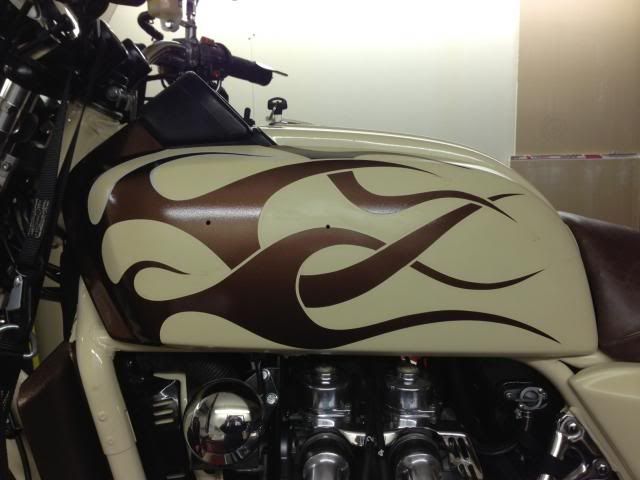
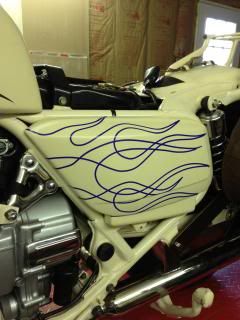
I finally got around to getting the flames painted on one of the side covers to see what it would look like. Painting is the least of my skills so there are some flaws on this cover. Thankfully it is just an extra cover so hopefully I can do better on the ones I will use.
Let me know what you think!

Let me know what you think!
1979 GL1000....Ya gotta start somewhere!
August 2013 BOTM!
http://ngwclub.com/forum/viewtopic.php?f=30&t=38985
August 2013 BOTM!
http://ngwclub.com/forum/viewtopic.php?f=30&t=38985
-
BusaRider
- Billet Alum. Member
- Posts: 254
- Joined: Thu Sep 06, 2012 9:43 pm
- Location: Pennsylvania
Re: 79 Resto Mod
I've been following your build for a while. I gotta tell you, when I first started reading your thread, I thought what an aweful color combo. As it has come together, it is simply amazing. Everything works to tie the scheme in perfectly. Thanks for posting your beautiful build! It's quickly become one of my favorite builds because it is really different and the attention to detail is outstanding!
'81 GL1100 - Café with a Twist * 1990 Suzuki GSXR-1100
2000 Triumph Speed Triple * 2016 BMW F800GS
2013 BMW S1000RR * 2017 Harley Davidson Heritage Classic
2000 Triumph Speed Triple * 2016 BMW F800GS
2013 BMW S1000RR * 2017 Harley Davidson Heritage Classic
-
Pokegama
- Billet Alum. Member
- Posts: 286
- Joined: Wed Aug 24, 2011 11:39 pm
- Location: Grand Rapids, MN
Re: 79 Resto Mod
Wow...Thank you for the very kind words. Coming from someone with an awesome bike like yours, I am truly flattered.BusaRider wrote:I've been following your build for a while. I gotta tell you, when I first started reading your thread, I thought what an aweful color combo. As it has come together, it is simply amazing. Everything works to tie the scheme in perfectly. Thanks for posting your beautiful build! It's quickly become one of my favorite builds because it is really different and the attention to detail is outstanding!
1979 GL1000....Ya gotta start somewhere!
August 2013 BOTM!
http://ngwclub.com/forum/viewtopic.php?f=30&t=38985
August 2013 BOTM!
http://ngwclub.com/forum/viewtopic.php?f=30&t=38985
-
Pokegama
- Billet Alum. Member
- Posts: 286
- Joined: Wed Aug 24, 2011 11:39 pm
- Location: Grand Rapids, MN
Re: 79 Resto Mod
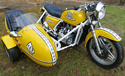
One step closer to being finished. I got the lower covers painted with the flames. A couple of more pictures.


1979 GL1000....Ya gotta start somewhere!
August 2013 BOTM!
http://ngwclub.com/forum/viewtopic.php?f=30&t=38985
August 2013 BOTM!
http://ngwclub.com/forum/viewtopic.php?f=30&t=38985
-
Pokegama
- Billet Alum. Member
- Posts: 286
- Joined: Wed Aug 24, 2011 11:39 pm
- Location: Grand Rapids, MN
Re: 79 Resto Mod
Like I said in an earlier post "painting is the least of my skills". Boy did that ring true....I had to sand all the covers back down to the plastic again. The ivory paint lifted off the primer when I lifted the pattern tape off. 
On the upside that does give me another opportunity to improve my limited painting skills!
I thought since I have to re-do everything, I would take a few pictures and document how I painted my covers and since my writing skills are worse than my painting skills I will use lots of pictures! I hope you guys don't mind a rather long post.
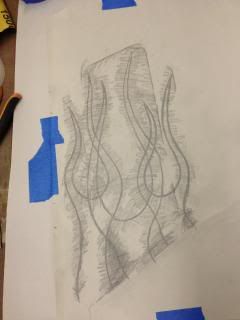
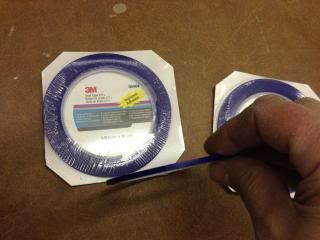
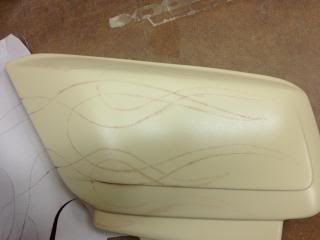
After sanding everything down (again) I sprayed on some adhesion promoter then a couple of coats of base color. On top of the base I shot a couple coats of clear and sanded everything smooth. Then I started to lay out the flame pattern on the covers using fine line tape. I did this by simply playing around with the tape. I went through a whole roll of tape before I got the pattern the way I liked it. Then I taped some tracing paper over the cover with the tape and did a pencil rub to transfer the pattern to the paper. You need to make a pattern to have the same image on the opposite side of the bike.
Flames laid out with tape on the cover.
Pattern.
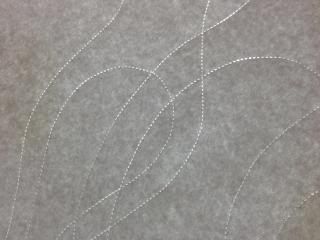
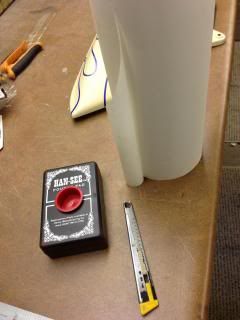
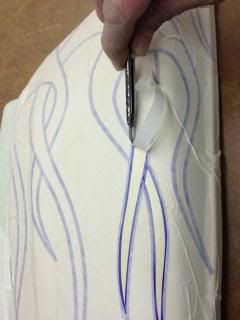
Once you have your pattern drawn out you need to punch lots of small holes in it to transfer the pattern to the other cover. To do that you need a pounce wheel.
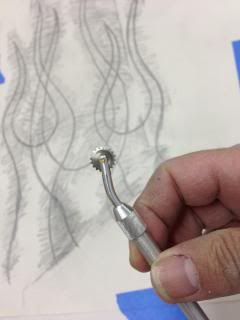
Just run the pounce wheel over the lines on the pattern to punch the holes then flip the paper over and lightly sand the back side to open up the hole a little better.
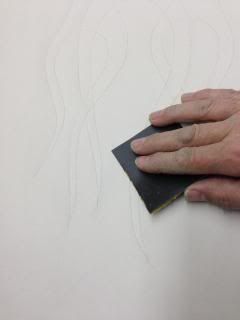
This is how it should look, with some light behind it, after sanding.
For the next steps you need a pounce pad, more fine line tape, premask or more painters tape and an X-Acto knife.
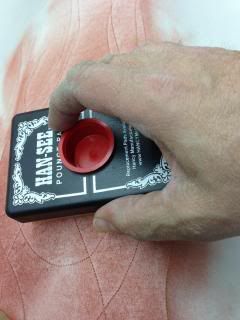
Now to transfer the pattern to the cover, tape the pattern to the cover and wipe the pounce pad over it. The chalk comes through the pad on the pounce pad and goes through the holes in the pattern and onto the cover.
After the pattern is on the cover put fine line tape over the pattern and trim any areas that should be open.
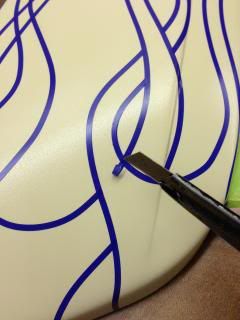
Now if the pattern looks the way you want it, cover it up with the premask and cut open the areas you want to paint. Be sure not to cut through into the paint. Use just enough pressure to cut through the premask. Or just tape off the areas you don't want to paint.
After the premask has been cut and peeled just spray on the next color. After that dries a bit, pull the premask and tape off. If everything was done right hopefully your base coat won't lift off like it did for me the first time around!
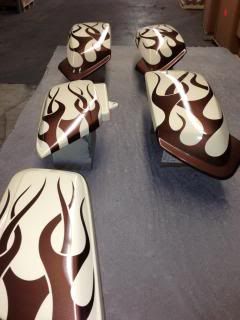
I painted everything with Duplicolor spray cans. Since what I used was lacquer paint and not resistant to gas spills I covered them all with Spray Max 2K epoxy clear. It worked great! It's an actual 2 part epoxy paint, it sprayed and flowed out beautifully. I did let the lacquer dry for a week before coating with the 2K.
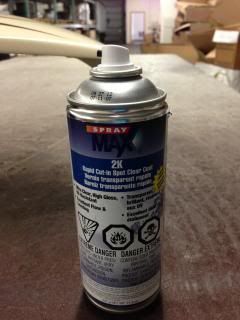
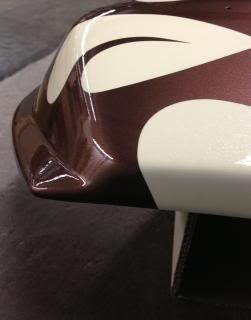
Here's a close up of one of the covers after the 2K clear had cured. I did shoot a mid coat metal flake clear to give the ivory a little sparkle in the sun. It doesn't show up very well in the picture but it looks great in person!
On the upside that does give me another opportunity to improve my limited painting skills!
I thought since I have to re-do everything, I would take a few pictures and document how I painted my covers and since my writing skills are worse than my painting skills I will use lots of pictures! I hope you guys don't mind a rather long post.
After sanding everything down (again) I sprayed on some adhesion promoter then a couple of coats of base color. On top of the base I shot a couple coats of clear and sanded everything smooth. Then I started to lay out the flame pattern on the covers using fine line tape. I did this by simply playing around with the tape. I went through a whole roll of tape before I got the pattern the way I liked it. Then I taped some tracing paper over the cover with the tape and did a pencil rub to transfer the pattern to the paper. You need to make a pattern to have the same image on the opposite side of the bike.
Flames laid out with tape on the cover.

Pattern.

Once you have your pattern drawn out you need to punch lots of small holes in it to transfer the pattern to the other cover. To do that you need a pounce wheel.

Just run the pounce wheel over the lines on the pattern to punch the holes then flip the paper over and lightly sand the back side to open up the hole a little better.

This is how it should look, with some light behind it, after sanding.

For the next steps you need a pounce pad, more fine line tape, premask or more painters tape and an X-Acto knife.


Now to transfer the pattern to the cover, tape the pattern to the cover and wipe the pounce pad over it. The chalk comes through the pad on the pounce pad and goes through the holes in the pattern and onto the cover.


After the pattern is on the cover put fine line tape over the pattern and trim any areas that should be open.

Now if the pattern looks the way you want it, cover it up with the premask and cut open the areas you want to paint. Be sure not to cut through into the paint. Use just enough pressure to cut through the premask. Or just tape off the areas you don't want to paint.

After the premask has been cut and peeled just spray on the next color. After that dries a bit, pull the premask and tape off. If everything was done right hopefully your base coat won't lift off like it did for me the first time around!

I painted everything with Duplicolor spray cans. Since what I used was lacquer paint and not resistant to gas spills I covered them all with Spray Max 2K epoxy clear. It worked great! It's an actual 2 part epoxy paint, it sprayed and flowed out beautifully. I did let the lacquer dry for a week before coating with the 2K.

Here's a close up of one of the covers after the 2K clear had cured. I did shoot a mid coat metal flake clear to give the ivory a little sparkle in the sun. It doesn't show up very well in the picture but it looks great in person!

1979 GL1000....Ya gotta start somewhere!
August 2013 BOTM!
http://ngwclub.com/forum/viewtopic.php?f=30&t=38985
August 2013 BOTM!
http://ngwclub.com/forum/viewtopic.php?f=30&t=38985
-
Lefty

- Silver Member
- Posts: 608
- Joined: Wed Apr 10, 2013 11:46 am
- Location: Durango Colorado
Re: 79 Resto Mod
I am stupified! Outstanding work from A to Z.
Been riding Hondas since 1964.
Current bikes:
1985 GL1200i work in progress.
2002 CB750 Nighthawk
Current bikes:
1985 GL1200i work in progress.
2002 CB750 Nighthawk
-
Pokegama
- Billet Alum. Member
- Posts: 286
- Joined: Wed Aug 24, 2011 11:39 pm
- Location: Grand Rapids, MN
Re: 79 Resto Mod
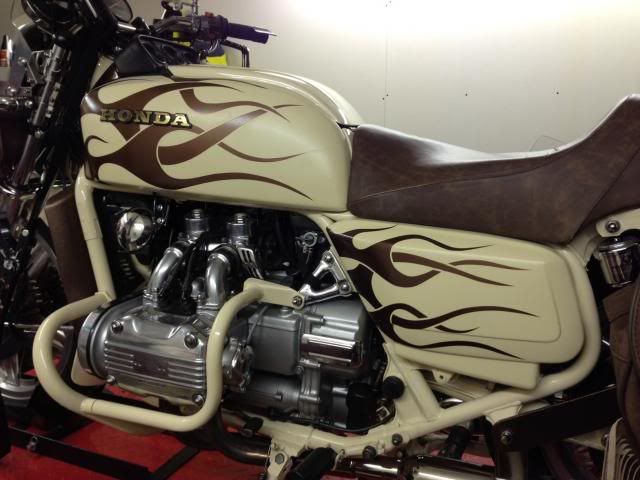
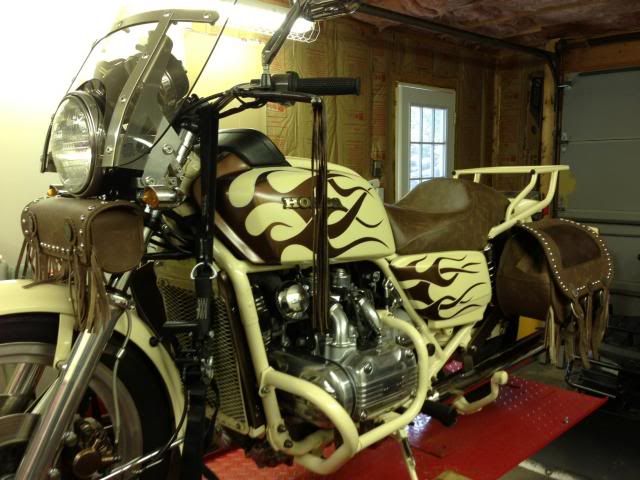
I did get the bike back together and out in the sun for the first time this year! It's been 2 years in the making but I do like how it turned out. Let me know what you guys think!
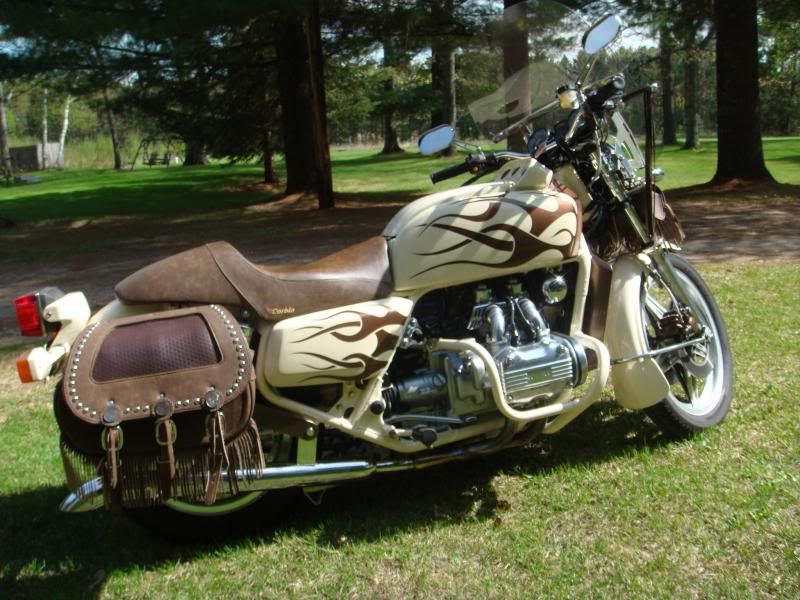
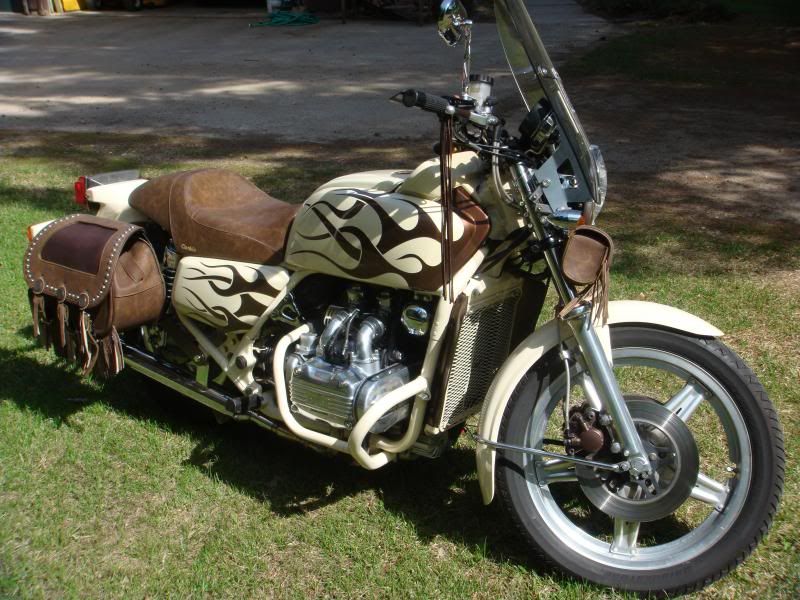
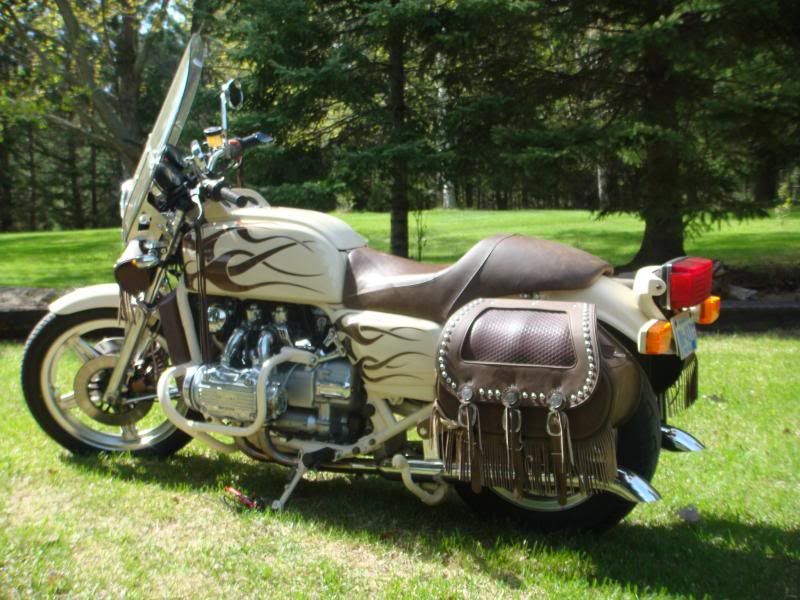
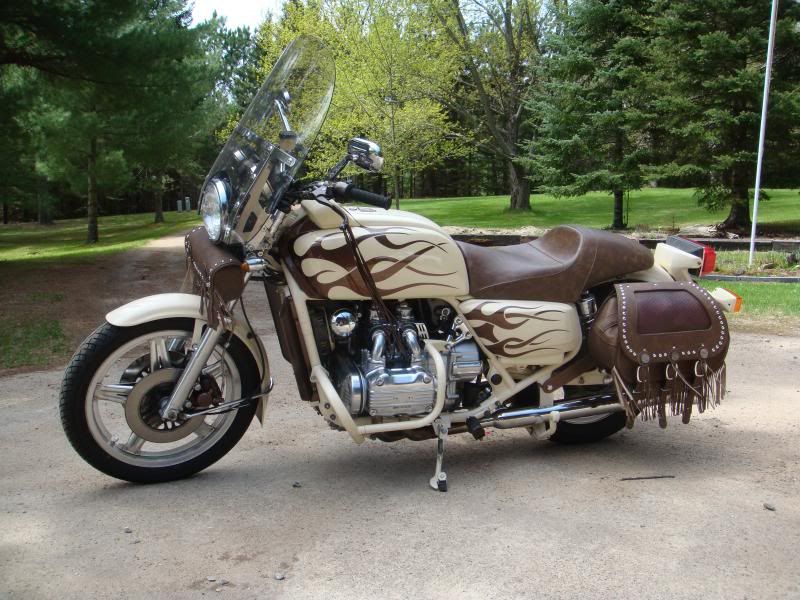
Still needs a little tune up but otherwise done!


Still needs a little tune up but otherwise done!
1979 GL1000....Ya gotta start somewhere!
August 2013 BOTM!
http://ngwclub.com/forum/viewtopic.php?f=30&t=38985
August 2013 BOTM!
http://ngwclub.com/forum/viewtopic.php?f=30&t=38985
-
wingrider
- SUPER BIKER!!!!
- Posts: 3809
- Joined: Thu May 24, 2012 12:15 pm
- Location: Maple Lake, MN USA
Re: 79 Resto Mod
Looks great! You did an excellent job!
2002 1800 Wing
2001 Valkyrie Interstate
1978 1200 EFI Wing with Motorvation Coupe Royale sidecar
1977 1200 Wing cafe/bobber project
1974 Suzuki GT550
2001 Valkyrie Interstate
1978 1200 EFI Wing with Motorvation Coupe Royale sidecar
1977 1200 Wing cafe/bobber project
1974 Suzuki GT550
-
past in time tony
- Billet Alum. Member
- Posts: 271
- Joined: Mon Jan 07, 2013 1:19 pm
- Location: kansas

-
Fred Camper

- Vice President

- Posts: 7383
- Joined: Wed Aug 12, 2009 9:38 pm
- My Album: http://www.ngwclub.com/gallery/v/wingmans/Jeff+Bozeman/
- Location: Metro Detroit
- Contact:
Re: 79 Resto Mod
Excellent color matched.
Proud member of the NGW Cartel (Rochester MI)
1977 GL1000 BADDOG (April 2012 BOTM)
1976 LTD - '993 LTD...and so it begins'
You should remember that it's peace of mind you're after and not just fixing the machine. R.Pirsig
1977 GL1000 BADDOG (April 2012 BOTM)
1976 LTD - '993 LTD...and so it begins'
You should remember that it's peace of mind you're after and not just fixing the machine. R.Pirsig
