Thanks,
The thing is it has not been started for 4 years so I wanted to basically start from scratch to ensure everything was okay. I triple checked the valve clearances. I was able to slide the correct guage in there with some resistance to a point where the next size up was unable to slide in.
Side note, So looking at the pulley's than, what is TDC #2. Would that still be T-1 with one pully pointing down and the other pointing up.
1978 GL 1000 "The Tank" Resoration Project
Moderators: Brant, Sagebrush, Forum Moderators
-
shieldsm
- Billet Alum. Member

- Posts: 256
- Joined: Sat Mar 19, 2011 9:33 am
- Location: Chisago City, MN
-
shieldsm
- Billet Alum. Member
- Posts: 256
- Joined: Sat Mar 19, 2011 9:33 am
- Location: Chisago City, MN
Re: Newly Purchased 78' DL1000; Where to start?
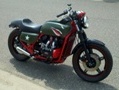
A picture of my new belts. Impossible to see where the pullys are at but I am proud of how I got the area nice and clean. She was a bit dirty.
You do not have the required permissions to view the files attached to this post.
-
rcmatt007
- Treasurer

- Posts: 31625
- Joined: Fri Oct 21, 2005 12:48 pm
- My Album: http://www.ngwclub.com/gallery/v/wingmans/rcmatt007/
- Location: New River Valley, Virginia
Re: Newly Purchased 78' DL1000; Where to start?
shieldsm wrote:Thanks,
The thing is it has not been started for 4 years so I wanted to basically start from scratch to ensure everything was okay. I triple checked the valve clearances. I was able to slide the correct guage in there with some resistance to a point where the next size up was unable to slide in.
Side note, So looking at the pulley's than, what is TDC #2. Would that still be T-1 with one pully pointing down and the other pointing up.
tdc #2 is to set the second side of the points during timing, and I do not know which way the pully points.... but both UP is TDC #1
-Rodger-
all it takes for evil to prosper is the want of a few good men to do nothing-Edmund Burke
The question is not how much time do you have, it is what you do with the time that you have Gandalf
"One of the greatest dignities of humankind is that each successive generation is invested in the welfare of each new generation." Fred Rodgers
"it takes 10,000 hours to become an expert" ancient saying
78 constantly modified/customized since 1978, BOTM June 2015 de-evolving this very moment viewtopic.php?f=30&t=65511
76 Ltd "cookies bike" ALMOST DONE
79 project, finished, FOR SALE
'86 1200 (Beth's)(FOR SALE) with motorvation sidecar (sidecar sold) , July 2017 BOTM
'17 HD Road king and 08 HD Heritage softail (Beth's) (FOR SALE). I guess you can say we have MBS
-
shieldsm
- Billet Alum. Member
- Posts: 256
- Joined: Sat Mar 19, 2011 9:33 am
- Location: Chisago City, MN
Re: Newly Purchased 78' DL1000; Where to start?
Okay. yep, that's what I had to do to set the valve's on the other side but I did not look to see what direction the pully's were at. I think all is good, just a tad nervous. I checked everything so many times, I was starting to get dizy. Thankful the 78s only have one valve clearance specification! I am not going to be riding it when I start it up, but I don't want a catistrophic engine failure so soon into my project. I still have to look over the electrical connections, and do a quick flush and cleaning of the carbs before I do my first initial start up. I am following closley Raandak's recommendations for start up procedures after a long lay up. If everything starts okay I will probably recheck the belts and valve clearances. Covers have to come off again anyway because they need SERIOUS polishing!
-
rcmatt007
- Treasurer
- Posts: 31625
- Joined: Fri Oct 21, 2005 12:48 pm
- My Album: http://www.ngwclub.com/gallery/v/wingmans/rcmatt007/
- Location: New River Valley, Virginia
Re: Newly Purchased 78' DL1000; Where to start?
before you start it up after a belt change use the bolt in the center area between the belts to hand turn the engine just to make sure it is correct, that way if it is not and the vlves contact the pistons you will not destroy the engine
-Rodger-
all it takes for evil to prosper is the want of a few good men to do nothing-Edmund Burke
The question is not how much time do you have, it is what you do with the time that you have Gandalf
"One of the greatest dignities of humankind is that each successive generation is invested in the welfare of each new generation." Fred Rodgers
"it takes 10,000 hours to become an expert" ancient saying
78 constantly modified/customized since 1978, BOTM June 2015 de-evolving this very moment viewtopic.php?f=30&t=65511
76 Ltd "cookies bike" ALMOST DONE
79 project, finished, FOR SALE
'86 1200 (Beth's)(FOR SALE) with motorvation sidecar (sidecar sold) , July 2017 BOTM
'17 HD Road king and 08 HD Heritage softail (Beth's) (FOR SALE). I guess you can say we have MBS
all it takes for evil to prosper is the want of a few good men to do nothing-Edmund Burke
The question is not how much time do you have, it is what you do with the time that you have Gandalf
"One of the greatest dignities of humankind is that each successive generation is invested in the welfare of each new generation." Fred Rodgers
"it takes 10,000 hours to become an expert" ancient saying
78 constantly modified/customized since 1978, BOTM June 2015 de-evolving this very moment viewtopic.php?f=30&t=65511
76 Ltd "cookies bike" ALMOST DONE
79 project, finished, FOR SALE
'86 1200 (Beth's)(FOR SALE) with motorvation sidecar (sidecar sold) , July 2017 BOTM
'17 HD Road king and 08 HD Heritage softail (Beth's) (FOR SALE). I guess you can say we have MBS
-
CAPT. BILL
- Tin Member

- Posts: 11
- Joined: Tue Mar 29, 2011 12:17 pm
- Location: TREASURE ISLAND, FL.
Re: 1978 GL 1000 "The Tank" Resoration Project
That's a nice 78  Mine is dressed but not for long....
-
sunnbobb

- Facebook Admin

- Posts: 21329
- Joined: Thu Jan 10, 2008 4:09 pm
- My Album: http://www.ngwclub.com/gallery/v/wingmans/sunnbobb/
- Location: LaConner, WA
Re: 1978 GL 1000 "The Tank" Resoration Project
Good advice Rodger!
I found the end of the internet
---- Bradshaw Bikes custom polishing for your wing. Visit us on facebook!
1978 Learning Experience
1980 County Road Hauler "Brain Damage"
1978 Cafe Custom Gl1000 "Vyper"
1977 Bulldog Inspired "Vaincre"
1981 Street Fighter GL1100 "No Quarter"
1983 Supercharged Street Drag "Anubis" (in worx)
1983 gl1100 mint restoration "Kristen"
1985 Aspencade..pondering.
-
rcmatt007
- Treasurer
- Posts: 31625
- Joined: Fri Oct 21, 2005 12:48 pm
- My Album: http://www.ngwclub.com/gallery/v/wingmans/rcmatt007/
- Location: New River Valley, Virginia
Re: 1978 GL 1000 "The Tank" Resoration Project
the best way, is always to make sure it is lined up correctly before you ever start, BUT if you are not sure and/or have to lign it up after you start, hand turn the engine to make sure you do not damage anything
thanks, capt bill
thanks, capt bill
-Rodger-
all it takes for evil to prosper is the want of a few good men to do nothing-Edmund Burke
The question is not how much time do you have, it is what you do with the time that you have Gandalf
"One of the greatest dignities of humankind is that each successive generation is invested in the welfare of each new generation." Fred Rodgers
"it takes 10,000 hours to become an expert" ancient saying
78 constantly modified/customized since 1978, BOTM June 2015 de-evolving this very moment viewtopic.php?f=30&t=65511
76 Ltd "cookies bike" ALMOST DONE
79 project, finished, FOR SALE
'86 1200 (Beth's)(FOR SALE) with motorvation sidecar (sidecar sold) , July 2017 BOTM
'17 HD Road king and 08 HD Heritage softail (Beth's) (FOR SALE). I guess you can say we have MBS
all it takes for evil to prosper is the want of a few good men to do nothing-Edmund Burke
The question is not how much time do you have, it is what you do with the time that you have Gandalf
"One of the greatest dignities of humankind is that each successive generation is invested in the welfare of each new generation." Fred Rodgers
"it takes 10,000 hours to become an expert" ancient saying
78 constantly modified/customized since 1978, BOTM June 2015 de-evolving this very moment viewtopic.php?f=30&t=65511
76 Ltd "cookies bike" ALMOST DONE
79 project, finished, FOR SALE
'86 1200 (Beth's)(FOR SALE) with motorvation sidecar (sidecar sold) , July 2017 BOTM
'17 HD Road king and 08 HD Heritage softail (Beth's) (FOR SALE). I guess you can say we have MBS
-
Missourimike
- Gold Member

- Posts: 1476
- Joined: Fri Feb 22, 2008 10:44 pm
- Location: Springfield, MO
Re: 1978 GL 1000 "The Tank" Resoration Project
Like the others said, change belts, clean tank, rehab the brakes as they tend to stick after sitting for months. I've had to use 4ft prybar on some, just to get the calipers off the rotor! And the #1 item to get on your list is a Genuine Honda Shop Manual for the GL1000. These bikes are very sophisticated to those with experience on them, but COMPLICATED to the first time owner. Once everything is in order and working, a lifetime of pleasure to own and ride. Don't guess at any part, in the restoration of one.
As for turning an engine over by hand, best use the bolt on the BACK of the engine, at the stator. It's under a cover.
As for turning an engine over by hand, best use the bolt on the BACK of the engine, at the stator. It's under a cover.
The difficult can be done in a day. The impossible takes a little longer, if you don't know it can't be done.
'75 GL YelloWing, '73 Norton Commando, '79 CB750, '80 Fiat Spyder, '83 Silverado w/ BB Cad, to name a few.
'79 Black Hondaline/Vetter bagger Tourer
'76 Yello Café to be
'83 CX650C Needs Work
'83 CX650C #2 Daily Rider
'79 Yamaha XS750
10 others in the project/parts pile
'75 GL YelloWing, '73 Norton Commando, '79 CB750, '80 Fiat Spyder, '83 Silverado w/ BB Cad, to name a few.
'79 Black Hondaline/Vetter bagger Tourer
'76 Yello Café to be
'83 CX650C Needs Work
'83 CX650C #2 Daily Rider
'79 Yamaha XS750
10 others in the project/parts pile
-
alwing17

- Exceptional Member

- Posts: 1853
- Joined: Fri Mar 07, 2008 4:36 pm
- Location: Cleveland,Ohio
Re: 1978 GL 1000 "The Tank" Resoration Project
T-1...Both pulleys should read UP...T-2... Both pulleys should be 180 degs. from UP,they will be upside down. The cams turn 180 degs. for every revolution of the crank.All 4 stroke motors work like this.
1975 GL 1000 "Street Fighter"
1976 GL 1000 "Screaming Yellow Zonker"
1976 GL 1000 Sulfur Yellow x2
1981 GL 1100 "Crown Royal"
1997 GL 1500 Pearl Sapphire Black
1977 GL1000 Cirrius Blue
1977 GL 1000 Skidmark build
1976 GL 1000 Limited
2003 ST 1300 Silver Streak
(And those are just the Gold Wings! With an exception..)
Team 898...25%er...*Beverages Consumed
Team LTD...1/6th'er...* Even more beverages consumed
-
alwing17
- Exceptional Member
- Posts: 1853
- Joined: Fri Mar 07, 2008 4:36 pm
- Location: Cleveland,Ohio
Re: 1978 GL 1000 "The Tank" Resoration Project
When you get her running... This link will help in checking your charging issue...http://www.ngwclub.com/forum/viewtopic.php?f=8&t=27215.
1975 GL 1000 "Street Fighter"
1976 GL 1000 "Screaming Yellow Zonker"
1976 GL 1000 Sulfur Yellow x2
1981 GL 1100 "Crown Royal"
1997 GL 1500 Pearl Sapphire Black
1977 GL1000 Cirrius Blue
1977 GL 1000 Skidmark build
1976 GL 1000 Limited
2003 ST 1300 Silver Streak
(And those are just the Gold Wings! With an exception..)
Team 898...25%er...*Beverages Consumed
Team LTD...1/6th'er...* Even more beverages consumed
1976 GL 1000 "Screaming Yellow Zonker"
1976 GL 1000 Sulfur Yellow x2
1981 GL 1100 "Crown Royal"
1997 GL 1500 Pearl Sapphire Black
1977 GL1000 Cirrius Blue
1977 GL 1000 Skidmark build
1976 GL 1000 Limited
2003 ST 1300 Silver Streak
(And those are just the Gold Wings! With an exception..)
Team 898...25%er...*Beverages Consumed
Team LTD...1/6th'er...* Even more beverages consumed
-
shieldsm
- Billet Alum. Member
- Posts: 256
- Joined: Sat Mar 19, 2011 9:33 am
- Location: Chisago City, MN
Re: 1978 GL 1000 "The Tank" Resoration Project
Day 3:
Did not do too much today. Did the "wiggle test" on the water pump. Not good. Way too much play. That will be replaced later, but I think it will be okay for the initial start up. I don't plan to be riding it before I do the complete tear down anyway. When draining the antifreeze it was very clean but I have not dumped the oil yet to see if any antifreeze got in there.
As far as ignition timing, I have the Dyna III electronic ignition. Am I supposed to do any valve timing with this?
-
shieldsm
- Billet Alum. Member
- Posts: 256
- Joined: Sat Mar 19, 2011 9:33 am
- Location: Chisago City, MN
Re: 1978 GL 1000 "The Tank" Resoration Project
Looked at the main fuse and wiring. It is a mess. Read Whiskerfish's post and I am definitly going to install the inline 30amp fuse!
-
shieldsm
- Billet Alum. Member
- Posts: 256
- Joined: Sat Mar 19, 2011 9:33 am
- Location: Chisago City, MN
Re: 1978 GL 1000 "The Tank" Resoration Project
I put in a inline 30 amp fuse which looks much cleaner. Question. In the pics and my old setup I see the red/white wire going to the starter relay along with the other end of the fuse (they are joined together with a terminal which are connected to the relay). Could I instead just make two seperate terminals instead of both these wires connected together?
So basically now on one side of the relay I have the positive battery cable, one fuse end, and the red/white wire that I believe goes to the ignition. On the other side of the relay is the wire going to the starter. The other end of the fuse is connected to the red wire that was next to the red/white wire.
I had electrical stuff....It seems the relay and what is connected to it is prone to moisture. The top plastic cover is shot to hell. Any ideas to protect the top of thre relay?
-
shieldsm
- Billet Alum. Member
- Posts: 256
- Joined: Sat Mar 19, 2011 9:33 am
- Location: Chisago City, MN
Re: 1978 GL 1000 "The Tank" Resoration Project
Sorry another question for you all.
I bought a rectifier/combo as the previous forums have suggested. Its not one of the newer ones used for the CBR600/1000 but the one I have fits where the old regulator when. The only difference with this one versus the FH00.. model is that is still has a black wire coming out of the new rectifier/regulator. I heard that to prevent the charging issues is to NOT use the black wire. Would it be safe to just cut the black wire coming from the new rectifier/regulator and close off the end. I already unhooked the old regulator and zip tied the old connection off.
I bought a rectifier/combo as the previous forums have suggested. Its not one of the newer ones used for the CBR600/1000 but the one I have fits where the old regulator when. The only difference with this one versus the FH00.. model is that is still has a black wire coming out of the new rectifier/regulator. I heard that to prevent the charging issues is to NOT use the black wire. Would it be safe to just cut the black wire coming from the new rectifier/regulator and close off the end. I already unhooked the old regulator and zip tied the old connection off.