Pics at last!

A forum for stories, pics and updates of your resto's. Be it a barn find, Grampas hand me down or a bike being brought back to it's former glory.If you are restoring it, show us your stuff!

Moderators: Brant, Sagebrush, Forum Moderators

Post Reply
User avatar
Old Fogey
Honored Life Member
Honored Life Member
Posts: 7798
Joined: Mon Aug 27, 2007 11:31 pm
Location: Glasgow, Scotland
Contact:

#331

Post by Old Fogey »

The first big test. (Of both of us :lol: ). ngwsmilie

Heading down south to visit my folks tomorrow, 330miles from Glasgow to Worcester.

Possibly going to head over the next day to visit Alleykat over Coventry way, about 140 miles, then back home around 400 miles. Or not, as the case may be!
Maybe straight back instead. Depends on how the arse blisters are doing :!: :!:

Ever the optimist, I've got the recovery service number safely tucked up in my wallet! crossy.gif
"Impossible Is Just a Level of Difficulty!..."
If I'd wanted you to understand, I would have explained it better! (Johann Cruyff)
I’d give my right arm to be ambidextrous! :-D
User avatar
Whiskerfish
President
President
Posts: 37996
Joined: Thu Feb 16, 2006 9:34 pm
My Album: http://www.ngwclub.com/gallery/v/wingmans/whiskerfish/
Location: Norfolk Va

#332

Post by Whiskerfish »

Sounds like an excellent round robin! Be safe and have fun. Check in with us if you can.
"Agreement is not a requirement for Respect" CDR Michael Smith USN (Ret) 2017
"The book is wrong, this whole Conclusion is Fallacious" River Tam
"Yea I do dance awkwardly, and I am having more fun than you" Taylor Swift
2008 GL1800 IIIA "TH3DOG"
1984 GL1200 Standard
1975/6/7/8/9 Arthur Fulmer Dressed Road bike
1975 Naked Noisy and Nasty in town bike

Psst. oh and by the way CHANGE YOUR BELTS!!!!
User avatar
Hoosier Daddy
True Blue Steel Biker
Posts: 2910
Joined: Thu May 21, 2009 9:12 pm
Location: N.E. Indiana (Kendallville)

#333

Post by Hoosier Daddy »

Nice lil jaunt! enjoy
Bulldoged '81 GL1100 "BOMBER!" BUILD THREAD
Bratstyle '80 GS750L "OVERKILL"
Cafe'd '81 CB750C "ROCK-IT"
Basket Case '72 CB450 K5 "NO CLASS"
Resto-Mod '67 BSA Spitfire "STAY CLEAN"

rainstromrider say's I'm "addicted to the build"... I think he might onto something :)
User avatar
Old Fogey
Honored Life Member
Honored Life Member
Posts: 7798
Joined: Mon Aug 27, 2007 11:31 pm
Location: Glasgow, Scotland
Contact:

#334

Post by Old Fogey »

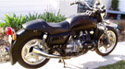
Ah well, that didn't go so good :cry:

Started off in the rain which started to clear about 40 miles out and the skies were looking good.
Stopped in the service area to put my earpieces in and I could smell it immediately. Yeh, the damned oil leak,

Rather than risk it I turned around and headed for home, running right back into what was now a fully fledged storm. Seems every time I take it out on a run I get soaked.

So, back home about 2.30pm, engine out and on the bench ready for stripping by about 6.30pm.

The following day, since virtually everything is built into the right hand crankcase I thought there was just a chance that I might be able to pull the left hand side off by 3/4" and slip an O ring onto the ferrule without a major strip, just the front and rear covers and one timing belt.

Hah! Think again!

The oil pump chain connects the two side so that means the clutch has to come off.
Then the real stupidity. There is a main crankcase bolt UNDERNEATH the left hand head! So the head has to come off just to get this one bolt undone. Clever!

While contemplating this I pulled the oil screen and found it clogged with a large amount of a sort of fibrous material and a fair bit of metal.
OK, so lets get it right apart and see what gives. A chance to see why the gearchange is iffy and noisy too.

How embarrassed am I? About this much- :oops: :oops: :oops: :oops: :oops: :oops: :oops: :oops:

The oil ring round the ferrule.......What ferrule ??????????

Not only forgotten the O, I hadn't even put the ferrule in! Dear God!

The sorry saga doesn't end there either - :oops: :oops: :oops: :oops: :oops:

In spite of taking pictures and telling folk to change the gear lever centring spring, I hadn't spotted the fact that I had missed out a spacer on the claw shaft, so the shaft could (and did) move, distorting the spring in the process. Don't know what happened to the original spacer, nowhere to be seen, so I used some washers to take up the distance.

(They say confession is good for the soul! Hmmmmmmmm, just makes me realise what an idiot I am!)

In spite of the tensioner fitted to the later models, my primary chain felt very slack whilst still built up when I got a finger to it through the gear window in the right hand case, to the extent that I though the tensioner had jammed down. But no, the tensioner was working properly.
It's a rubbish design. Honda back then just couldn't design chain tensioners for some reason.
This chain I know to have only done about 20k so it should be good. Checking it against the old chain that had done high miles I could find NO difference other than the old one could be bent sideways a little more. The lengths were identical. I even went to the length of fitting the old one in, to find it was exactly the same amount of slop to the millimeter, measuring 25 mm from low point to high point installed.

I don't know what a new one would measure and besides, a new one non-OEM would be £90 /$135 which on top of the gasket set was just too much with the trip coming up, so the newest one went back in.

Still haven't found where the fibres were from. Speaking to Cyborg he reckons they could be an accumulation from cleaning cloths. Sounds as likely as anything else as there is nothing in the engine to create stuff like that. And no sign of any damage to cause the odd bits of metal either.


Image


So, it's all back together waiting for the gaskets to arrive and the paint to arrive.

Paint?
Yup, most disappointed with the paint I used. Over the course of 200 miles plus some idling set-up time, some of it has become almost gold!


Image


So I've ordered some fresh paint, supposedly recommended by Yamaha. Just hope it lasts better than the this.
"Impossible Is Just a Level of Difficulty!..."
If I'd wanted you to understand, I would have explained it better! (Johann Cruyff)
I’d give my right arm to be ambidextrous! :-D
User avatar
TomE
Platinum Member
Platinum Member
Posts: 1648
Joined: Wed Nov 21, 2007 4:15 am
My Album: http://www.ngwclub.com/gallery/v/wingmans/TomE/

#335

Post by TomE »

Engine out in four hours? Didn't you stop for a break in there somewhere? That's pretty good!
TomE
Big Red, a '75 Wing
Black Beauty, a '99 Valkyrie
User avatar
Whiskerfish
President
President
Posts: 37996
Joined: Thu Feb 16, 2006 9:34 pm
My Album: http://www.ngwclub.com/gallery/v/wingmans/whiskerfish/
Location: Norfolk Va

#336

Post by Whiskerfish »

Have you inspected the clutch plates?
"Agreement is not a requirement for Respect" CDR Michael Smith USN (Ret) 2017
"The book is wrong, this whole Conclusion is Fallacious" River Tam
"Yea I do dance awkwardly, and I am having more fun than you" Taylor Swift
2008 GL1800 IIIA "TH3DOG"
1984 GL1200 Standard
1975/6/7/8/9 Arthur Fulmer Dressed Road bike
1975 Naked Noisy and Nasty in town bike

Psst. oh and by the way CHANGE YOUR BELTS!!!!
User avatar
Old Fogey
Honored Life Member
Honored Life Member
Posts: 7798
Joined: Mon Aug 27, 2007 11:31 pm
Location: Glasgow, Scotland
Contact:

#337

Post by Old Fogey »

TomE wrote:Engine out in four hours? Didn't you stop for a break in there somewhere? That's pretty good!
Once I get going I don't stop, plenty of time for coffee once it's done.

Yesterday I worked on it from 2.30pm right through till 6.30am due to other sh*t I haven't mentioned like stripped threads, snapped bolts etc with one break about 11pm for food and a coffee break about 3am.

Whiskerfish wrote:Have you inspected the clutch plates?
Yup, all present and correct!
"Impossible Is Just a Level of Difficulty!..."
If I'd wanted you to understand, I would have explained it better! (Johann Cruyff)
I’d give my right arm to be ambidextrous! :-D
User avatar
Whiskerfish
President
President
Posts: 37996
Joined: Thu Feb 16, 2006 9:34 pm
My Album: http://www.ngwclub.com/gallery/v/wingmans/whiskerfish/
Location: Norfolk Va

#338

Post by Whiskerfish »

Unless that fiber is from the break-in of your clutch plates I have no idea's except for what Doug said.

4 hours is actually a bit slow for someone that knows the job and has the proper tools. He must have been slacking off a bit ;) ;) ;) ;) ;)
"Agreement is not a requirement for Respect" CDR Michael Smith USN (Ret) 2017
"The book is wrong, this whole Conclusion is Fallacious" River Tam
"Yea I do dance awkwardly, and I am having more fun than you" Taylor Swift
2008 GL1800 IIIA "TH3DOG"
1984 GL1200 Standard
1975/6/7/8/9 Arthur Fulmer Dressed Road bike
1975 Naked Noisy and Nasty in town bike

Psst. oh and by the way CHANGE YOUR BELTS!!!!
User avatar
Old Fogey
Honored Life Member
Honored Life Member
Posts: 7798
Joined: Mon Aug 27, 2007 11:31 pm
Location: Glasgow, Scotland
Contact:

#339

Post by Old Fogey »

In another thread, we got on to the subject of the chain tensioner which prompted me to look at this again.

My chain tensioner plastic surface is quite flat, more or less in line with the metal backing. I thought it was the way it was made.

However, looking very closely at the fisces for that part it would appear there should be a pronounced hump on the hard plastic part, which was the way I thought it should have been made, so obviously most of it has been worn away. That's a lot of material which could have explained this screen from the first strip down.


Image


This part 23137-431-000 is discontinued. However, with much searching I think I have found one, waiting for a reply back.

Noooooooooooooo. That means I've got to strip it again. Fortunately I'm still waiting for the head gasket to arrive and it's still on the bench.
"Impossible Is Just a Level of Difficulty!..."
If I'd wanted you to understand, I would have explained it better! (Johann Cruyff)
I’d give my right arm to be ambidextrous! :-D
User avatar
Sagebrush
Run Executive
Run Executive
Posts: 6537
Joined: Wed Aug 15, 2007 10:35 pm
My Album: http://www.ngwclub.com/gallery/v/wingmans/album269/
Location: Raleigh, NC

#340

Post by Sagebrush »

Old Fogey wrote:So, it's all back together waiting for the gaskets to arrive and the paint to arrive.

Paint?
Yup, most disappointed with the paint I used. Over the course of 200 miles plus some idling set-up time, some of it has become almost gold!
O.F. what type of paint did you use? Was it a high temperature engine enamel or an off the shelf run of the mill rattle can paint?
Dean Spalding
Raleigh, NC

"Two things are infinite: the universe and human stupidity; and I'm not sure about the universe." - Albert Einstein

'82 Yellow GL1100
'81 Blue GL1100

My Gallery
My 1100 Build Thread
User avatar
Old Fogey
Honored Life Member
Honored Life Member
Posts: 7798
Joined: Mon Aug 27, 2007 11:31 pm
Location: Glasgow, Scotland
Contact:

#341

Post by Old Fogey »

Sagebrush wrote:
Old Fogey wrote:So, it's all back together waiting for the gaskets to arrive and the paint to arrive.

Paint?
Yup, most disappointed with the paint I used. Over the course of 200 miles plus some idling set-up time, some of it has become almost gold!
O.F. what type of paint did you use? Was it a high temperature engine enamel or an off the shelf run of the mill rattle can paint?
Well, it was supposed to be high temp but not specifically for engines. I think their definition of 'high temperature' could do with some fine tuning.

:idea: Just thought. I found that it wasn't fuel proof after painting it! So rather than strip it I used a fuel proof laquer over the top. I bet that's what's discoloured. :oops:

What do you think? Should I strip it all off or clean it all, scotchbrite everything and respray. The pain is solid, just discoloured, the original but scabby Honda paint is still there under that.
The new paint IS engine specific.
"Impossible Is Just a Level of Difficulty!..."
If I'd wanted you to understand, I would have explained it better! (Johann Cruyff)
I’d give my right arm to be ambidextrous! :-D
User avatar
Whiskerfish
President
President
Posts: 37996
Joined: Thu Feb 16, 2006 9:34 pm
My Album: http://www.ngwclub.com/gallery/v/wingmans/whiskerfish/
Location: Norfolk Va

#342

Post by Whiskerfish »

I bet you are 100% correct that the lacquer is what yellowed not the paint. What a shame. Depending on the type of paint you are going to put on, I would clean it scuff it and squirt it. Some paints do not like to adhere to lacquer's real well and will bubble or orange peal so a small test area might be good while you are waiting for parts.
"Agreement is not a requirement for Respect" CDR Michael Smith USN (Ret) 2017
"The book is wrong, this whole Conclusion is Fallacious" River Tam
"Yea I do dance awkwardly, and I am having more fun than you" Taylor Swift
2008 GL1800 IIIA "TH3DOG"
1984 GL1200 Standard
1975/6/7/8/9 Arthur Fulmer Dressed Road bike
1975 Naked Noisy and Nasty in town bike

Psst. oh and by the way CHANGE YOUR BELTS!!!!
User avatar
Rat
Photo Gallery Admin
Photo Gallery Admin
Posts: 15933
Joined: Fri Oct 21, 2005 9:59 pm
My Album: https://www.ngwclub.com/gallery/v/wingmans/rat/
RIP: cookie, KyPM, Roady
Location: Toronto .... Canada

#343

Post by Rat »

Don't we just love riding and WRENCHING these ole bikes? :roll:

Keep us up on the continuing saga.

Gord :coffee
"I'd rather Ride than Shine"
‘14 KLR650 ... not a rat ... yet
‘84 GL1200i ‘R2B6' (Rat to Be 6, the last, adopted by twowings)
My Original 'RAT' was a hybrid '82 CB900/1100F
User avatar
Cookie
Honored Life Member
Honored Life Member
Posts: 15821
Joined: Thu Oct 25, 2007 11:37 pm
RIP: 1950-2011
Location: San Mateo, CA

#344

Post by Cookie »

Where the heck is that shop rag?
I admire that you have found a method of antiqueing engine paint. It has taken many years for the folks in the antique and document field to discover proper methods of doing this.
They say that practice makes perfect but you might consider adapting your engine for Dzus fasteners.
http://www.southco.com/landingpages/dzus/
Enjoy life,
Cookie


A guy with two sidecars can't be all bad.
Owner of 4.4 76s and one lone 75 Wings (does a spare engine make .2?)
User avatar
TomE
Platinum Member
Platinum Member
Posts: 1648
Joined: Wed Nov 21, 2007 4:15 am
My Album: http://www.ngwclub.com/gallery/v/wingmans/TomE/

#345

Post by TomE »

Strip the paint. It's just too easy for incompatible paints to mess each other up. And this way, you can do primer, base coat, clear coat if you want.

Stripping the paint is easy when the motor is out. A good chemical stripper, a garden hose, and a bit of steel wool should do the job in 20 minutes or so.
TomE
Big Red, a '75 Wing
Black Beauty, a '99 Valkyrie
Post Reply

Return to “Members Restorations and Projects”