'86 SE-i That Followed Me Home
Moderators: Brant, Sagebrush, Forum Moderators
-
ritalz
- Honored Life Member

- Posts: 4326
- Joined: Sat Jun 25, 2005 10:22 am
- Location: St Louis, MO
Re: '86 SE-i That Followed Me Home
When adding beads I always mount the tire on the rim and go ahead an seat the bead. Then use the bead breaker again to open a slot big enough to pour in the beads. Way easier than trying to poke them in through the stem. I also use more beads in the rear tire.
Al
2003 Goldwing Daily Rider
1975 Goldwing 'Max'
1984 Goldwing New Bagger Project
1986 Goldwing Aspy 2nd daily rider
1976 Goldwing 'Grocery Getter' Sold
1985 Goldwing Interstate 'NCC-1985' sold
1981 Silverwing Sold
1982 Goldeing Project Sold
1981 Goldwing Parted Out
1983 Goldwing Project Sold
1973 CB500F Long Gone
1966 CL77 First Street Bike
http://www.ngwclub.com/gallery3/index.p ... ans/ritalz
-
Rat

- Photo Gallery Admin

- Posts: 16006
- Joined: Fri Oct 21, 2005 9:59 pm
- My Album: https://www.ngwclub.com/gallery/v/wingmans/rat/
- RIP: cookie, KyPM, Roady
- Location: Toronto .... Canada
Re: '86 SE-i That Followed Me Home
How disappointing … hard to believe the guy let you travel all that way without checking to see if he actually had what you came for
Gord
Gord
"I'd rather Ride than Shine"
'13 Honda NC700sa … TNG
‘14 KLR650 ... not a rat ... yet
‘84 GL1200i ‘R2B6' (Rat to Be 6, the last, adopted by twowings)
My Original 'RAT' was a hybrid '82 CB900/1100F
'13 Honda NC700sa … TNG
‘14 KLR650 ... not a rat ... yet
‘84 GL1200i ‘R2B6' (Rat to Be 6, the last, adopted by twowings)
My Original 'RAT' was a hybrid '82 CB900/1100F
-
3KidsinAustin

- Chrome Member

- Posts: 161
- Joined: Sat Feb 08, 2025 5:04 pm
Re: '86 SE-i That Followed Me Home
Yes, it was a bit frustrating, but I won't fault him. He is an older gentleman with health issues that has been in the GW hobby for decades. He had a stack of titles, just not paired exactly to what he thought he had. It ended ok, with a very nice frame that I do not have to do any work to pretty up.
Been carefully removing parts off the original frame the past couple of days. The first day was spent removing things from the rear of the bike - there wasn't much there, but I took off the lever that attaches to the swingarm for the height controller module, battery box, rear brake, etc. A few things are mounted back on the bike. Yesterday I focused on the front, stripping off the handlebars, all associated wiring, fairing brace and such. After getting everything off the forks, I discovered the steering head bearings are definitely shot - not a smooth transition between left and right, very disjointed and rough.
The goal for today will be to get the main harness removed and everything off the bike except the FI system and engine. Might be too lofty of a goal, we'll see.
As parts are getting removed, they are getting cleaned in the buzz box, or is electronic - a good wipe down. Going to paint the brackets that I've removed so far in Rustoleum hammered bronze, it might be a close enough match to the frame.
Of course, lots and lots of pictures being taken so I can hopefully remember how this puzzle all goes back together!
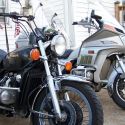
Current state of affairs:
You do not have the required permissions to view the files attached to this post.
1985 Limited (SOLD) - Build Thread Here: https://goldwingdocs.com/forum/viewtopic.php?t=72752
1986 Aspencade (SOLD): viewtopic.php?p=829477#p829477
1986 SE-i (Current Project): viewtopic.php?p=831425#p831425
1984 Interstate (Future Project)
1986 Aspencade (SOLD): viewtopic.php?p=829477#p829477
1986 SE-i (Current Project): viewtopic.php?p=831425#p831425
1984 Interstate (Future Project)
-
Rednaxs60
- Gold Member

- Posts: 1123
- Joined: Mon Nov 30, 2015 11:14 pm
- Location: Victoria, BC, Canada
Re: '86 SE-i That Followed Me Home
These FI models are a wiring nightmare. Understand what you are going through. BTDT when I rebuilt the engine and painted my '85. Had the frame tucked in the corner by the hot water tank. Had a lot of wiring to make nice:
Worth it when finished.
You do not have the required permissions to view the files attached to this post.
"When writing the Story of your life, don't let anyone else hold the pen."
Ernest
1985 GL1200 Limited Edition
2014 Can-Am Spyder RT LE
2021 Royal Enfield Himalayan (sold)
1995 GL1500 SE CDN Edition (sold)
2012 Suzuki DL1000 VStrom (sold)
Ontario 1985 GL1200 Limited Edition (sold)
2008 GL1800 (sold)
Ernest
1985 GL1200 Limited Edition
2014 Can-Am Spyder RT LE
2021 Royal Enfield Himalayan (sold)
1995 GL1500 SE CDN Edition (sold)
2012 Suzuki DL1000 VStrom (sold)
Ontario 1985 GL1200 Limited Edition (sold)
2008 GL1800 (sold)
-
3KidsinAustin
- Chrome Member
- Posts: 161
- Joined: Sat Feb 08, 2025 5:04 pm
Re: '86 SE-i That Followed Me Home
Yep, it's a lot. Fortunately, as of about 15 minutes ago, it is all out of the bike. I wrestled everything out through the rear, mainly because the cruise control module was still attached and it looked complicated to remove. Now that everything is out, I'll take that off and clean the harness. I think installation might be easier coming in from the front of the bike as it got a bit tight between the top of the intake manifold and one of the frame cross bars.
To reduce clutter around the bike, I finally reassembled the brake calipers so I could store them out of the way and use their boxes to store specific systems to hopefully minimize confusion when time to reassemble. Because I wanted to really clean the harness, I held off on tagging every connector, relying on lots of pictures instead. I'm hoping to not regret that decision...
Probably done on the bike today as I've been putting off other projects to focus on it. Wife isn't irritated yet, but no sense in pushing my luck.
Probably done on the bike today as I've been putting off other projects to focus on it. Wife isn't irritated yet, but no sense in pushing my luck.
You do not have the required permissions to view the files attached to this post.
1985 Limited (SOLD) - Build Thread Here: https://goldwingdocs.com/forum/viewtopic.php?t=72752
1986 Aspencade (SOLD): viewtopic.php?p=829477#p829477
1986 SE-i (Current Project): viewtopic.php?p=831425#p831425
1984 Interstate (Future Project)
1986 Aspencade (SOLD): viewtopic.php?p=829477#p829477
1986 SE-i (Current Project): viewtopic.php?p=831425#p831425
1984 Interstate (Future Project)
-
3KidsinAustin
- Chrome Member
- Posts: 161
- Joined: Sat Feb 08, 2025 5:04 pm
Separation Day
Unexpectedly, today ended up being the day the untitled frame was separated from its engine. My only intention was to remove the front mount bolts and the engine cover/frame hoop so I could clean them up. Then I just started checking that I could access the engine mount bolts and they turned - yup. Next thing you know, I have all the bolts loosened and have gone to the hardware store to get an M10x1.25 nut so I could bang on the long bolt that holds up the rear of the engine to the triangle mounts. I also took the opportunity to completely remove the rear swingarm. It took a lot of persuasion - first with penetrant, then lots of heat, and finally some working over with the ugga-ugga gun. Once it spun out, I could see why it was so firmly entrenched.
I'd spent lots of time yesterday thinking about how to brace the engine as my plan was to keep the engine in place and pull the frame off away from it. I already had my main scissor jack supporting the weight of the engine and the bike, but I added a scissor jack for changing a tire to the rear transmission housing to keep it from tipping backwards. Then, unsure of its potential movement left to right with the frame removed, I squeezed a couple of jack stands under the valve covers.
Once all the bolts were removed, I was surprised by how stable everything remained. Chalk it up to beginner's luck! Keeping the jack stand in place on the left side, I removed the right then carefully lifted the frame away. I had to first clear the rear of the engine which gave me enough space to move the frame forward and clear the water pump housing and oil filter. Removing the swingarm took a substantial portion of the weight off the frame and made it considerably less bulky.
After this picture was taken, the frame got a good washing and dried out in the sun. I'll have to find a way to store this where it won't get damaged in the event the Seller ever finds the title.
My plan is to spend the next day or two continuing to clean up the engine and give hit it with a bit of spray paint - the bare spots you see on the rear engine cover are where I have already worked it over with a steel brush. A few areas of oxidation and where fluid had damaged the paint. I'm leaving the intake and injection system in place, so that will limit a 100% cleanup, but this will be "good-nuff."
I'm already thinking that I'll strip the new frame of its swingarm and front forks to make installation easier. Then - with a friend's help - swing the frame back onto the engine and get the bolt holes lined up. Definitely expecting installation to be a bit tougher than removal, but all in all I am pleased with the progress.
You do not have the required permissions to view the files attached to this post.
1985 Limited (SOLD) - Build Thread Here: https://goldwingdocs.com/forum/viewtopic.php?t=72752
1986 Aspencade (SOLD): viewtopic.php?p=829477#p829477
1986 SE-i (Current Project): viewtopic.php?p=831425#p831425
1984 Interstate (Future Project)
1986 Aspencade (SOLD): viewtopic.php?p=829477#p829477
1986 SE-i (Current Project): viewtopic.php?p=831425#p831425
1984 Interstate (Future Project)
-
3KidsinAustin
- Chrome Member
- Posts: 161
- Joined: Sat Feb 08, 2025 5:04 pm
Frame Swap Complete
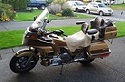
Turned a big corner this afternoon after getting the title frame bolted onto the engine. Seeing as how easy it was to remove the old frame with the swingarm and forks removed, I did the same with the new frame. The tires were old so would have had to come off anyway. With those parts removed, it was fairly easy to lift it up and around the engine to clear the water pump and begin to bolt it up. I'm glad I'd read up ahead of time that it would take some twisting and prying to line up the bolt holes - a pry bar came in handy at the end to get the top brackets lined up. Here are some pictures of the beautification and installation process. The Duplicolor Cast Aluminum engine paint I used is a pretty close match. Not perfect as I show in one of the pics, but good enough for the gal I date.
During this project, I began to understand why these Goldwings are so heavy. I had to swap the top steering brace as it turned out the new one had a bolt stuck inside and had been poorly drilled out. That piece alone weighs almost two pounds! That's 899 grams for our cousins up north that are smart enough to have adopted the very sensible metric system!
You do not have the required permissions to view the files attached to this post.
1985 Limited (SOLD) - Build Thread Here: https://goldwingdocs.com/forum/viewtopic.php?t=72752
1986 Aspencade (SOLD): viewtopic.php?p=829477#p829477
1986 SE-i (Current Project): viewtopic.php?p=831425#p831425
1984 Interstate (Future Project)
1986 Aspencade (SOLD): viewtopic.php?p=829477#p829477
1986 SE-i (Current Project): viewtopic.php?p=831425#p831425
1984 Interstate (Future Project)
-
3KidsinAustin
- Chrome Member
- Posts: 161
- Joined: Sat Feb 08, 2025 5:04 pm
Frame Swap Complete #2
Limited on the pictures per post, so a few of the completed project and process. I purchased a metric thread chaser set just to help repair any buggered threads that I caused. This turned out to be a great investment as I could clean up all the studs from the powdercoating process.
Stopped for the day after I got everything bolted in. Tomorrow I'll start routing the clutch and brake lines, then lay the wiring in place and begin hooking things up. Hopefully I took enough pictures along the way! (I have about 220 separate pictures saved in my "Frame Swap" folder)
You do not have the required permissions to view the files attached to this post.
1985 Limited (SOLD) - Build Thread Here: https://goldwingdocs.com/forum/viewtopic.php?t=72752
1986 Aspencade (SOLD): viewtopic.php?p=829477#p829477
1986 SE-i (Current Project): viewtopic.php?p=831425#p831425
1984 Interstate (Future Project)
1986 Aspencade (SOLD): viewtopic.php?p=829477#p829477
1986 SE-i (Current Project): viewtopic.php?p=831425#p831425
1984 Interstate (Future Project)
-
3KidsinAustin
- Chrome Member
- Posts: 161
- Joined: Sat Feb 08, 2025 5:04 pm
Re: '86 SE-i That Followed Me Home
Wiring is coming along. The main trunk lines are in and mostly connected. I need to install the handlebars and controls to hook on the rest.
The front fairing mount needed to be refinished, so that got sanded down today and painted with some Rust-Oleum Rust Converter. Good time to also do the kickstand.
You do not have the required permissions to view the files attached to this post.
1985 Limited (SOLD) - Build Thread Here: https://goldwingdocs.com/forum/viewtopic.php?t=72752
1986 Aspencade (SOLD): viewtopic.php?p=829477#p829477
1986 SE-i (Current Project): viewtopic.php?p=831425#p831425
1984 Interstate (Future Project)
1986 Aspencade (SOLD): viewtopic.php?p=829477#p829477
1986 SE-i (Current Project): viewtopic.php?p=831425#p831425
1984 Interstate (Future Project)
-
3KidsinAustin
- Chrome Member
- Posts: 161
- Joined: Sat Feb 08, 2025 5:04 pm
First Start on New Frame
Hooked up the ECU this afternoon and the bike roared to life - literally, given the complete lack of exhaust. Sounded worse than a Harley! Regardless, the computer was happy, not flashing any LEDs. Now that I know the wiring is all hooked up correctly, I'll go through my pictures and make sure I have all the bundles attached with the factory zip ties in the right locations. Next is reinstalling all the subsystems. I'll probably hook up the cooling system, then front forks, then bleed out the three calipers before installing the gas tank. Things just get so much more inconvenient once the tank is in place.
Here is the short clip I took on firing it up. I was first trying to prime the system and was getting concerned because there was no fuel pump action or lights on the ECU. Then I remembered I had turned the engine kill switch to OFF while cleaning the controls and forgot to turn it on...
Here is the short clip I took on firing it up. I was first trying to prime the system and was getting concerned because there was no fuel pump action or lights on the ECU. Then I remembered I had turned the engine kill switch to OFF while cleaning the controls and forgot to turn it on...
1985 Limited (SOLD) - Build Thread Here: https://goldwingdocs.com/forum/viewtopic.php?t=72752
1986 Aspencade (SOLD): viewtopic.php?p=829477#p829477
1986 SE-i (Current Project): viewtopic.php?p=831425#p831425
1984 Interstate (Future Project)
1986 Aspencade (SOLD): viewtopic.php?p=829477#p829477
1986 SE-i (Current Project): viewtopic.php?p=831425#p831425
1984 Interstate (Future Project)
-
Rednaxs60
- Gold Member
- Posts: 1123
- Joined: Mon Nov 30, 2015 11:14 pm
- Location: Victoria, BC, Canada
Re: '86 SE-i That Followed Me Home
Excellent!!
"When writing the Story of your life, don't let anyone else hold the pen."
Ernest
1985 GL1200 Limited Edition
2014 Can-Am Spyder RT LE
2021 Royal Enfield Himalayan (sold)
1995 GL1500 SE CDN Edition (sold)
2012 Suzuki DL1000 VStrom (sold)
Ontario 1985 GL1200 Limited Edition (sold)
2008 GL1800 (sold)
Ernest
1985 GL1200 Limited Edition
2014 Can-Am Spyder RT LE
2021 Royal Enfield Himalayan (sold)
1995 GL1500 SE CDN Edition (sold)
2012 Suzuki DL1000 VStrom (sold)
Ontario 1985 GL1200 Limited Edition (sold)
2008 GL1800 (sold)
-
3KidsinAustin
- Chrome Member
- Posts: 161
- Joined: Sat Feb 08, 2025 5:04 pm
Front End Coming Together
Been working in small segments as the August heat in Austin can quickly wear you out. Over the last couple of days I've mounted the timing covers (trying just the outer bolts for easy access to view timing marks), radiator and the front forks. Starting to resemble a motorcycle after each addition, and that has been keeping me motivated.
Will be tackling the hydraulics next. I want to make sure the Rear MC and clutch slave are working properly before stuffing the tank back into place.
You do not have the required permissions to view the files attached to this post.
1985 Limited (SOLD) - Build Thread Here: https://goldwingdocs.com/forum/viewtopic.php?t=72752
1986 Aspencade (SOLD): viewtopic.php?p=829477#p829477
1986 SE-i (Current Project): viewtopic.php?p=831425#p831425
1984 Interstate (Future Project)
1986 Aspencade (SOLD): viewtopic.php?p=829477#p829477
1986 SE-i (Current Project): viewtopic.php?p=831425#p831425
1984 Interstate (Future Project)
-
ritalz
- Honored Life Member
- Posts: 4326
- Joined: Sat Jun 25, 2005 10:22 am
- Location: St Louis, MO
Re: '86 SE-i That Followed Me Home
Progress is progress. Using just the outer bolts on the timing covers is good for future maintenance.
Al
2003 Goldwing Daily Rider
1975 Goldwing 'Max'
1984 Goldwing New Bagger Project
1986 Goldwing Aspy 2nd daily rider
1976 Goldwing 'Grocery Getter' Sold
1985 Goldwing Interstate 'NCC-1985' sold
1981 Silverwing Sold
1982 Goldeing Project Sold
1981 Goldwing Parted Out
1983 Goldwing Project Sold
1973 CB500F Long Gone
1966 CL77 First Street Bike
http://www.ngwclub.com/gallery3/index.p ... ans/ritalz
2003 Goldwing Daily Rider
1975 Goldwing 'Max'
1984 Goldwing New Bagger Project
1986 Goldwing Aspy 2nd daily rider
1976 Goldwing 'Grocery Getter' Sold
1985 Goldwing Interstate 'NCC-1985' sold
1981 Silverwing Sold
1982 Goldeing Project Sold
1981 Goldwing Parted Out
1983 Goldwing Project Sold
1973 CB500F Long Gone
1966 CL77 First Street Bike
http://www.ngwclub.com/gallery3/index.p ... ans/ritalz
-
3KidsinAustin
- Chrome Member
- Posts: 161
- Joined: Sat Feb 08, 2025 5:04 pm
Tank Installed
Always a major milestone when the fuel tank is installed. To me, it signifies that all the nearby, ancillary systems are checked out and ready. Yesterday I'd installed and bled 3/4 of the hydraulic clutch and brake systems. Waiting on a rebuild kit for the front master cylinder, but that area is unaffected by the tank status.
I've pulled these in and out at least three times now, one for each bike, so it has gotten easier as I know how to prep the area (remove EVERYTHING) and where to look for binding. Fuel injected models are tougher as the petcock presents a challenge for hooking up to the fuel line with such tight spaces. Regardless, the tank is sitting back in its home! Got a bit ahead of myself when I mounted the inner rear fender. It was then that I realized that the battery box and its electronics needs to be in place before the area is closed off. So it came out and I started routing the wiring harnesses for each side. The extra dog bone fuse that the injected models get is broken on my bike. I've been using a blade fuse holder as a temporary replacement, but now I think I'll route that fuse holder to a more convenient location so it is accessible without removing any major parts.
Onward and upward!
You do not have the required permissions to view the files attached to this post.
1985 Limited (SOLD) - Build Thread Here: https://goldwingdocs.com/forum/viewtopic.php?t=72752
1986 Aspencade (SOLD): viewtopic.php?p=829477#p829477
1986 SE-i (Current Project): viewtopic.php?p=831425#p831425
1984 Interstate (Future Project)
1986 Aspencade (SOLD): viewtopic.php?p=829477#p829477
1986 SE-i (Current Project): viewtopic.php?p=831425#p831425
1984 Interstate (Future Project)
-
Rednaxs60
- Gold Member
- Posts: 1123
- Joined: Mon Nov 30, 2015 11:14 pm
- Location: Victoria, BC, Canada
Re: '86 SE-i That Followed Me Home
I relocated mine as shown in the attached picture. The CFI fuse is circled, the relay is for the accessory fuse block located in the rear trunk:
You do not have the required permissions to view the files attached to this post.
"When writing the Story of your life, don't let anyone else hold the pen."
Ernest
1985 GL1200 Limited Edition
2014 Can-Am Spyder RT LE
2021 Royal Enfield Himalayan (sold)
1995 GL1500 SE CDN Edition (sold)
2012 Suzuki DL1000 VStrom (sold)
Ontario 1985 GL1200 Limited Edition (sold)
2008 GL1800 (sold)
Ernest
1985 GL1200 Limited Edition
2014 Can-Am Spyder RT LE
2021 Royal Enfield Himalayan (sold)
1995 GL1500 SE CDN Edition (sold)
2012 Suzuki DL1000 VStrom (sold)
Ontario 1985 GL1200 Limited Edition (sold)
2008 GL1800 (sold)