Hey Alley Kat ........ very nice work !! You are very talented. Any suggestions on what to use for paint on lower fork legs if done with a rattle can ?? I'm assuming some type of epoxy paint ??
Keep up the good work and keep the pictures coming !!
If you find yourself "Blocked" please contact me via the link below
https://ngwclub.com/forum/app.php/contactadmin
https://ngwclub.com/forum/app.php/contactadmin
My Wing: progress shots
Moderators: Brant, Sagebrush, Forum Moderators
-
Alley Kat
- Silver Member

- Posts: 711
- Joined: Thu Apr 12, 2007 4:11 pm
- Location: UK
Thanks for the kind words ... I'm no pro painter, ElPiloto will have wiser words. But I've done a few rattle jobs and if it were me I'd get primer and hi-build primer. Best get cans made up at a paint shop, you get better quality paint than off the shelf usually and a better spray fan.
Epoxy primer far as I know is a 2-pack paint only (need breathing kit and spraying kit). Not heard of a 1k (single pack) epoxy but there may be one.
Sand and flat best you can, clean everything. Wear gloves. Prime and hi-build prime. Use stopper for small pits etc. Flat & smooth. Clean. Then colour and clear if needs be. Don't go mad with the clear, 1k clear isn't meant for lots of layers and depth, it's prone to cracking if too thick. Flat & polish, can do it by hand with 1500-2500 paper wet, and G3 and G10 compounds.
Well I've got a semblance of a tickover after playing with timing and opening the pilot airscrews a bit. Still damned if I can get a timing mark to play the game, non-running or otherwise. But beer calls, so happy xmas everybody... see you on the other side...
-
Cookie

- Honored Life Member

- Posts: 15821
- Joined: Thu Oct 25, 2007 11:37 pm
- RIP: 1950-2011
- Location: San Mateo, CA
-
ElPiloto
- True Blue Steel Biker

- Posts: 2085
- Joined: Fri Apr 06, 2007 4:01 pm
- Location: Southern Arizona
Understanding those words makes you a pro for knowledge. The rest is just practice applying the paint.Sand and flat best you can, clean everything. Wear gloves. Prime and hi-build prime. Use stopper for small pits etc. Flat & smooth. Clean. Then colour and clear if needs be. Don't go mad with the clear, 1k clear isn't meant for lots of layers and depth, it's prone to cracking if too thick. Flat & polish, can do it by hand with 1500-2500 paper wet, and G3 and G10 compounds.
My best advice for any paint work: 95% of a good paint job is the preparation of the surface.
That means a lot of sanding in progressively finer grades. On curved surfaces use a sanding pad, not a sanding block. My advice for rattle can painters is the above and put the rattle cans in very warm water for 20 minutes before you start spraying. This will give you a better spraying fan and finer atomization.
Painting is fun. Relax and enjoy the experience. Don't worry.
"Some Cats Got it, Some Cats Ain't"
-
Doby Pilgrim
- Titanium Member

- Posts: 343
- Joined: Mon Jul 09, 2007 12:34 am
- Location: Santa Fe, NM USA
Putting the cans in warm water is a GREAT tip, and in all my 50 years, I had not heard of that. I live a sheltered life, but once painted a car with rattle cans. It actually came out OK, believe it or not. NOT great, but good enough to sell it!
Doby
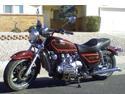
[img]http://i264.photobucket.com/albums/ii194/dobypilgrim/Copyofpic7.jpg[/img]
1983 Naked GL1100
1995 Customized VS1400
2000 Vulcan Classic
[img]http://i264.photobucket.com/albums/ii194/dobypilgrim/Copyofpic7.jpg[/img]
1983 Naked GL1100
1995 Customized VS1400
2000 Vulcan Classic
-
sodbuster

- Gold Member

- Posts: 1379
- Joined: Sun Jul 09, 2006 10:34 pm
- Location: S. Haven, Mn
Alley Kat / ElPiloto
Seeing as how the lower fork legs are clear coated aluminum (on my '83 anyway) I was thinking of just stripping the factory clear coat, cleaning up the aluminum or polish and reaplying a new top coat of clear epoxy. Is that something that sounds realistic or am I way off base. The existing factory clear coat is getting that dreaded cloudy yellowish look and is very distracting.
I've seen your work so I know I'm in good company for advice. Again, nice work.
'06 H-D Road King
'99 Valkyrie Standard - TOTALED :(
'83 GL1100 Standard - SOLD
'82 CB900F - Black & Red - SOLD
'99 Valkyrie Standard - TOTALED :(
'83 GL1100 Standard - SOLD
'82 CB900F - Black & Red - SOLD
-
ElPiloto
- True Blue Steel Biker
- Posts: 2085
- Joined: Fri Apr 06, 2007 4:01 pm
- Location: Southern Arizona
-
sodbuster
- Gold Member
- Posts: 1379
- Joined: Sun Jul 09, 2006 10:34 pm
- Location: S. Haven, Mn
-
ElPiloto
- True Blue Steel Biker
- Posts: 2085
- Joined: Fri Apr 06, 2007 4:01 pm
- Location: Southern Arizona
I don't know about clear epoxy. I would use a very high quality urethane clearcoat. The better ones have the best UV protectors. By high quality, I meant DuPont or PPG.
Actually, if you just keep them waxed with a good car wax, they will not oxidize for a long time. Once they are polished, they are easily re-polished by hand.
Actually, if you just keep them waxed with a good car wax, they will not oxidize for a long time. Once they are polished, they are easily re-polished by hand.
"Some Cats Got it, Some Cats Ain't"
-
sodbuster
- Gold Member
- Posts: 1379
- Joined: Sun Jul 09, 2006 10:34 pm
- Location: S. Haven, Mn
-
Alley Kat
- Silver Member
- Posts: 711
- Joined: Thu Apr 12, 2007 4:11 pm
- Location: UK
So I got me an xenon light with advance dial, tried timing on the flywheel but it wasn't happening. Odd. Painted a white line on one of the optical "choppers" on the ign unit, and started to move the base plate to line up the marks, with 5 degress advance, using the light set to 5 deg btdc. Still rough. Dismantling showed bright metal on the ATU bob-weights, and it seems the weights have been chafing on the underside of the timing baseplate, where there's a small rivetted plate. OK, so choppers / advance is 'sticky' hence causing probs using the strobe. Now we're getting somewhere. Spaced the ignition housing away from the AT housing with a couple of washers, and the chopper springs freely back & forth now. Good. But then the starter solenoid packed up.  It'll be 2 weeks before I can get a new one from David Silver. Progress of a sort, I guess.
-
Cookie
- Honored Life Member
- Posts: 15821
- Joined: Thu Oct 25, 2007 11:37 pm
- RIP: 1950-2011
- Location: San Mateo, CA
-
Alley Kat
- Silver Member
- Posts: 711
- Joined: Thu Apr 12, 2007 4:11 pm
- Location: UK
True words. Got to expect things to go t*ts up I guess, as it's not run for 8 years till now. Got a Honda relay off ebay for £14 delivered ($28) which looks very similar and maybe identical to the Wing one. OEM one here is £32/$64.
Ordered some foam for the seat re-covering - an army camping mat. Want a very thin seat, the 'glass base is quite flexy and rubber mounted so it might be OK.
Ordered some foam for the seat re-covering - an army camping mat. Want a very thin seat, the 'glass base is quite flexy and rubber mounted so it might be OK.
-
Cookie
- Honored Life Member
- Posts: 15821
- Joined: Thu Oct 25, 2007 11:37 pm
- RIP: 1950-2011
- Location: San Mateo, CA
-
Alley Kat
- Silver Member
- Posts: 711
- Joined: Thu Apr 12, 2007 4:11 pm
- Location: UK
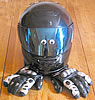
Q: Can you guess what it is?

A: Decided to polish the paint a bit, it had some swirl, prob from a foam head that's gone a bit hard. Seemed a good idea for something to pass the time too, having a fever and not sleeping for a couple of days. Piccy's a reflection off a dummy tank panel. In reality they aren't concours by any means, but are good enough.
A: Decided to polish the paint a bit, it had some swirl, prob from a foam head that's gone a bit hard. Seemed a good idea for something to pass the time too, having a fever and not sleeping for a couple of days. Piccy's a reflection off a dummy tank panel. In reality they aren't concours by any means, but are good enough.