
Kit needed:
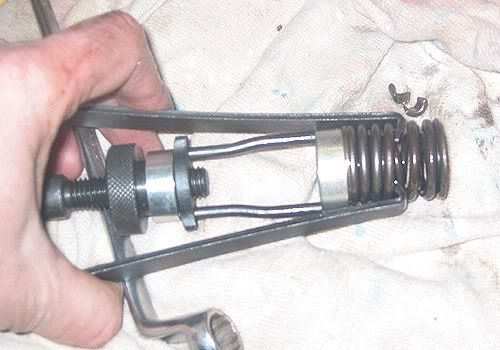
Valve spring compressor, the type that hooks into the springs.
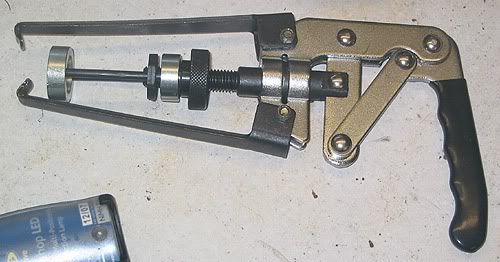
A spring compressor yesterday
And a way of filling the cylinder: you can do the old school rope trick of stuffing nylon rope into the chamber, or use compressed air (which I did).
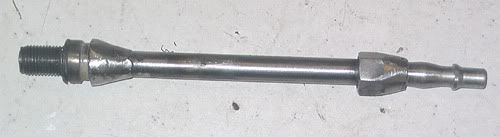
Home-lashed-up air adaptor:
I couldn't find any 12mm adaptors to buy, and anyway this cost £0 as the bits were lying around, which is my all-time favourite price especially for stuff I'm not likely to use very often.
Batter a spark plug with hammer & chisel to crack off the top ceramic part. Drill out the rest (hammer action), trim off the electrode, hollow out the plug.
Weld an air hose adaptor to a steel tube, along with a nut, so the thing can be tightened (or you could weld t-handles). The plug body gets welded to the other end of the tube of course.
A fair bit has to come off but it is easy stuff. I preferred to leave perfectly OK heads where they were, and save the cost of gaskets etc. Not to mention I'd be forced to clean and smooth the ports, lap valves, and consider swapping in earlier cams, and so on... Avoiding that path of temptation made much sense for me.
Drain coolant, and get the rad off. You'll have your own ways but I undo the top hose off the engine housing, and undo the lower housing so the hoses stay with the rad. Seems easiest.
Put the crank to TDC on #1 (T1 mark aligned).
Remove the front timing belt covers.
Loosen the belts in the normal way and remove the outer pulleys. Reason for this is that the inner belt covers must come off, because one LHS one has a bolt going into the rocker block, and also the gaskets will be mangled when removing the rocker blocks.
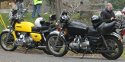
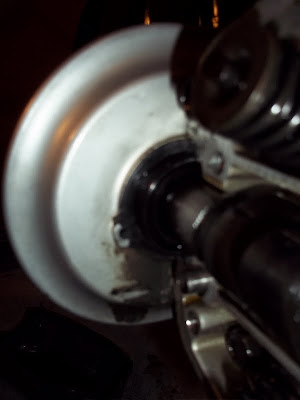
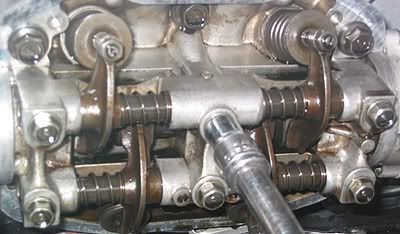
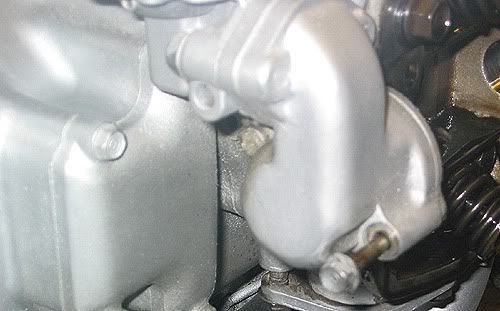
Put the bike on a centre stand, in my case I'd removed it, so axle stands did the job. Reason for this is that the exhaust valves point downards, and reducing that angle helps a bit with fiddling with the valve collets later. Here's a pic showing the pointy end...
LHS first:
Remove the engine-side timing belt cover, which the camshaft is poking through. You'll need to buy or make a new gasket for that.
Remove the valve cover.
Carefully undo the 6 rocker block bolts, I did a diagonal pattern, bit at a time, just in case - don't want to warp this. Remove the rocker block.
I left the cam in place, and just held the forward end up with a bungee to stop it flapping about.
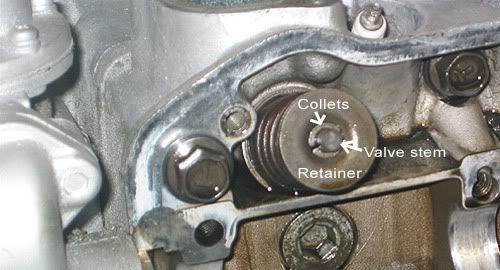
Now the pressure on the valves is released, and they're all closed.
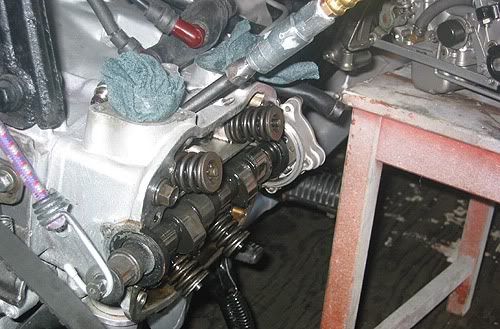
Mount the air adaptor into a plug hole (or do the rope thing). Hook up the compressor and let it fill up. You want about 90-120psi roughly, just enough to keep the valve pushed closed is all.
Get the spring comp hooked into the spring as low as poss, and adjust the collar so it sits ontop the valve. Compress the spring. The cam action locks the spring comp so you can lift off the springs and comp as a unit later.
I used a telescopic OSM ("Oh Sh*t" Magnet) to get the collets out, sometimes wiggling the spring a bit to give space. One did ping across the floor, where one of the garage monkeys stole it, never to be seen again.

Withdraw the tool/spring as a unit.
Remove the old seal. Mine got destroyed doing this, had to get fairly medieval on them.
The new ones slip on very easily.
Back on with tool/springs, and now the fun starts...
You might have your own way, but I did this:
Tilt the tool/spring to give room around the valve stem where you want the collet to go. Stick a collet onto the OSM, and poke that into the retainer. Poke the collet off the magnet with a screwdriver. Then move the valve spring/tool to hold the collet in place. Do a similar job with the other collet.
For this stage that extra arm that Ma Nature or a dubious family history gave you is very useful. Or a tame fully garage-trained chimp. The chimp's better, he can also manage the beer fridge.
Undo the tool. I like to poke the collets a bit, or mood depending, put a piece of wood on the valve stem and give it a tap. A sturdy tap. To help seat the retainer/collets. Makes me feel better anyway.
RHS:
Undo the outer 10mm bolt on the fuel pump block - or remove the block completely.
Remove the rocker block as before. The cam wanted to stay with the rocker block, who am I to come between such close friends, I left them be.
The rest is as before.
Assembly:
The rocker blocks want about 20lbs torque on bare threads, so a bit less if they're oily.
Oil up cams, rocker pads, bearing surfaces and of course make sure they're clean. I used cam assembly lube because I had some, otherwise oil would be OK.
Throw the other stuff back onto the engine, remembering to turn it over a couple of times on the 12mm rear bolt and then do the valve clearances. I'll do them again after one engine run-up too.
Home-made gaskets:
I made gaskets using kiddies' blue waterpaint to get an imprint, a scalpel, and I have bits of tube sharpened up on the bench grinder as a hole punches, an old air fitting likewise, for different size holes.
When punching a hole put a piece of card or another bit of gasket paper under the target piece. Tap the punch with a hammer, and it'll punch a nice hole out, much better than a single layer on a hard surface. Use proper gasket paper. You can make gaskets out of normal card sometimes and get away with it, but proper gasket material is dirt cheap.
Hopefully this will eliminate the smoke puffs at start up that sometimes happen; I reckon sitting still for 9 years does no-one any damn good and the poor bike's the same.
(PS - my carbs are off, but they don't need to be for this job)