I decided today to tackle the upgrade or fix for the white stator connector. While doing so I took some pics hoping someone might get some benefit.
The connector in question. Just to the left of the battery. Note battery ground disconnected. Always disconnect the battery when working on electrics:
Inside the connector. Hope you can see that the copper connectors are very dirty and corroded:

Another shot. Note the brown discoloration caused from heat. Heat is not your friend with electrical connections:

Note the brown heat induced discoloration. This in my opinion had already failed but we caught it in time:

Cut the wires from the connectors as close as you can get to the connector. Strip about 3/4 to 1 inch off the insulation and use the edge of a knife to make the copper wires shiny. :

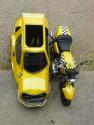
Here is the soldering gun and solder you need for this job. Do not try it with a smaller soldering pen or thin solder.

You want 60/40 rosin core solder ONLY:

I couldn't hold the wires with one had and soldering gun with the other hand and solder with the 3rd hand and take the picture with what ever was left over so here is a quick tutorial on soldering two wires together. Start with stripping more than you think you need. About an inch:

Put some heat shrink tubing on before you connect the two ends of the wires. Twist both wires and lay one wire over the other at about a 90 deg angle

Begin by twisting one wire all the way around and over the other wire.

Now do the same with the remaining wire in this case the one on the right side now. Note that they are in a nice straight line with very little bulge:

When the soldering gun tip is hot just touch some solder to it to get the surface wet with molten solder. That helps the heat transfer to the wire joint quicker. Then place the tip under the wire.
Add the solder to the joint from the opposite end. The molten solder will flow toward the heat even up hill.
When it cools slide the heat shrink tubing over the joint and use a heat gun or match or cig lighter to heat and shrink the heat shrink tubing to fully insulate the joint.. Here is what it looks like before I tied it up with tie wraps. I added about 4 to 6 inches of #12 wire to make the whole process easier. Once you clip those connectors off there is not much play in the wires.

Now the final test the next 2pics are of the voltmeter engine on at idle and engine on at 2500 rpm. Yeah the 2500 rpm reading is a little high. I'll have to look into that. On the 1200 it's probably the sense wire (black) from the ignition switch to the fuse block. Also could be a poor ground on the regulator but I had just cleaned that connection a month or so ago.


Hope someone gets some benefit from this posting. As always I enjoy working on these things about as much as I like riding them.